Guides
Last Updated Aug 02, 2023

How to Compress an Image in React

Elizabeth (Lizzie) Shipton

Table of Contents:

Get your free
API
key now
4.8 from 1,863 votes
See why the best developers build on Abstract
START FOR FREE
Thank you! Your submission has been received!
Oops! Something went wrong while submitting the form.
No credit card required
Get your free
Image Processing API
key now
4.8 from 1,863 votes
See why the best developers build on Abstract
START FOR FREE
Thank you! Your submission has been received!
Oops! Something went wrong while submitting the form.
No credit card required

React is pretty much the de-facto frontend framework for building Javascript apps today. For that reason, it's critical to understand how to do image compression in React. Images are critical in any website or mobile app, and delivering high-quality images fast is a huge part of the user experience. Additionally, compressing images prior to uploading them will save bandwidth.

In this article, we'll look at how to compress images for a React app using two different methods. First, we'll look at the Browser Image Compression package, and then we'll check out AbstractAPI, a third-party API service dedicated to image compression and resizing.

This tutorial assumes familiarity with React and assumes you already have a React app up and running. If you need help getting started with React, we recommend reading the docs. Create React App is an excellent tool for scaffolding performant React applications.

Let’s send your first free
API
Image Processing API
call
See why the best developers build on Abstract
Get your free api

Compress Images Using Browser Image Compression

The browser-image-compression library is a handy NPM package that runs in a web browser. You can use the module to compress jpeg and png images by either reducing the image resolution or storage size before uploading to the server.

The package supports multi-threaded, non-blocking compression through web workers.

Get Started

First, download the package from NPM.


npm install --save browser-image-compression

Next, import the module into your React component.


import imageCompression from 'browser-image-compression';

Compress an Image File

Add the following code block to your component to use browser image compression in an async/await context.


// React compress image component

async function handleImageUpload(event) {

  const imageFile = event.target.files[0];

  const options = {
    maxSizeMB: 1,
    maxWidthOrHeight: 1920
  }
  try {
    const compressedFile = await imageCompression(imageFile, options);
    console.log(compressedFile.size/1024/1024);
  } catch (error) {
    console.log(error);
  }

}

As you can see, the image compressor logic is very straightforward. Simply pass the image file to be compressed, along with an object specifying the options for image quality and image size. The compressed file can then be uploaded to a server, saved, or forwarded to another image manipulation function.

The options object allows you to specify multiple different extensions for the image compressor, including whether or not to use web workers, a callback function to run once compression is complete, a signal to indicate whether the process has been completed or has been aborted, and advanced configuration options.

The complete options API is as follows:


const options: Options = { 
  maxSizeMB: number,
  maxWidthOrHeight: number,
  onProgress: Function,
  useWebWorker: boolean,
  signal: AbortSignal,
  maxIteration: number,
  exifOrientation: number,
  fileType: string,
  initialQuality: number,
  alwaysKeepResolution: boolean
}

The only required parameters are maxSizeMB or maxWidthOrHeight.

Compress an Image File Using AbstractAPI

Libraries and packages are great, but they do add to your bundle size and ultimately make your app larger. If you're looking for a way to compress an image file without installing an additional package, consider using an API service.

Image compression APIs expose endpoints that allow you to upload an image, specify the way an uploaded image should be compressed, and then return either the compressed image or a link to a hosted image file.

Let's look at one such API: the AbstractAPI Image Processing and Optimization API.

Get Started

To use the API, you'll need to sign up for a free account and get an API key. All of the Abstract API endpoints are secured by HTTPS and protected by API keys. They are all free to use and signing up for an account will not add you to any mailing or spam lists.

Acquire an API Key

Go to the API home page and click “Get Started.” If you’ve never used AbstractAPI before, you’ll need to input an email and password to create an account. If you have an account, you may need to log in.


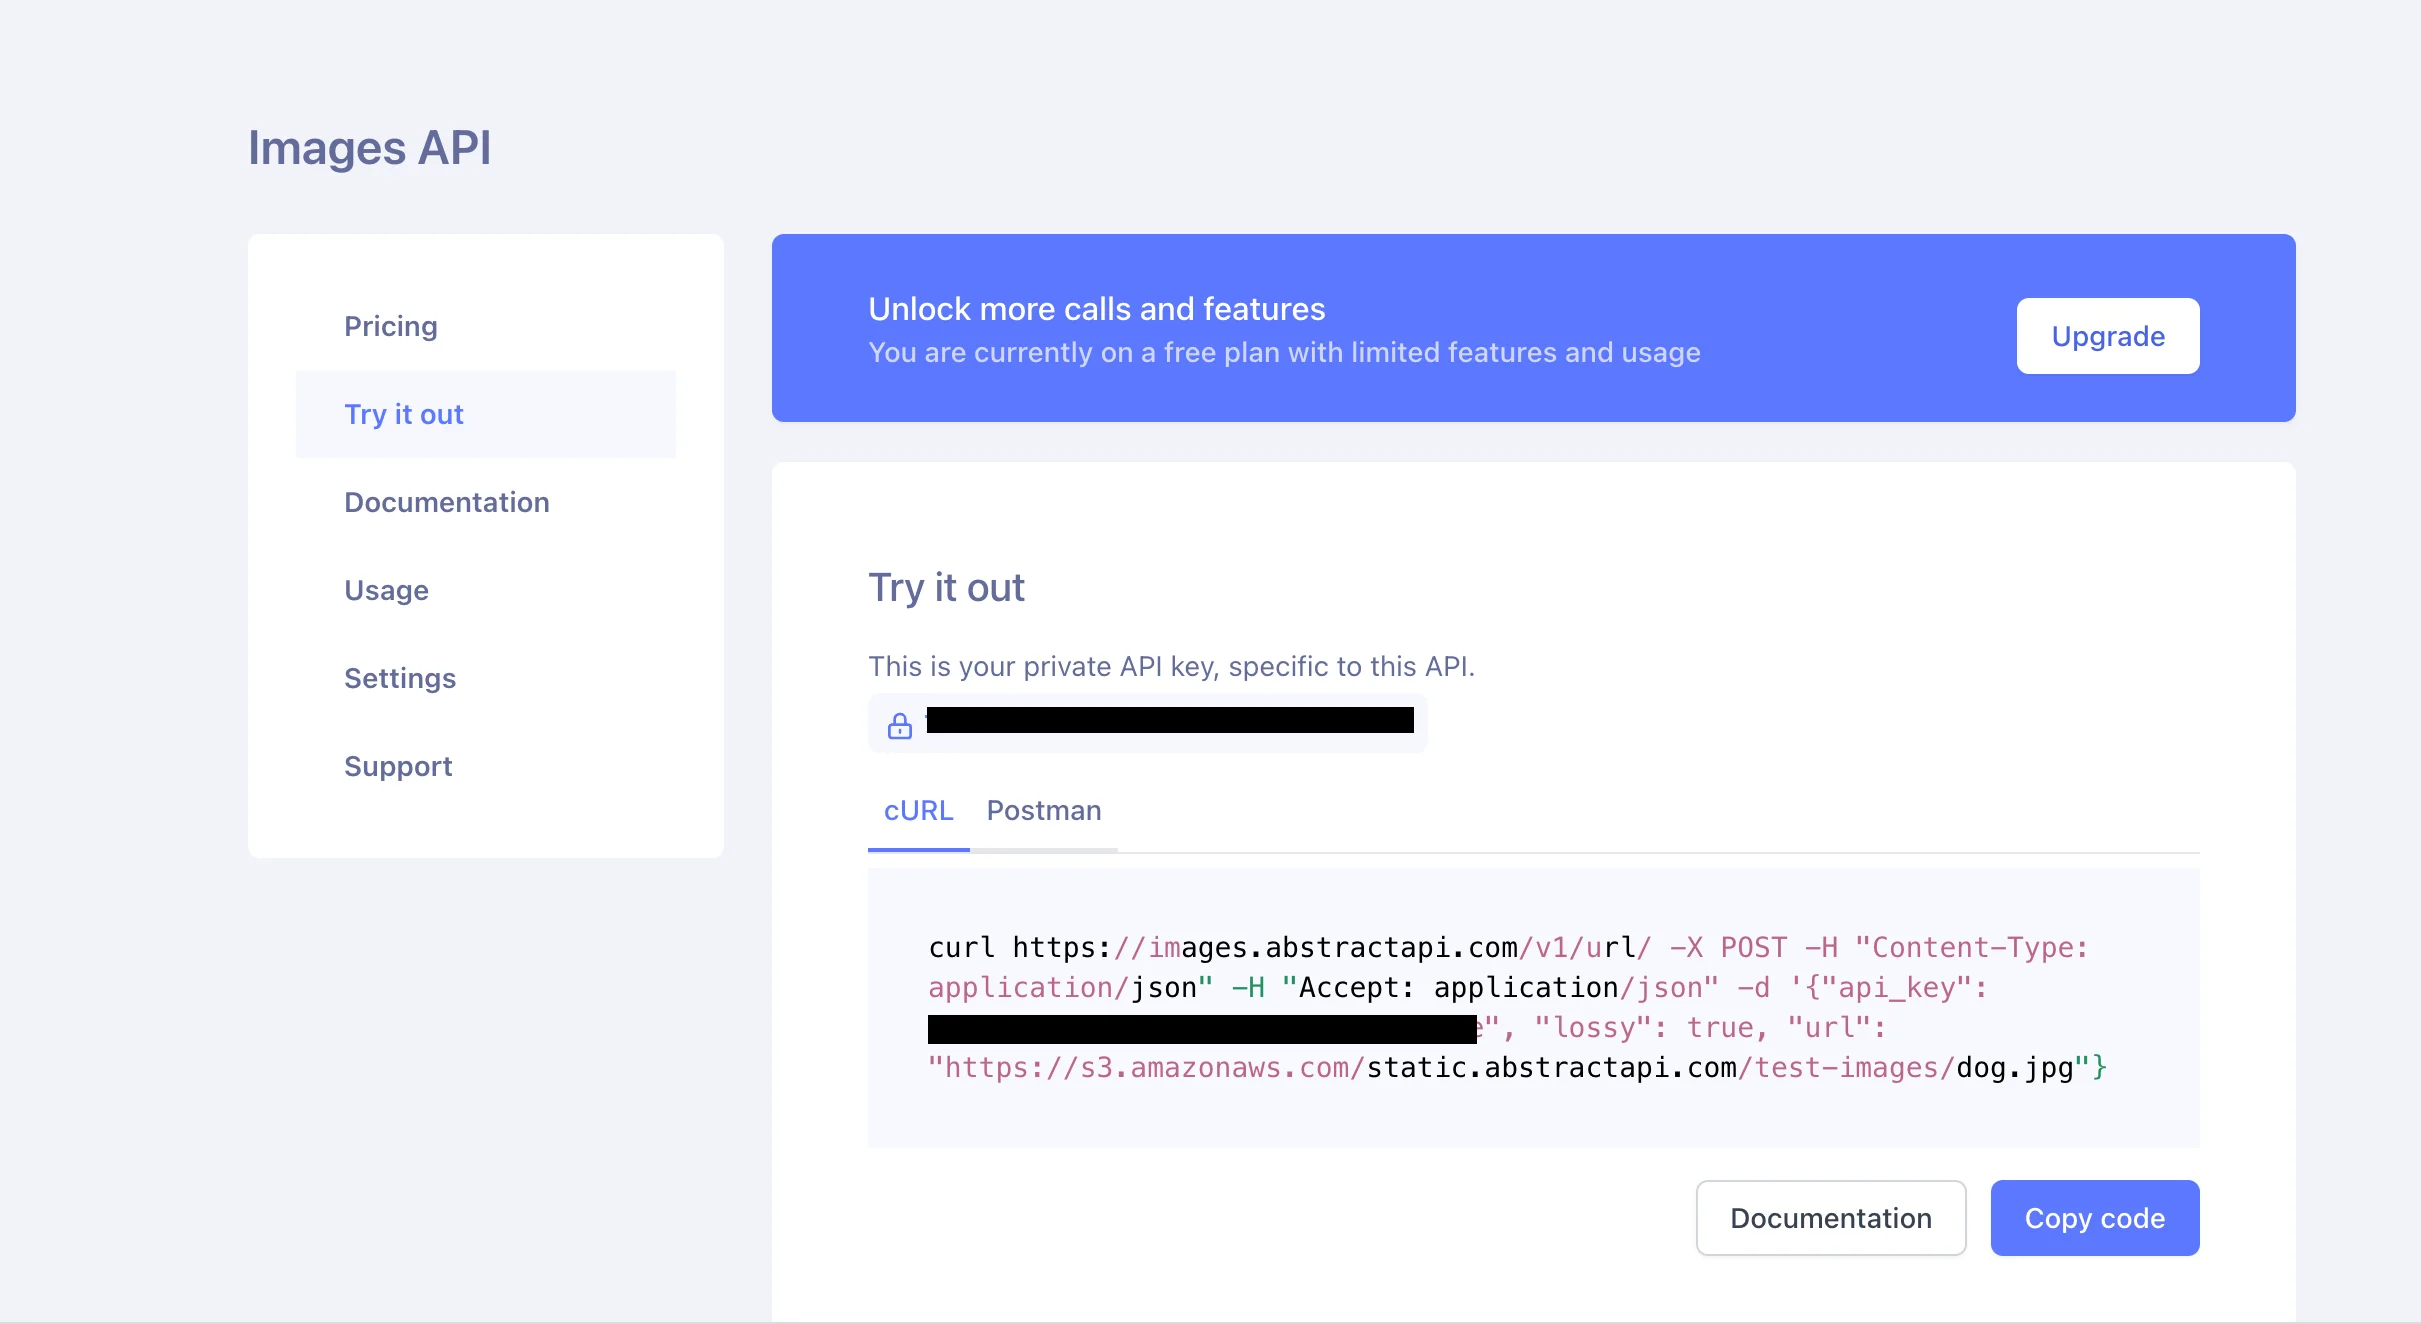
You’ll be taken to the Images API test page, where you'll see links to documentation and pricing, as well as your unique API key.
Make an API Request

To compress an image file, we'll send an HTTP request to the API endpoint. AbstractAPI provides two methods for image upload: multipart form upload so you can send the complete image file, and regular POST request, where you specify the image to be compressed by providing a URL.

In both cases, AbstractAPI will process the image and return a url for the resized image path, hosted at an Amazon S3 bucket. 

We’ll use this example image from AbstractAPI to send a regular POST request with an image URL:

https://s3.amazonaws.com/static.abstractapi.com/test-images/dog.jpg”


fetch('https://images.abstractapi.com/v1/url/', {
 method: 'POST',
 headers: {
   Accept: 'application/json',
   'Content-Type': 'application/json'
 },
 body: JSON.stringify({
   api_key: “YOUR_API_KEY”,
   url: 'https://s3.amazonaws.com/static.abstractapi.com/test-images/dog.jpg',
   lossy: true
 })
});

Here, we've told the API to compress the image by setting the lossy option to true. The API uses lossy compression to massively shrink the image file size while slightly reducing resolution quality.

Receive the Compressed Image

The API returns a JSON object with information about the original image and a URL to the new image. The data looks something like this:


{
   "original_size":205559,
   "original_height":430,
   "original_width":1142,
   "final_size":75101,
   "bytes_saved":130458,
   "final_height":430,
   "final_width":1142,
   "url":"https://abstractapi-images.s3.amazonaws.com/8f2dd6392c524bc98313a89a24012b1f_dog.jpg"
}

As you can see, the image width and height have not changed, but we have decreased the file size by about 130500 bytes.

Conclusion

In this post, we took a look at two different methods for compressing all your images in a React app. First, we checked out the Browser Image Compression package, which allows us to compress images right in the browser. We then took a look at AbstractAPI's Image Processing and Optimization API, which exposes an endpoint where we can send images for compression.

FAQs

Does React Optimize Images?

React does not optimize images on its own. To optimize images in React, you can use Webpack - specifically the webpack-image-loader module. By adding this module and configuring it correctly in your webpack.config.js file, you can tell React to serve compressed images from the public folder.

The module can be configured to handle SVG, WEBP, GIF and JPEG files separately.

How Do I Set the Width and Height of an Image in React?

The easiest way to specify the width and height of an image in React is to use the width and height attributes on an HTML image tag, or use CSS to adjust the width and height of the image container. You can specify the height in pixels, a percentage of the parent container, ems, or rems.

Does React Lazy Load Images?

To lazy load images in React, install the react-lazy-load-image component. This package exports a higher-order component (HOC) that you can use instead of a normal React Image component to load and render your images.

Is it Better to Use SVG or PNG in React?

There is no definite answer as to whether SVGs or PNGs are "better" for websites and web apps. Both have their advantages and downsides. Both are great for logos and images that require transparency. PNGs can be a little slower to load than SVGs, however, they are compatible with more browser versions, and they are easier to embed and create than SVGs.

How Do I Reduce Image Load Time in React?

The best way to reduce image load time in React is to compress your image files and utilize lazy loading. You should always serve images optimized for whatever device your user is using. Use lower-quality images as placeholders until the full-quality image is available. You might also consider taking advantage of CDNs and other edge network devices.

4.4/5 stars (12 votes)

Elizabeth (Lizzie) Shipton
Lizzie Shipton is an adept Full Stack Developer, skilled in JavaScript, React, Node.js, and GraphQL, with a talent for creating scalable, seamless web applications. Her expertise spans both frontend and backend development, ensuring innovative and efficient solutions.
Get your free
Image Processing API
API
key now
Try Abstract's free image resizing API today.
get started for free

Related Articles

Get your free
API
Image Processing API
key now
4.8 from 1,863 votes
See why the best developers build on Abstract
Thank you! Your submission has been received!
Oops! Something went wrong while submitting the form.
No credit card required