

Why Compress Images?
Humans are visual creatures. We digest information better through images than we do through text. This is why it’s important to have thoughtful, high-quality images front and center on your site. The average user wants to be able to absorb the information on your homepage in just a few seconds, and images make this possible.
Unfortunately, images can also slow down your site’s performance. Large images are slow to load and make a page laggy, meaning user experience suffers. You need to be compressing the images that load on your site to ensure a smooth and speedy experience.
Not only that, image size also affects SEO. Image optimization, accessibility, and load speed are things that search engines like Google look at to determine SEO rankings. Compression, having alternate text for your images, and ensuring that you’re loading the right-sized images for the right device are all ways to improve your SEO.
Understanding Image Compression
Image compression can feel like a daunting subject. Terms like “lossless compression” and “optimization” sound scary and technical. But it’s actually not complicated when you break it down. Let’s take a look at some of the terminology now.
Lossless Compression vs. Lossy Compression
Lossless compression is a form of image compression that preserves image quality. With lossless compression, every bit of data from the original file is retained so that it can be restored when the image is uncompressed.
Lossy compression is different in that it affects the output image quality. With lossy compression, data is actually removed from the image and cannot be restored once the image is uncompressed.
Lossy compression results in a smaller file size, since the data is actually removed from the image. However, lossless compression means that the image can be compressed at its original quality.
When to Use Lossy vs. Lossless Compression
Deciding when to use lossless or lossy compression will depend on your application, the size of the image you need to display, and how much quality you are willing to sacrifice. Usually, the amount of data lost during lossy compression is so small that it is unnoticeable to the human eye, so lossy compression can be used in most cases.
If you have a website that renders a lot of large, very high-quality images, you may want to use lossless compression for those.
How to Compress Images With an Online Tool
There are many free and paid online tools out there that can quickly compress images for you. One such tool is TinyPNG.
TinyPNG
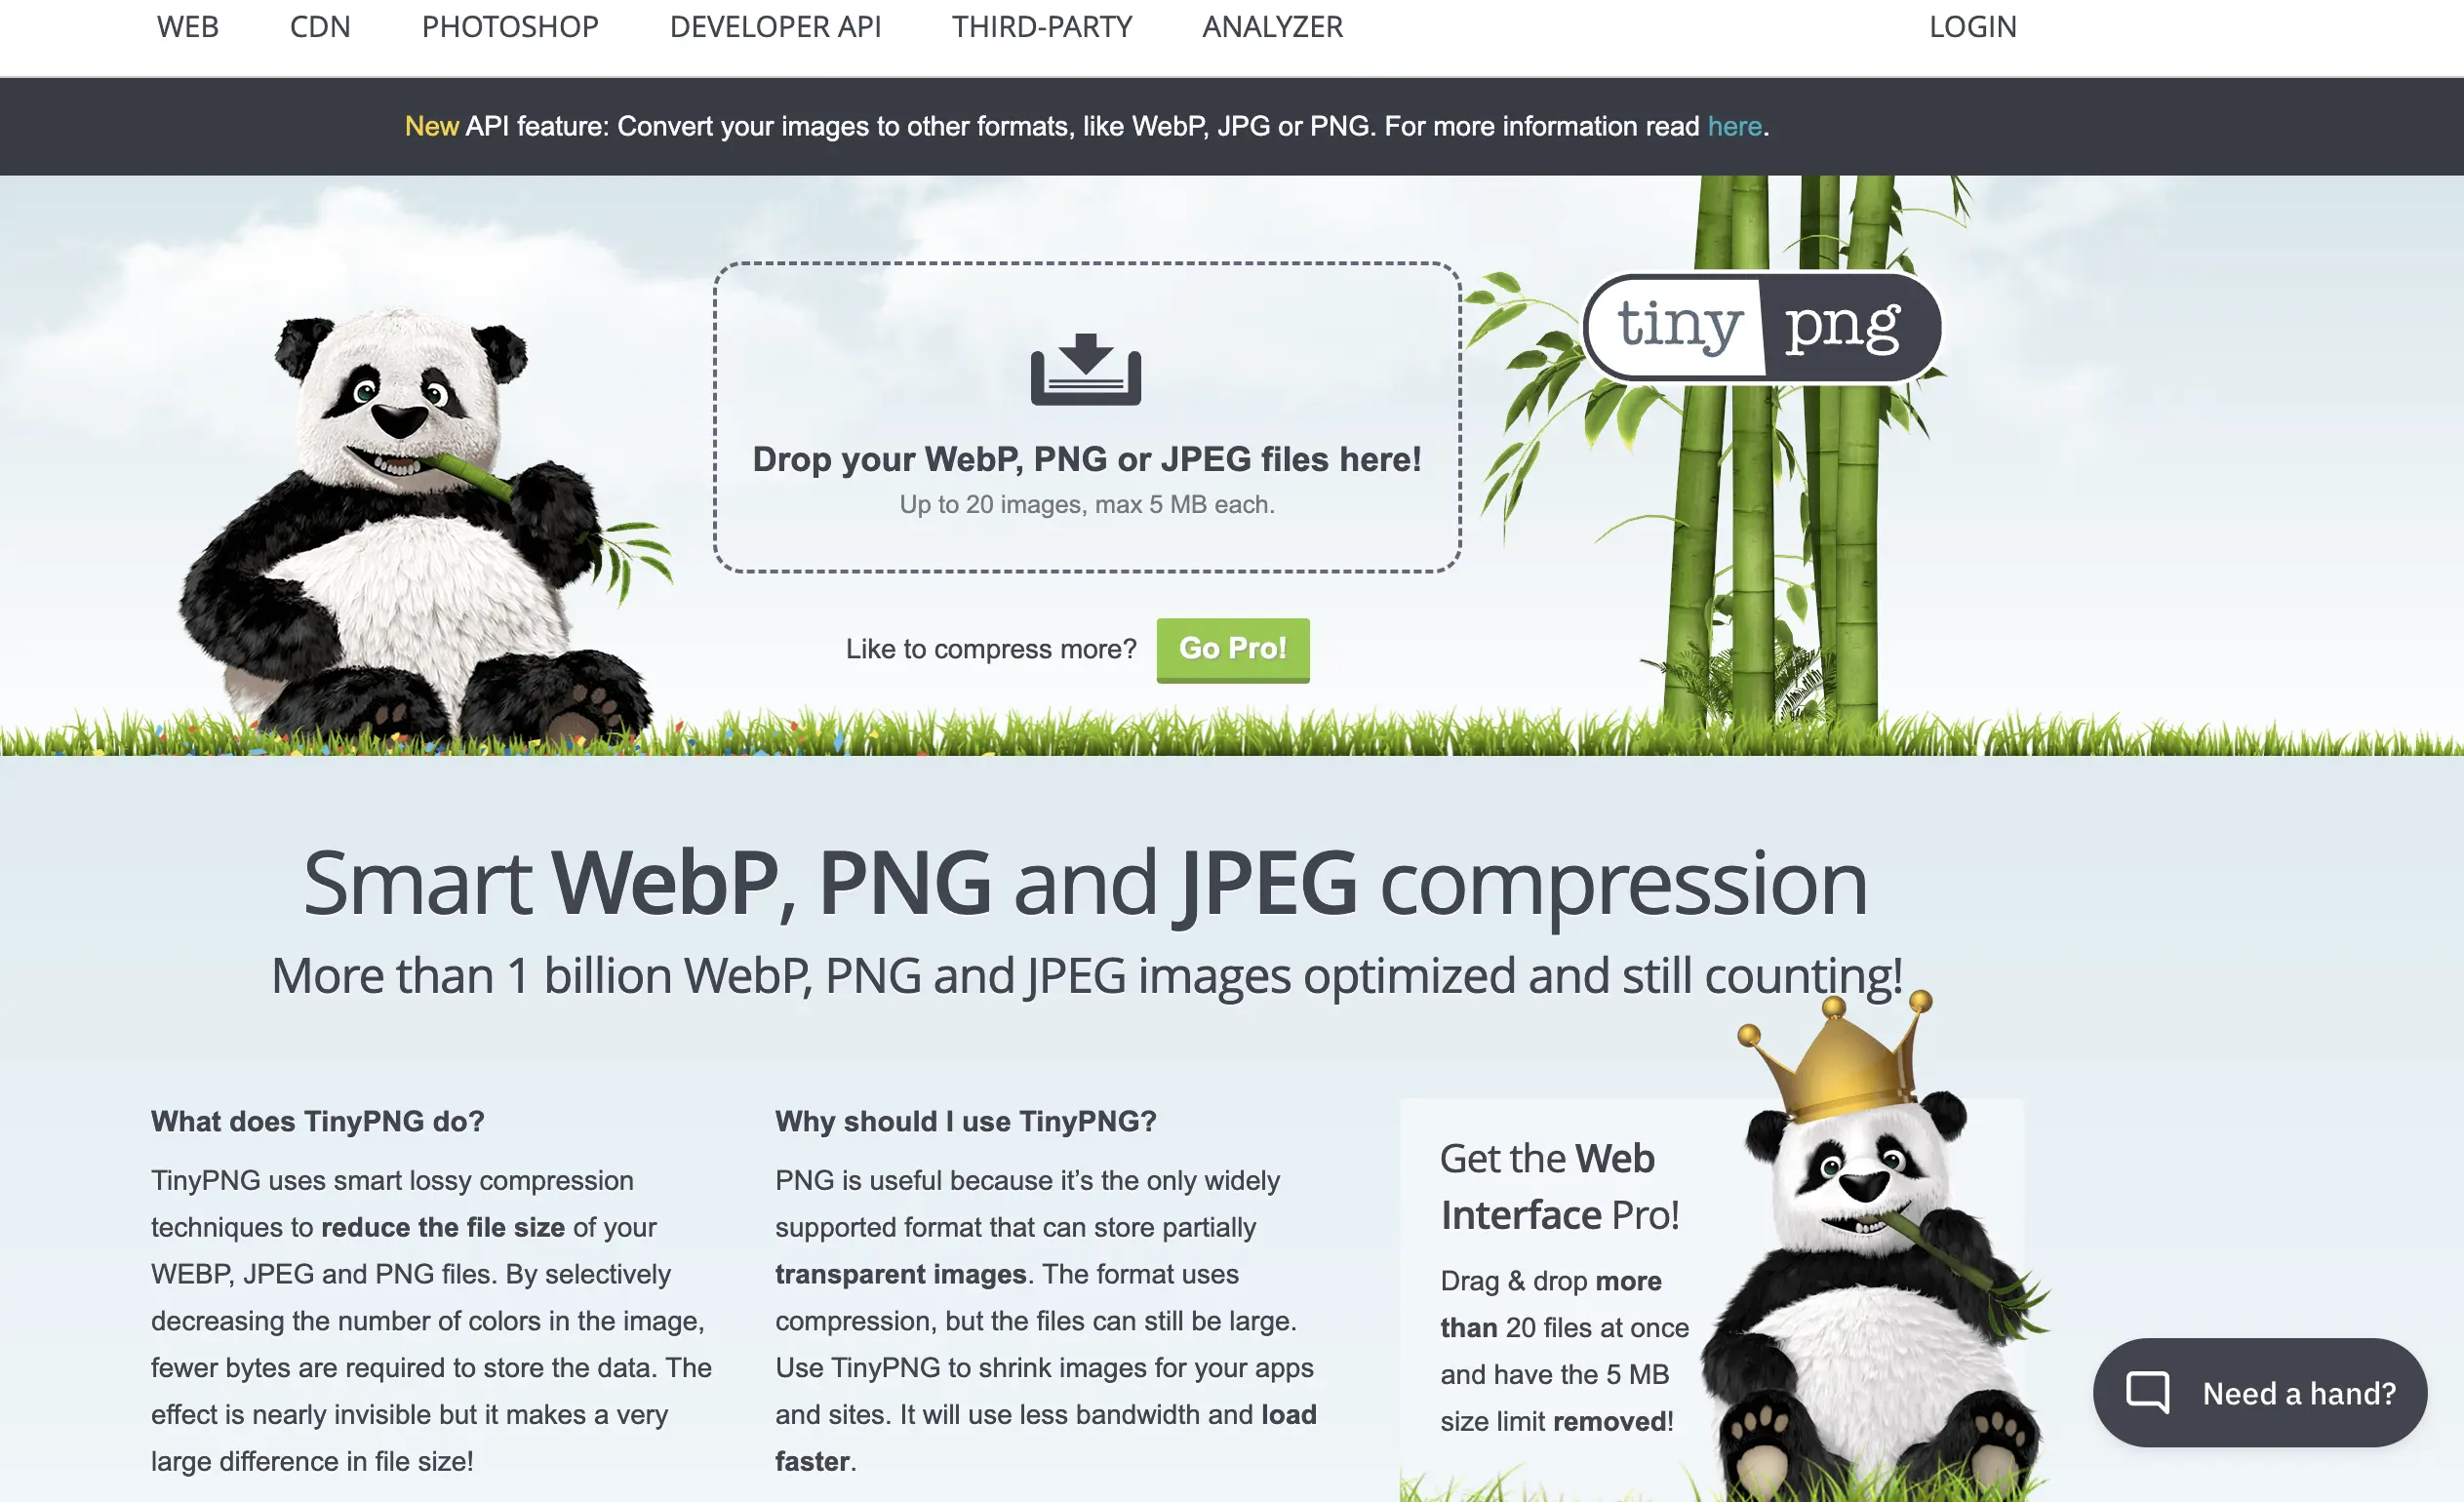
TinyPNG is the most popular online image compression tool around. It offers an easy-to-use interface directly in the browser, as well as an image compression API and a Photoshop plugin.
How to Compress Images with TinyPNG
Let’s look at how to use TinyPNG’s online tool to compress an image right in the web browser.
- Navigate to https://tinypng.com/
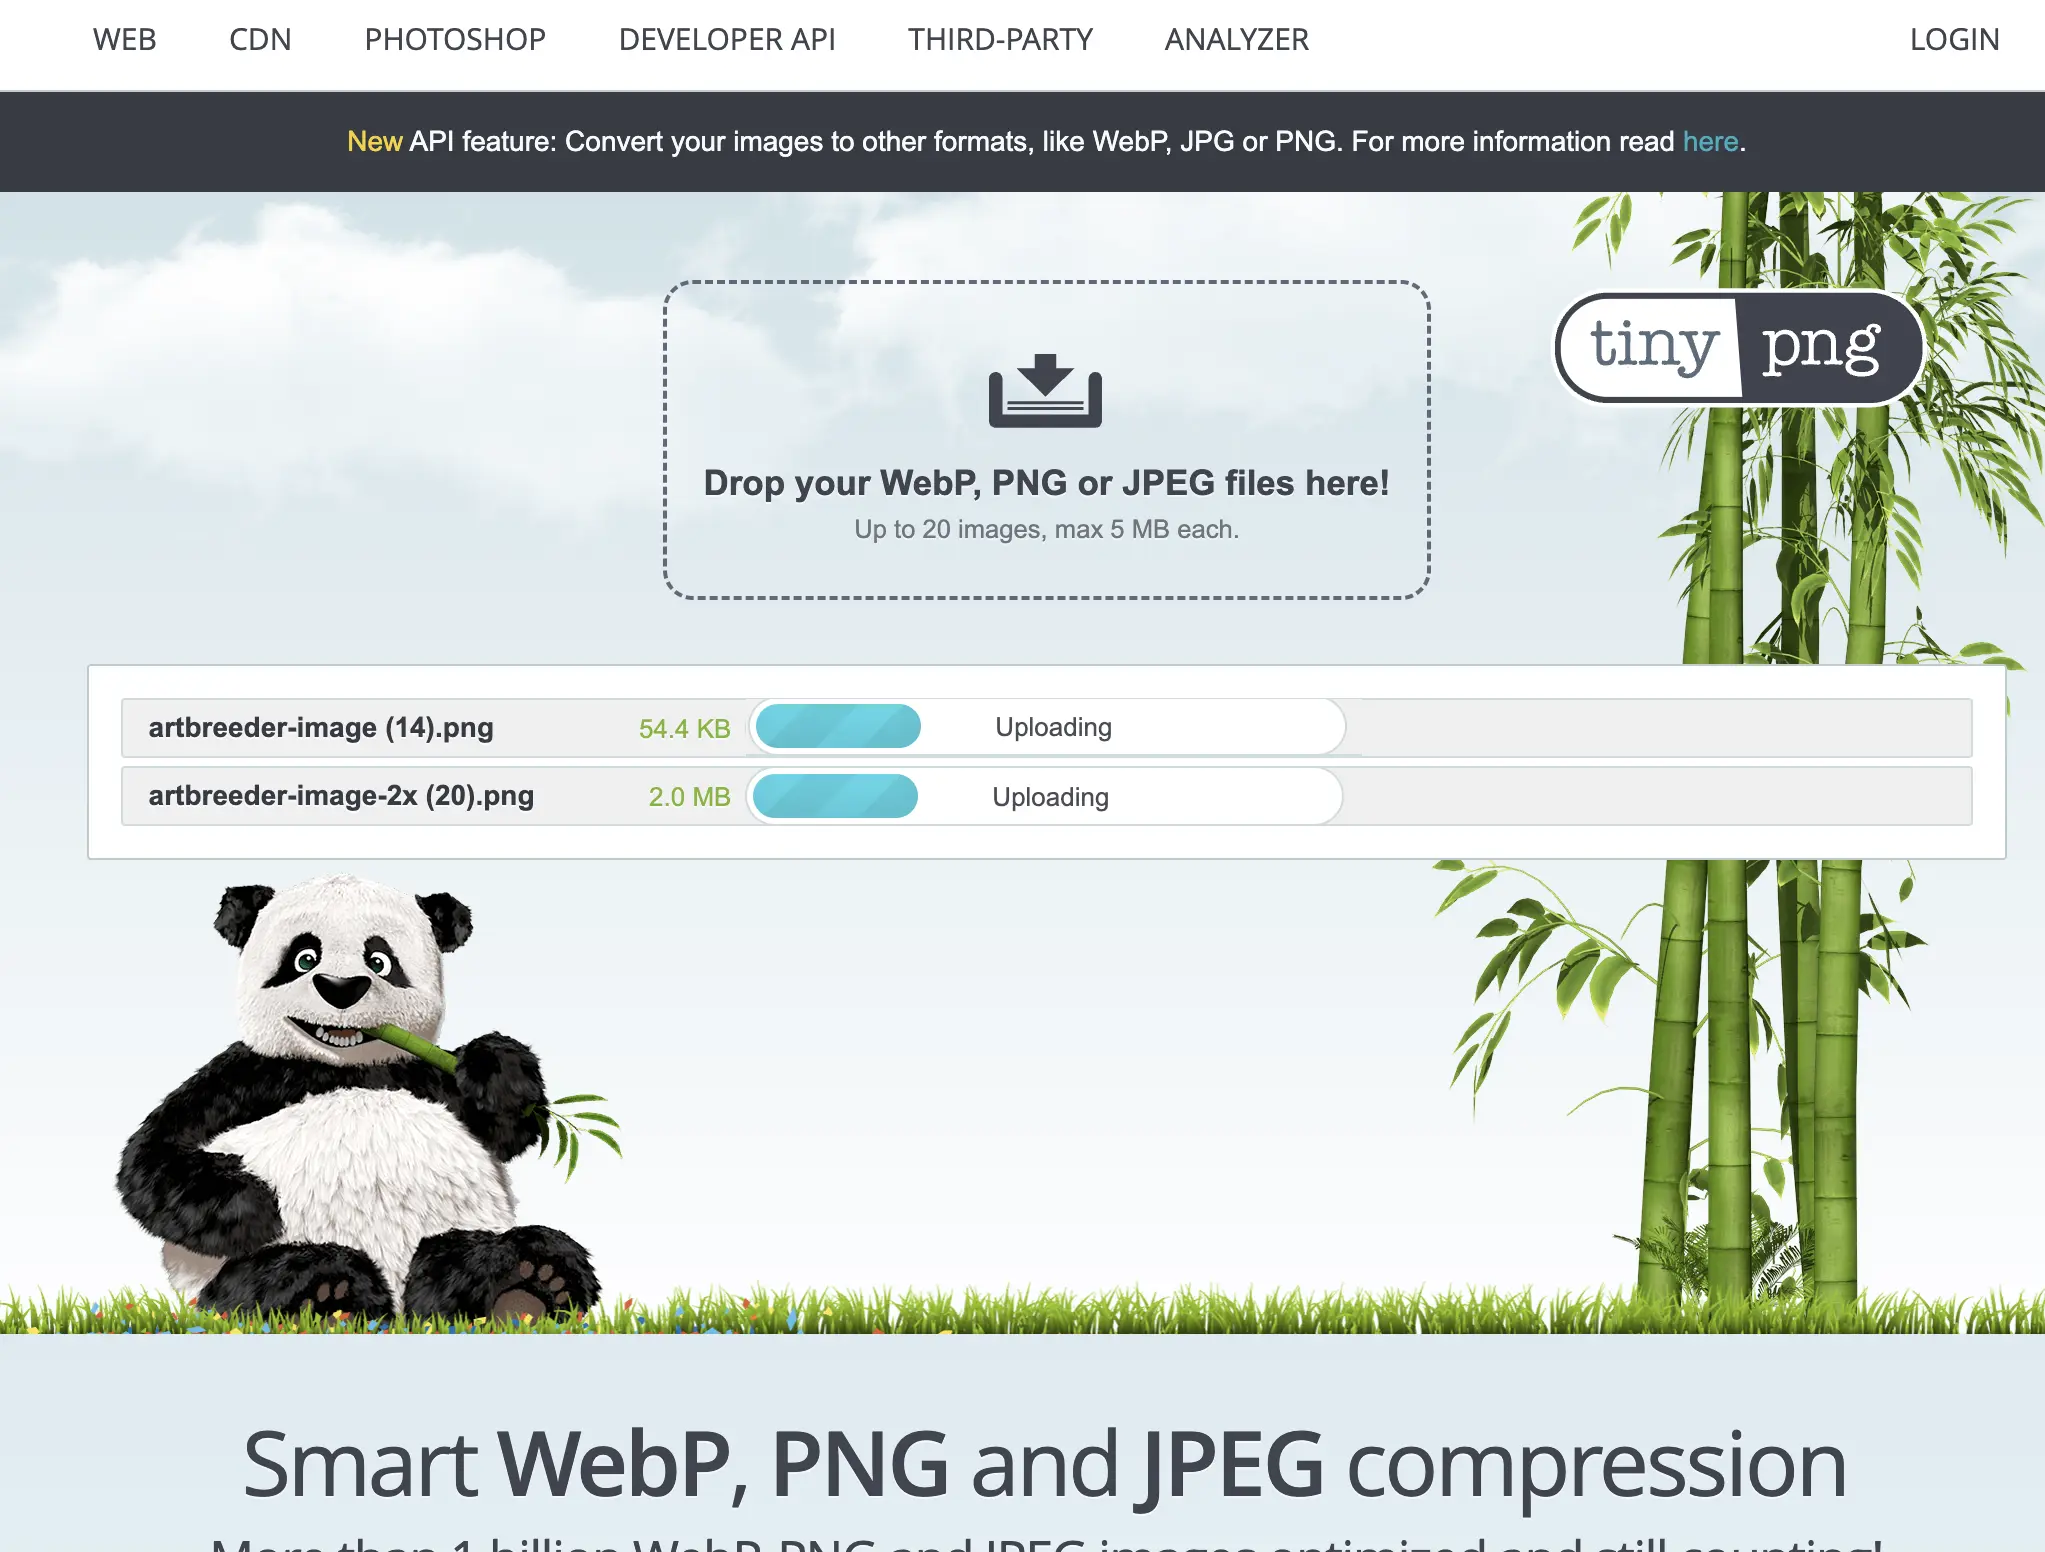
- Drag an image into the compression box, or click to open the file finder. You can upload multiple images at once.
- Wait for the image to upload and compress (takes about 10 seconds depending on file size)
- Click “download” to download your compressed image
- TinyPNG tells you how much the image was compressed.
How to Compress Images in Paint
If you don’t want to upload your images to an online tool, there are plenty of applications available on your desktop or laptop that can do image compression. Paint is one of the easiest-to-use desktop applications for image compression.
Let’s look at a step-by-step guide to compressing images in Paint.
- If you don’t have Paint on your computer, you will need to install it. You can download it for free from the App Store (called “Paint S”) or from https://apps.microsoft.com/store/detail/paint/9PCFS5B6T72H
- Open the Paint application on your computer
- Click File > Open and select the image you want to resize. The image will open in the editor.
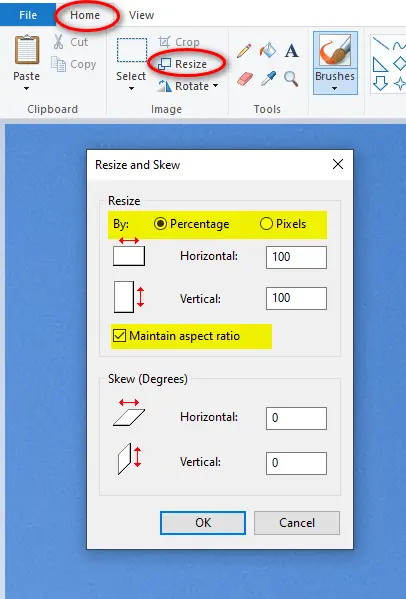
- Click on Home > Image section > Resize
- The resizing options will appear. You can resize by percentage or by pixels. Resizing by percentage is usually the best way to go for quick and easy resizing.
- Select “Percentage” and type in the percentage by which you want to shrink the image.
- Select “Maintain Aspect Ratio” to keep the output image the same shape as the input image.
- Click “Ok”
- Once the image has been resized, select File > Save As and give the smaller image a new name like “Image_smaller” to prevent saving over the original image
How to Compress Images with Adobe Photoshop
Adobe Photoshop is a powerful piece of image editing software used by professionals to create media. As a piece of image compression software it is overkill, and we don’t recommend purchasing Photoshop just to compress images. However, if you already have Photoshop installed on your computer, here is how you can use it to compress image files.
- Open your image in Photoshop by clicking File > Open and selecting the image from the finder
- Once the file is open in the editor, click File > Export As
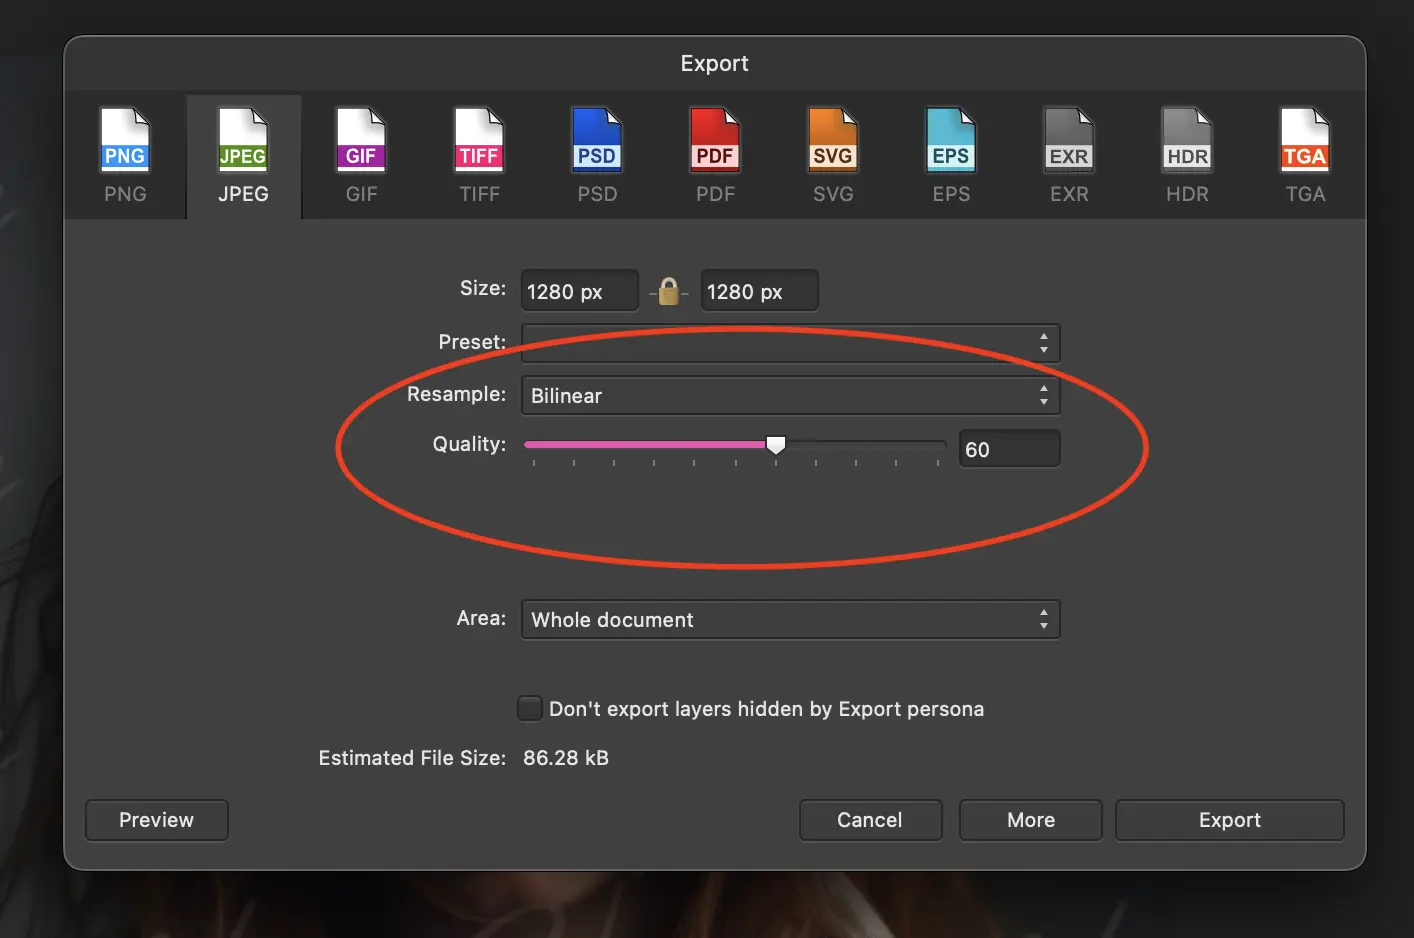
- Choose the file type you want to export (we recommend JPG for most photos or PNG for logos and vector images)
- Move the slider to the left to decrease file size and quality. You can preview the output image in the left-hand side of the window.
- Once you have selected the desired output size, click “Export” and choose where to save the new image
How to compress images with an API
If you are a developer who needs to offer your users a way to compress their own images in your app, or if you have some technical skill and want a way to compress many images quickly without having to load each image into an image editor, you can use an image compression API.
An image compression API allows you to send a web request with data about the image you want to compress and how you want it to be compressed. The API compresses the image and returns a link to the new image, which is hosted in an online storage space.
Using an image compression API requires some basic understanding of REST and network requests, but it is possible to do even if you aren’t a coder. Let’s take a look at using one of the easiest image compression APIs, AbstractAPI.
How to Compress Images Using AbstractAPI
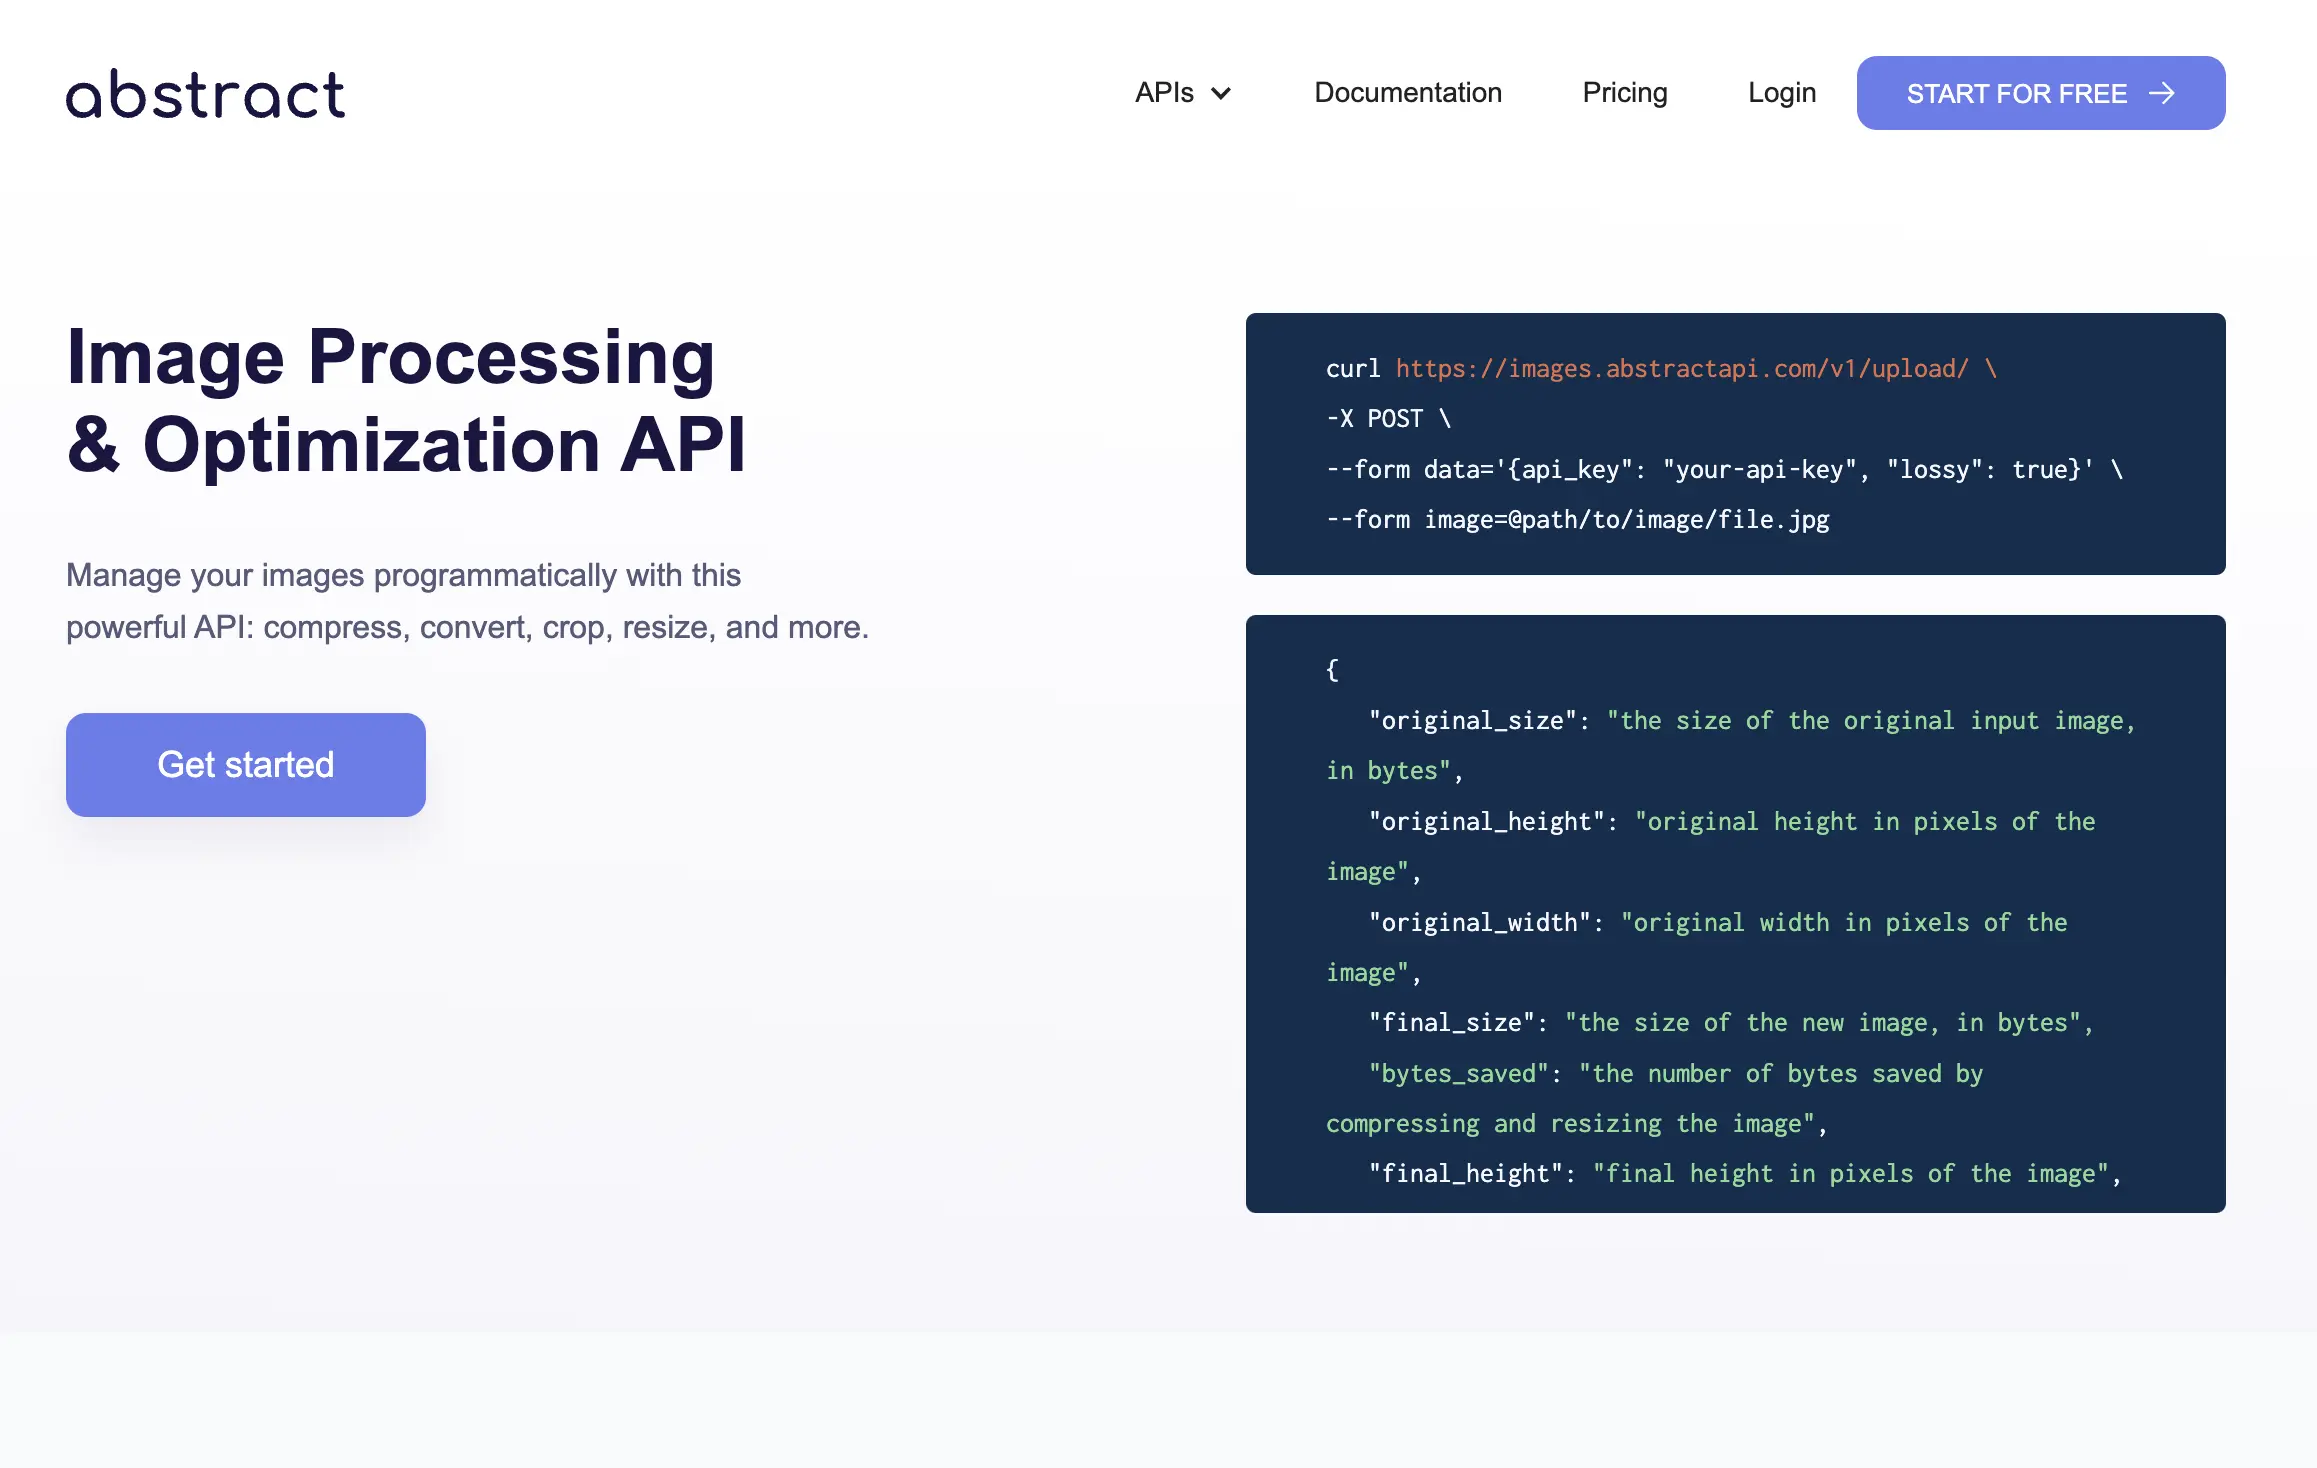
AbstractAPI’s Free Image Processing API provides an endpoint that accepts requests with image data and returns a link to a compressed image. Here’s how to compress an image using the API step-by-step.
For this demo, you’ll need to have your image hosted somewhere online.
Acquire an API Key
Navigate to the Images API home page and click the “Get Started” button.
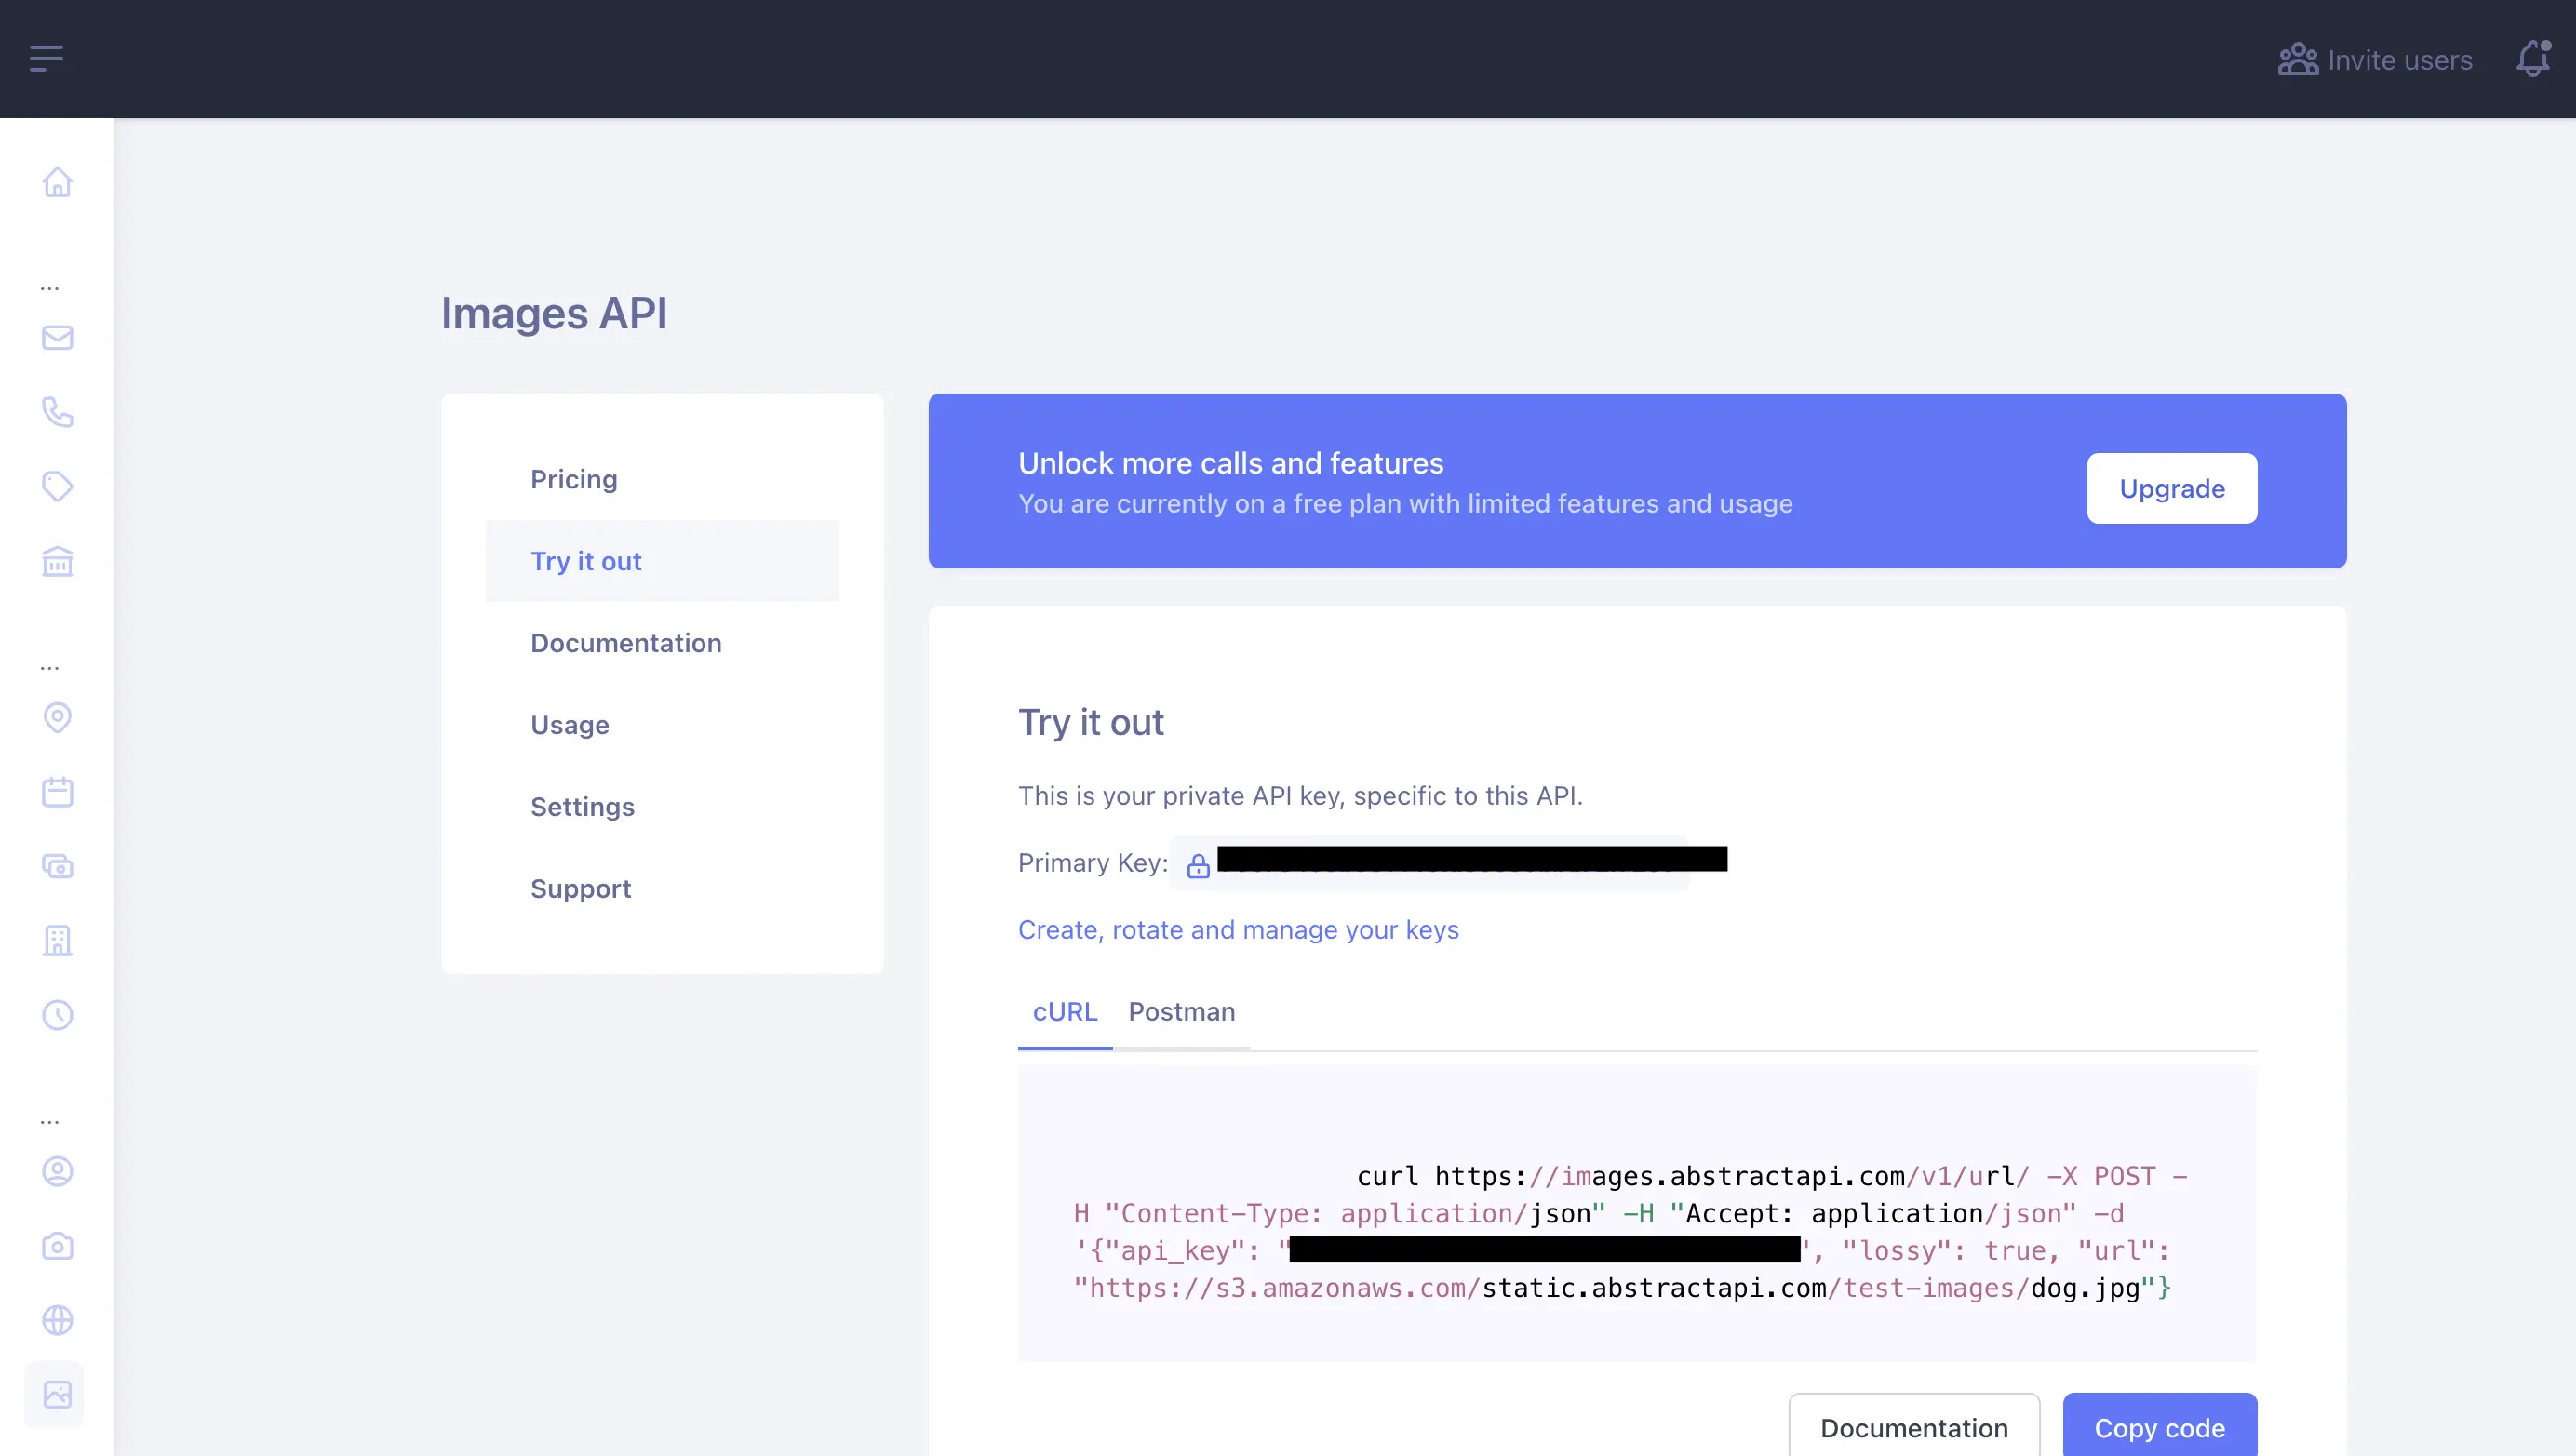
You may need to create a free account or log in, then you’ll be taken to the Images API tester page. On this page you’ll see links to documentation and pricing, plus your API key.
Make a Test API Request
Click the “CURL” tab above the large input box. You should see a sample CURL request string appear inside the input box. It will look something like this:
curl https://images.abstractapi.com/v1/url/ -X POST -H "Content-Type: application/json" -H "Accept: application/json" -d '{"api_key": "YOUR_API_KEY", "lossy": true, "url": "https://s3.amazonaws.com/static.abstractapi.com/test-images/dog.jpg"}'
The request starts with the shell command “curl”, which lets us send a request over the network to a remote server.
The next part of the command is the URL we want to send the data to: https://images.abstractapi.com/v1/url/
Next, we provide the type of request we are sending—in this case, POST—via the -X option. The -H option specifies the necessary headers for the request. Here, we tell the server that we are sending a JSON object, which is a piece of code that contains information about our request.
Finally, the -d option contains the actual data we will be sending. There are three pieces of data: api_key, lossy, and url. Copy and paste your API key into the api_key field. In the url field, put a URL that points to your hosted image.
Open a Terminal by hitting Cmd + Spacebar to open Spotlight, and typing “terminal.” Copy and paste the CURL request into a new terminal window.
Send the request by hitting “Enter” and take a look at the response object:
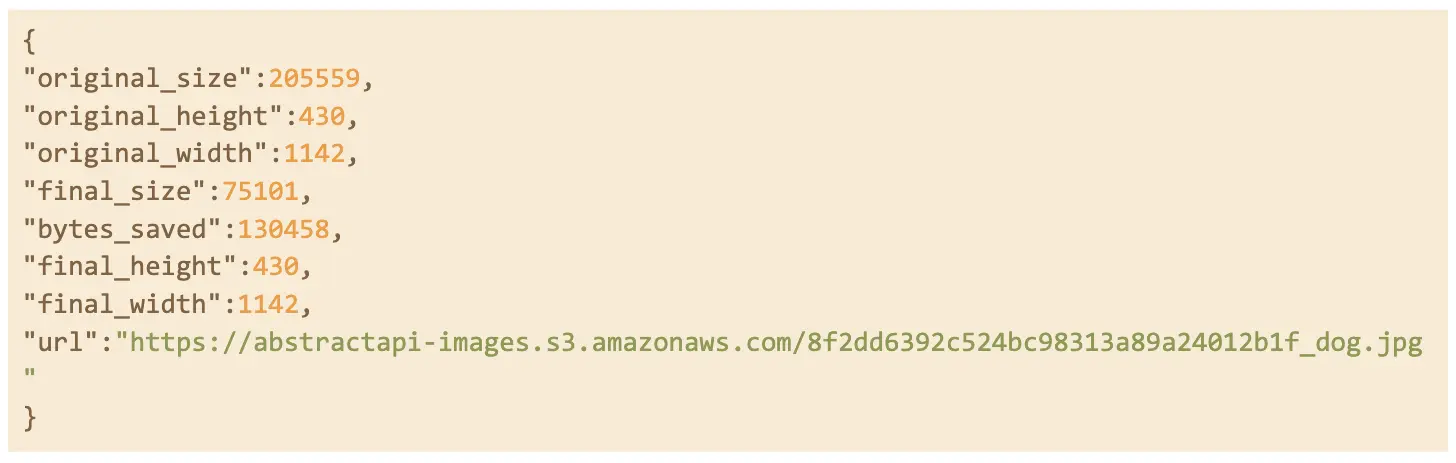
The API sends back information about the original image we sent, as well as the size, height and width of the new image, and a url to the new image ( which is hosted on AbstractAPI’s S3 server.)
By default, the API uses lossless compression to resize the file without a reduction in image quality.
How to Compress Images in Word
Word is a text editor, but did you know it can also be used to compress images? This is useful if you are creating a Word document with a lot of images in it and want to shrink all the images in the document before you send it or upload it somewhere.
Note that this will only compress the images inside the Word document. This will shrink the size of the Word document, but it won’t change the size of the original images on your computer.
- Open the Word document that contains the images you want to compress
- Select an image
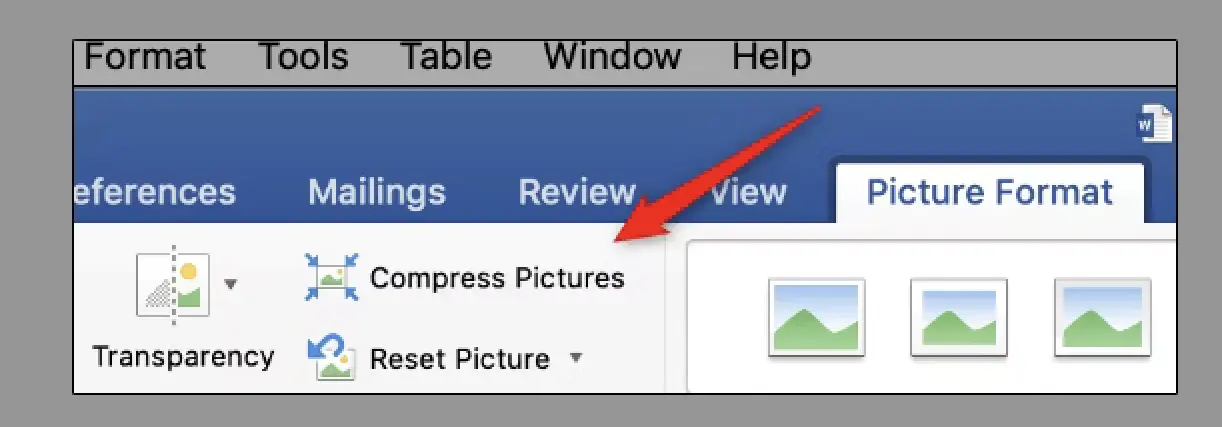
- Click on the “Picture Format” tab and select “Compress Pictures”
- A dialogue box will appear. In the dropdown menu, select the output quality you want for the images.
- You can optionally apply the change to just the selected image, or to all the images in the document
- Click “Ok”
How to Compress Images in PowerPoint
Similar to a Word document, you can also compress images in a PowerPoint presentation to make the size of the presentation document smaller. Again, this will only change the size of the images in the presentation - it won’t affect the actual image files.
- Open the PowerPoint presentation containing the images you need to compress
- Select the image you want to compress (you can also select multiple images)
- Click the “Picture Format” tab and choose “Compress Pictures”
- In the dialogue box, choose the output quality you want from the dropdown menu, and choose to either apply the change to just the selected image or to all images
- Click “Ok”

Tips to Compress Without Losing Quality
As we discussed, lossy image compression means that some of the data from your original image will be lost, resulting in a slight reduction of image quality. The easiest way to retain image quality is to use lossless compression whenever possible. This will result in a larger image file size.
Lossless compression is best if you want to compress photos or other complex images.
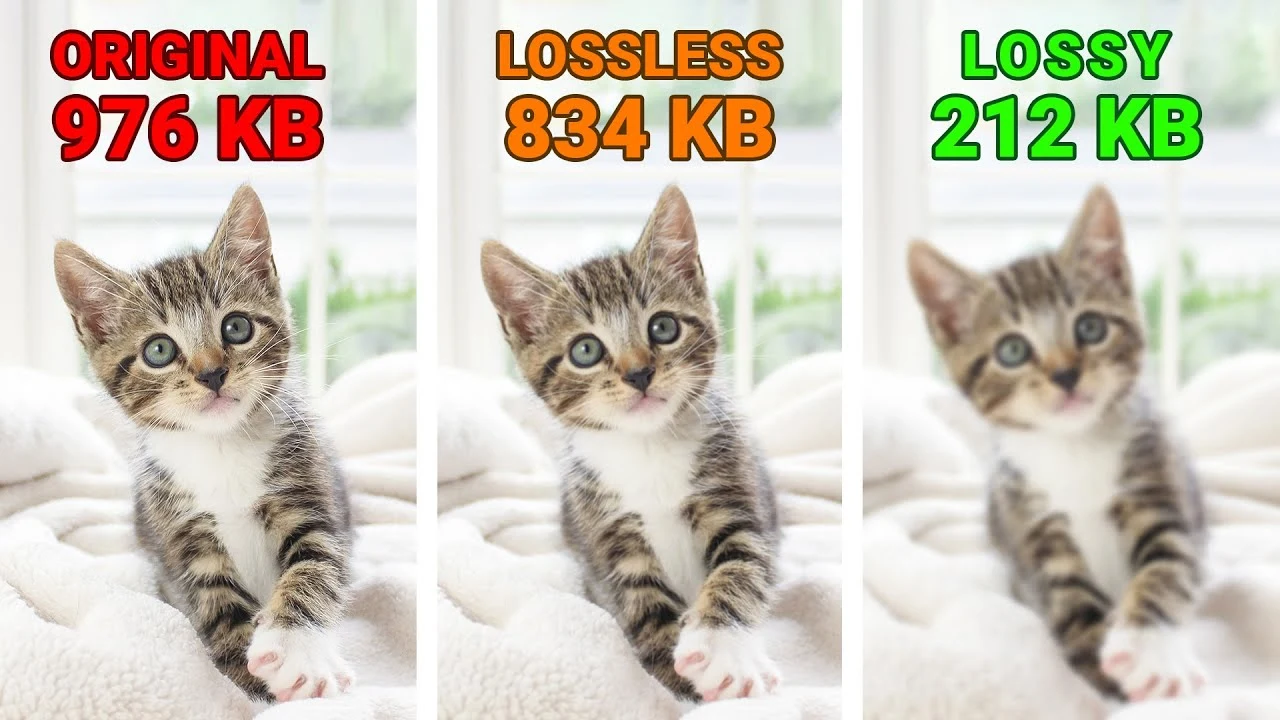
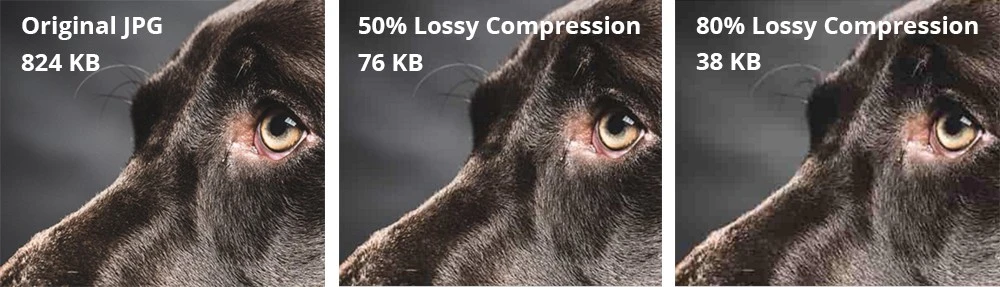
For simpler images like vectors, business logos, illustrations and cartoons, lossy compression can work just fine. Usually, the amount of data that is lost with lossy compression is so small that humans won’t be able to tell the difference. Here’s an example:
Understanding and using the correct file format is another way to make sure you retain image quality. Most vector images and illustrations will have the file format PNG, while photos and complex images should use the JPG or JPEG file extension. PNG images also have the benefit of being able to have transparent backgrounds, which is useful for logos.
Conclusion
Resizing images is important for anyone building a web page, running a blog, or simply sending photos via email or even SMS. Smaller photos take less time to load, improve your site’s SEO, and create a smoother, faster user experience. They also take up less storage space, which can save you time and money in the long run.
FAQs
Why is image compression important?
Image compression makes for a smoother user experience by loading only the smallest image necessary. This improves load time on a website, which not only makes users happy but also leads to better SEO rankings by search engines like Google.
Does compressing an image reduce its quality?
If lossy compression is used to compress an image, there will be a slight reduction in image quality. However, this reduction is usually so small that the human eye can’t detect it (depending on how much you scale down the image.)
What's the difference between lossless and lossy compression?
Lossless compression does not remove any data from the original image, so the original, full-quality image can be restored after compression. Lossy compression actually removes bits of data from the image, so the resulting image is of lower quality and may appear blurry or pixelated. Lossless compression results in a larger file size.
How often should I compress images for my website?
You should compress all images that load on your website, especially if your site will be accessed by mobile devices or tablets.
