
.avif)
How to Validate Phone Number Format with Abstract Phone Validation API
Open an account with Abstract and select the Phone Validation API from the dashboard. You can choose the free plan for now, which gives you 250 API requests per month.
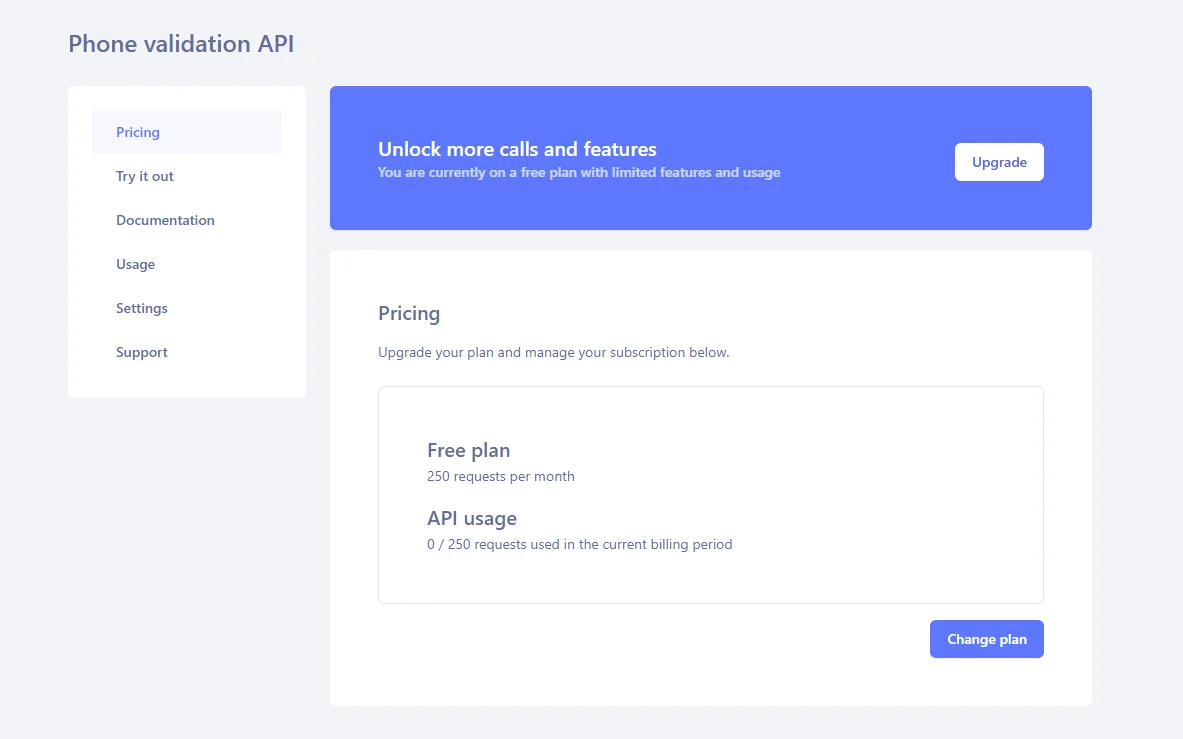
Check out the "Try it out" section to get your unique API key.
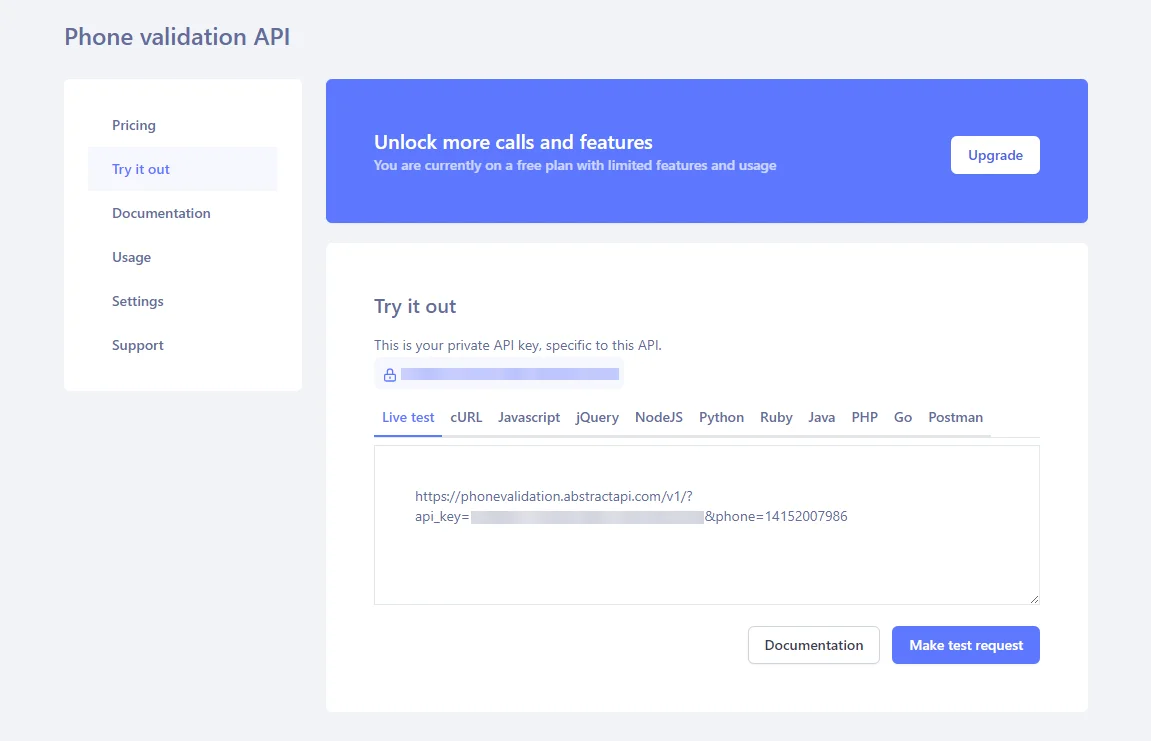
With this key, you can fire up a Postman API call to test any number.
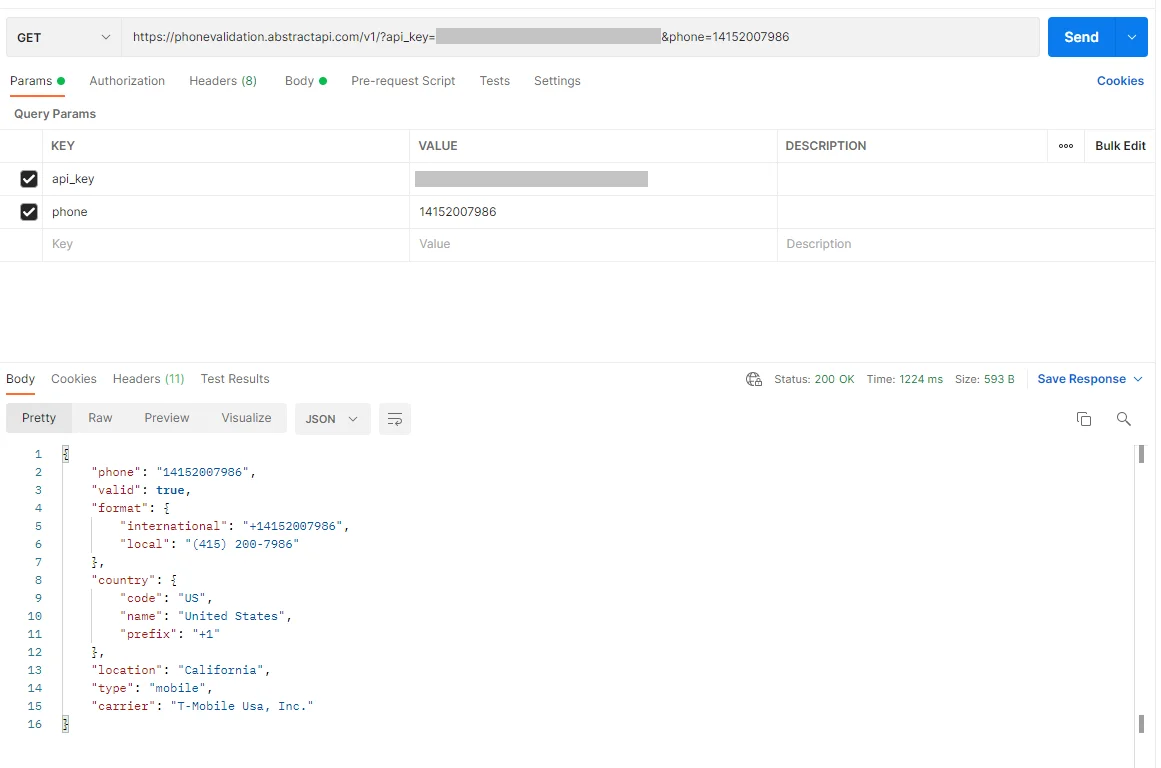
You can see that the API response contains a "valid" key which indicates the activation status of the number. The API response also has the human-readable phone number format in international and local formats. Further, it shows the country code, name, and carrier information.
With this information, it is possible to convert a given number format into display friendly format or profile them based on countries and carriers. You can try calling with API with invalid phone numbers containing not a digit or nonexistent country code to see how it responds.
For more information about the API response parameters, you can check out the documentation section of the API page.
Building a Laravel App for Phone Number Format Validation
Laravel Framework is an open-source MVC framework in PHP for building simple to complex web applications. Laravel strictly follows the MVC (Model-View-Controller) architectural pattern. It is known for its beautiful and elegant syntax as a web framework.
Laravel has many great web development features, such as
- Service container for easy dependency Injection.
- Built-in authentication mechanism with boilerplate login and registration handling.
- One of the best ORMs, Eloquent for handling database connection, migration, and queries easily.
- Easy to use a templating engine called Blad.
- Out-of-the-box integrations with popular front-end frameworks like Vue and React.
You will now build a sample Laravel app that displays a user registration form for capturing contact information, including a phone number. This form will internally validate the number to ensure that any form submission with fake numbers is blocked. We will use the out-of-the-box code scaffoldings provided by the Laravel ecosystem to demonstrate this feature in quick and easy steps to ensure you do not have to write too much code.
We will build this sample app in two phases. At first, we will build the default Laravel app with the form for capturing the user's phone number and other details. Then, in the second phase, we will add number format checking to the form with the help of Abstract Phone Validation API.
Before proceeding, ensure that you have a development environment setup with the latest PHP v8 stack already installed using XAMPP or Homebrew, which gives you the PHP runtime and MySQL database server.
Let's dive in.
Default User Registration Form with Phone Number
Step 1: Install Laravel
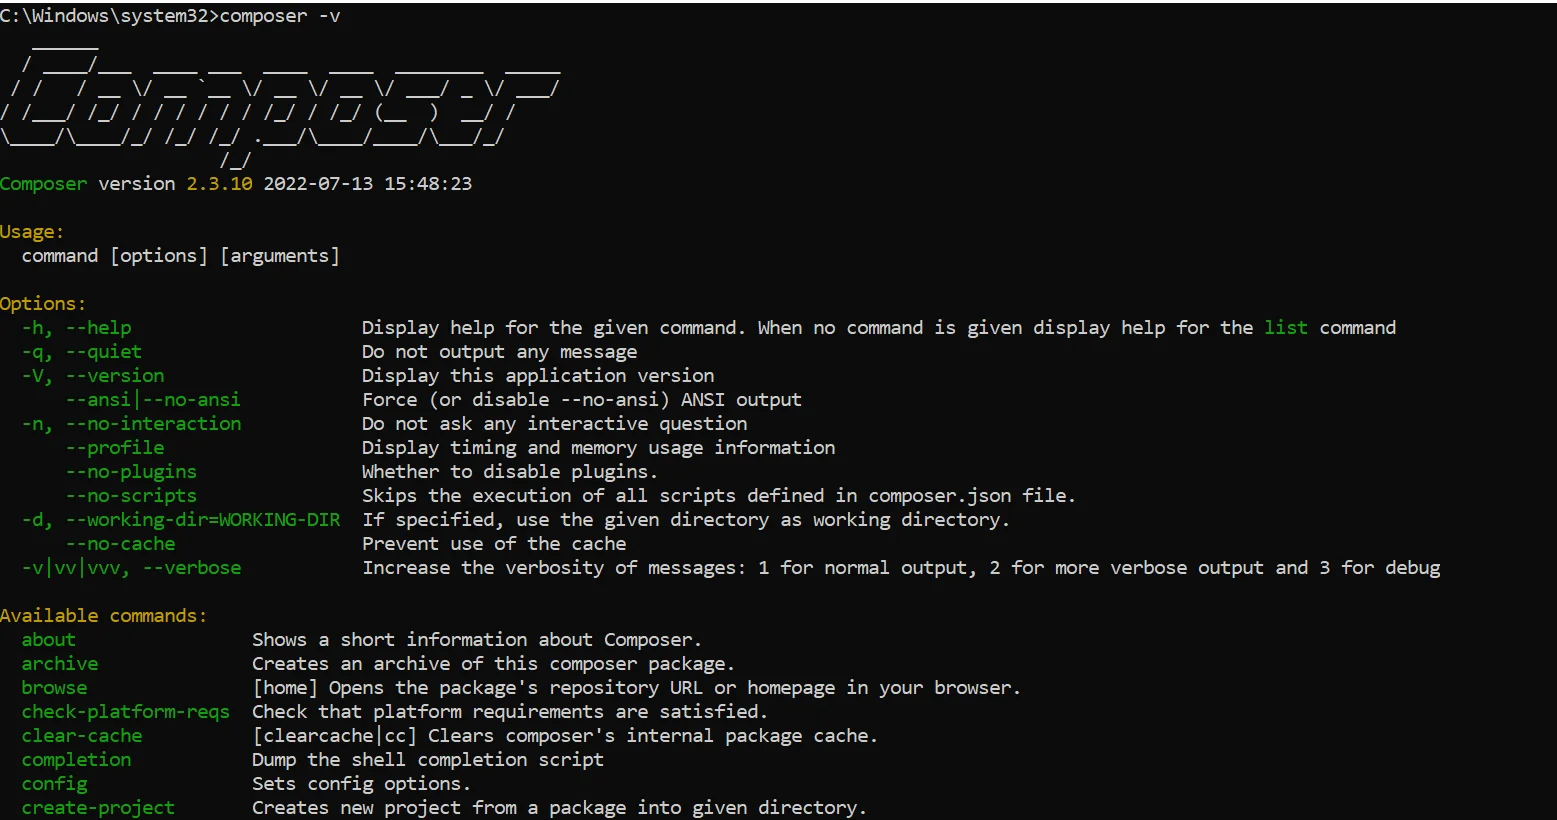
Composer is a package manager for PHP. Since Laravel is a PHP framework, it is best to use Composer to install Laravel.
You can either use the PHP binary from a command line terminal to install Composer or use the installation file (preferable for Windows).
Check the download instructions on the official website for the installation steps. Once installed, open a terminal and run the composer command to verify the installation.
composer -v
You should get a response like this.
Step 2: Create a new Laravel project using the composer
Create a new PHP project named "phonevalidation" in Composer by running the following command on the terminal.
composer create-project --prefer-dist laravel/laravel phonevalidation
This will install Laravel and all its dependencies and create a default project sub-directory named "phonevalidation" under the current working directory.
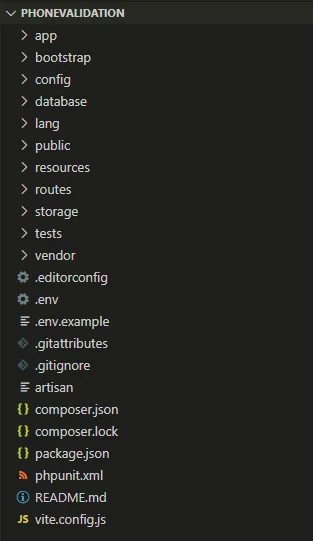
Once the installation process is complete, change the directory to the "phonevalidation" project directory. You can also open the project directory inside a code editor like VS Code to inspect the project sub-directory structure. From here onwards, it is assumed that all the terminal commands will be executed from the project directory.
Step 3: Run the Laravel application
Now, you can run the default Laravel application with the following command.
php artisan serve
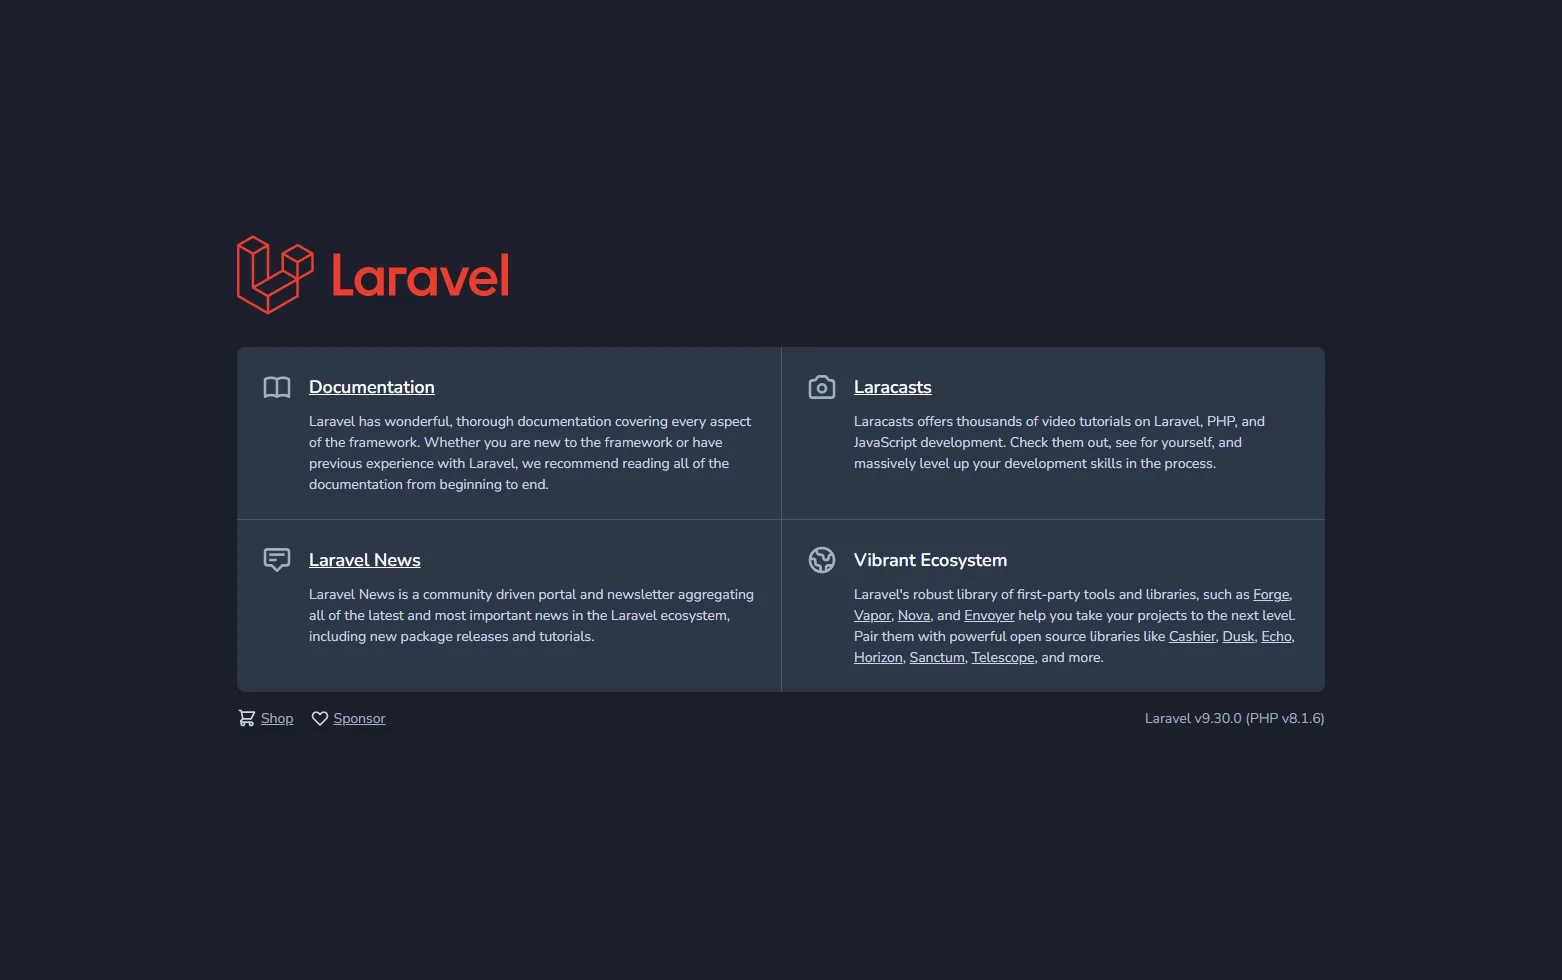
This will start the PHP development server and host the default application at http://127.0.0.1:8000
Visit the URL in your browser, and you will get this page.
Step 4: Add the UI Scaffolds for registration forms
Now, it's time to add some UI elements to the default Laravel application to demonstrate phone validation during user registration. For this, we can leverage the Laravel ecosystem provided scaffoldings for readymade UI components in some of the popular Javascript frameworks such as React and Vue. We will use these components to build a cookie-cutter registration page.
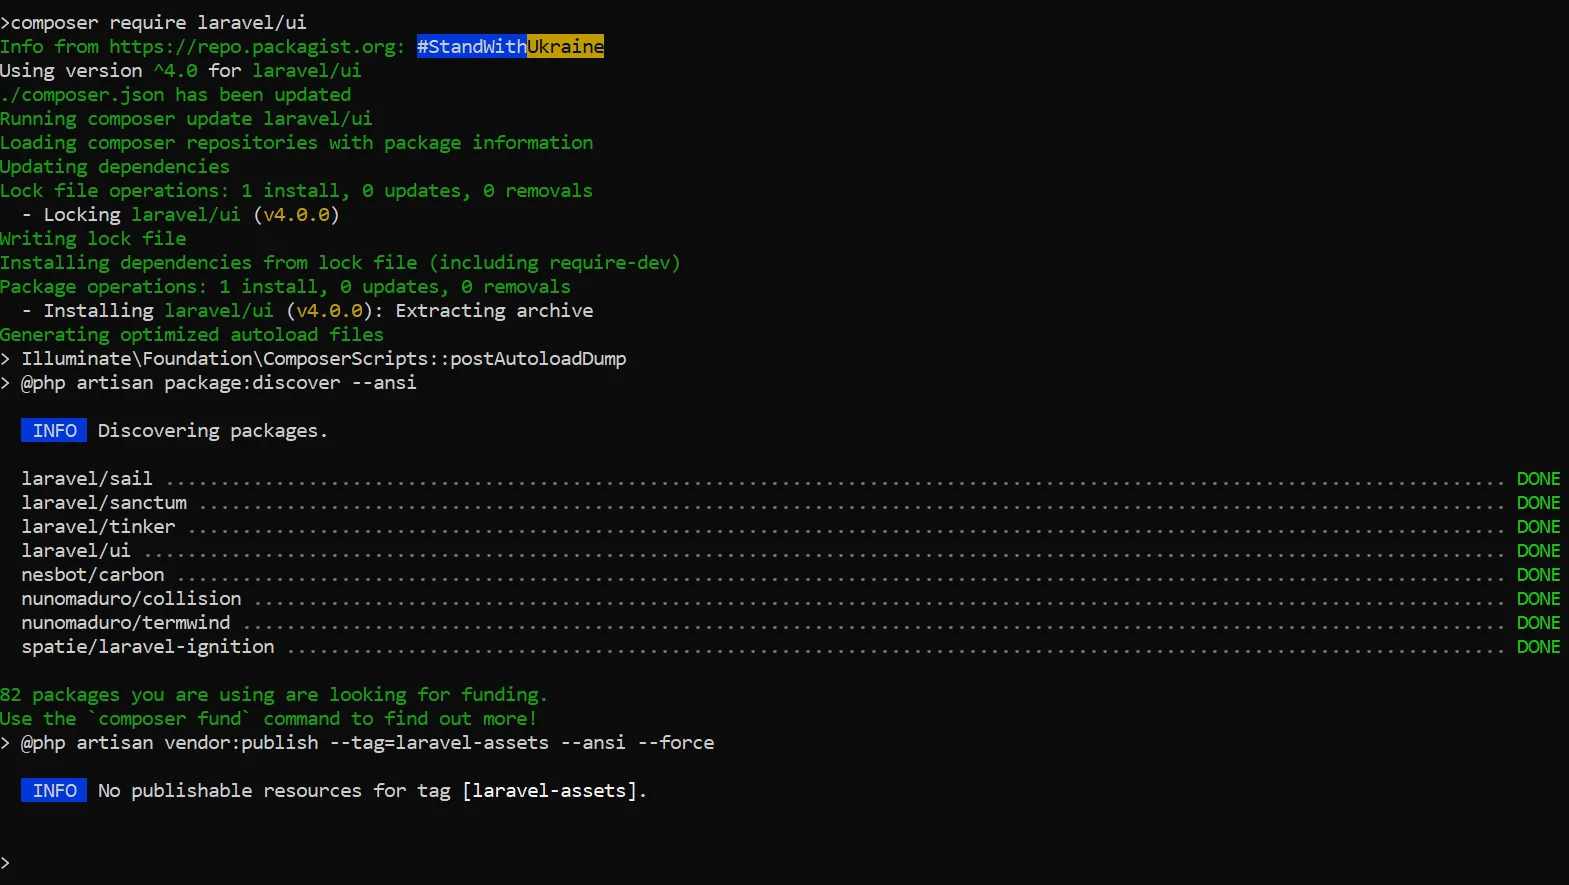
To install the Laravel UI package, run this command on a separate terminal.
composer require laravel/ui
Afterward, you must scaffold the Laravel application with Vue.js auth view by executing these three commands in sequence.
php artisan ui vue --auth

npm install

npm run dev
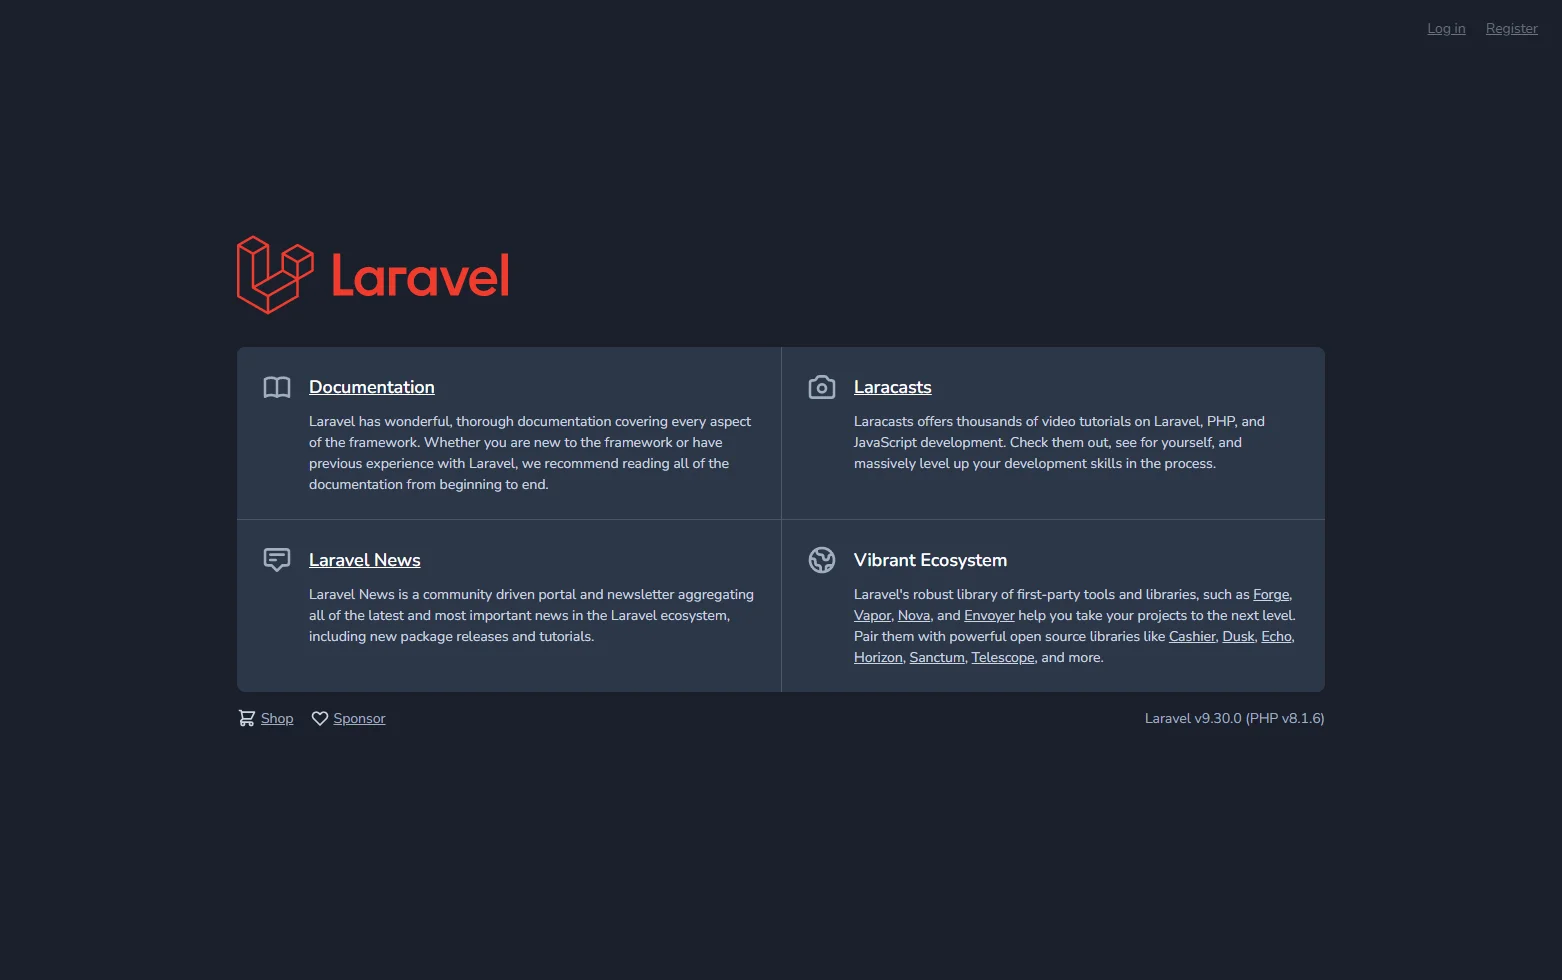
If you now reload the Laravel application (hosted on the first terminal) on the browser, you will see a new login and register links added to the page at the top right corner.
Click on the register link, and you should get a view like this.
This view is the default registration form.
Step 5: Update the registration form with the phone number field
As you can see, Laravel's default registration form doesn't have the phone number field. You can add that by updating the 'resources/views/auth/register.blade.php'.

Copy the below code snippet to replace the entire code inside 'register.blade.php'.
@extends('layouts.app')
@section('content')
{{ __('Register') }}
@endsection
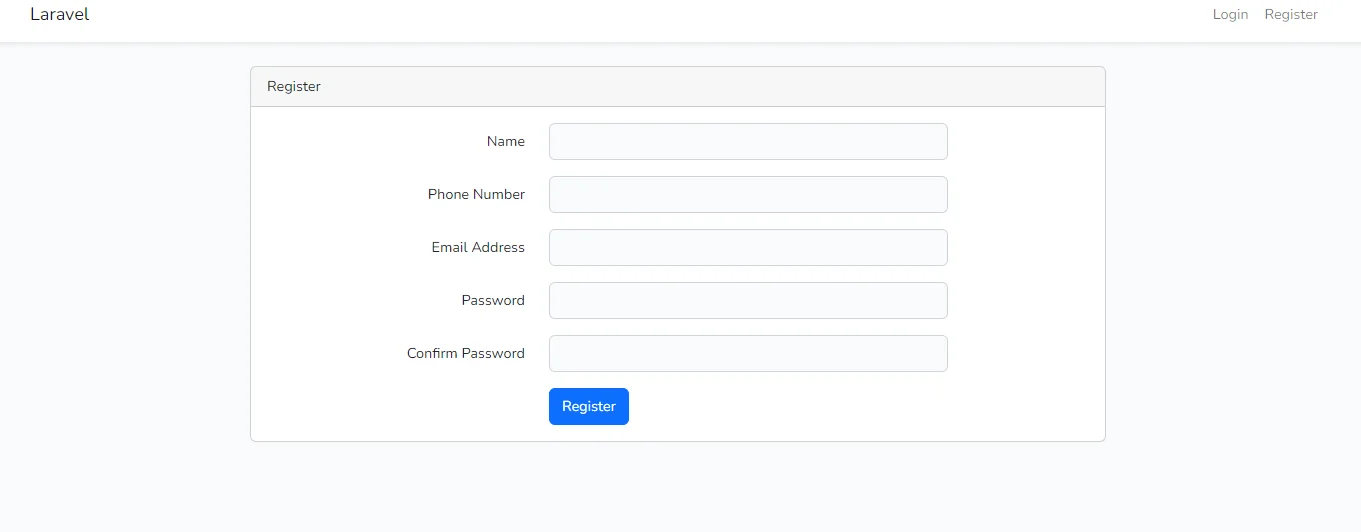
Upon saving the file, the Laravel registration form page should refresh to display the updated form with the phone number field.
Step 6: Update the database for storing phone number
This registration form stores the submitted data in a database. Therefore, it should be connected to the backend MySQL database server.
To make it work, ensure that your MySQL database server is up and running and you have access to the admin credentials.
For storing user details, you need a designated database. Let's call it "phonevalidation". Make sure to create this database within the MySQL server.
Now open the .env file and replace the parameters prefixed with "DB_" with the below snippet.
Ensure that you replace the placeholder <your_db_password> with your actual MySQL database password.
Now, you need to update the migration scripts to take the registration form's database operations.
Open the file 'database/migrations/2014_10_12_0000_create_users_table.php' and replace the code with the code snippet below.
use Illuminate\Database\Migrations\Migration;
use Illuminate\Database\Schema\Blueprint;
use Illuminate\Support\Facades\Schema;

return new class extends Migration
{
    /**
     * Run the migrations.
     *
     * @return void
     */
    public function up()
    {
        Schema::create('users', function (Blueprint $table) {
            $table->id();
            $table->string('name');
            $table->string('email')->unique();
            $table->string('phone')->unique();
            $table->timestamp('email_verified_at')->nullable();
            $table->string('password');
            $table->rememberToken();
            $table->timestamps();
        });
    }

    /**
     * Reverse the migrations.
     *
     * @return void
     */
    public function down()
    {
        Schema::dropIfExists('users');
    }
};
Save the file. After that, navigate to 'app/Http/Controllers/Auth/RegisterController.php' and replace the entire code.
namespace App\Http\Controllers\Auth;

use App\Http\Controllers\Controller;
use App\Providers\RouteServiceProvider;
use App\Models\User;
use Illuminate\Foundation\Auth\RegistersUsers;
use Illuminate\Support\Facades\Hash;
use Illuminate\Support\Facades\Validator;

class RegisterController extends Controller
{
    /*
    |--------------------------------------------------------------------------
    | Register Controller
    |--------------------------------------------------------------------------
    |
    | This controller handles the registration of new users as well as their
    | validation and creation. By default this controller uses a trait to
    | provide this functionality without requiring any additional code.
    |
    */

    use RegistersUsers;

    /**
     * Where to redirect users after registration.
     *
     * @var string
     */
    protected $redirectTo = RouteServiceProvider::HOME;

    /**
     * Create a new controller instance.
     *
     * @return void
     */
    public function __construct()
    {
        $this->middleware('guest');
    }

    /**
     * Get a validator for an incoming registration request.
     *
     * @param  array  $data
     * @return \Illuminate\Contracts\Validation\Validator
     */
    protected function validator(array $data)
    {
        return Validator::make($data, [
            'name' => ['required', 'string', 'max:255'],
            'phone' => ['required','digits:10','unique:users'],
            'email' => ['required', 'string', 'email', 'max:255', 'unique:users'],
            'password' => ['required', 'string', 'min:8', 'confirmed'],
        ]);
    }

    /**
     * Create a new user instance after a valid registration.
     *
     * @param  array  $data
     * @return \App\Models\User
     */
    protected function create(array $data)
    {
        return User::create([
            'name' => $data['name'],
            'phone' => $data['phone'],
            'email' => $data['email'],
            'password' => Hash::make($data['password']),
        ]);
    }
}
Save this file.
You also have to replace the protected fillable variable in the User Model class, which is located at 'app/Models/User.php'
protected $fillable = [
        'name',
        'email',
        'password',
        'phone'
    ];
Now, we are ready for the migration. Run the following command on another terminal for the migration to execute.
php artisan migrate
This will create a few tables within the 'phonevalidation' database. The 'users' table will hold the details for the registered user.
Step 7: Test the default Registration form
With the database set up, you can now test the registration form, by filling in some data and submitting it.
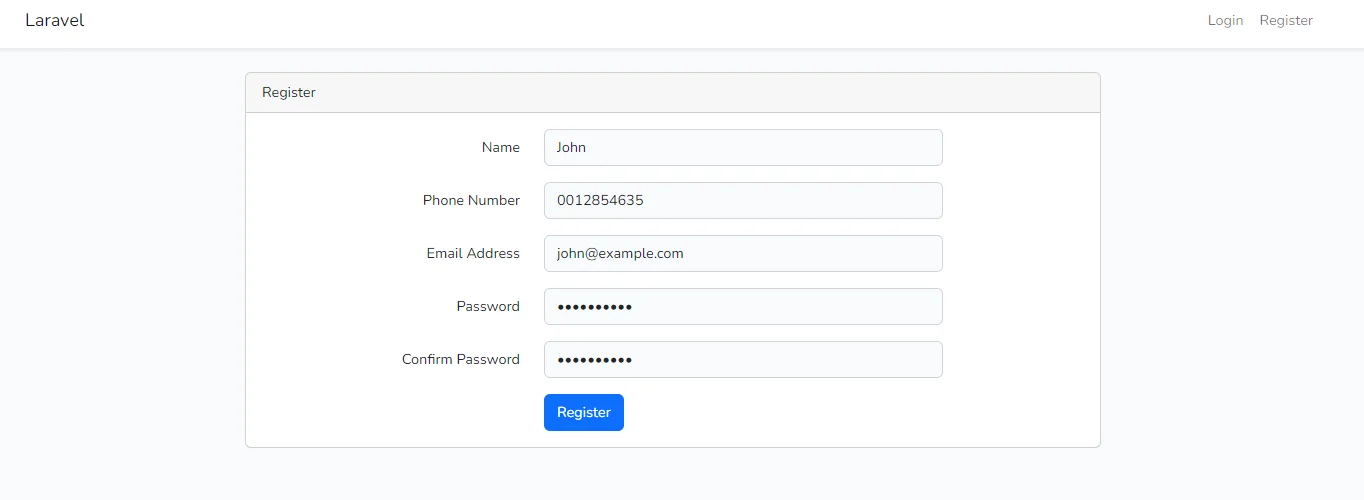
After submitting the form, you should see a message "You are logged in!". You should also see the submitted data in the "users" table of the "phonevalidtion" database, including the phone number.
This means that the default registration with the addition of a phone number is now working.
Enhanced Registration form with Phone Number Format Validation
Let's improve the registration form to detect invalid phone numbers so that only a valid number is submitted. You have already seen the capabilities of the Abstract Phone Validation API. Integrating this API into this form is easy. The recommended option to add custom validation in Laravel is to add a Rule and then attach it to the controller that is handling the form submission. The next few steps help you achieve this to complete our demo Laravel application with custom phone number validation.
Step 1: Add a custom rule for phone number format validation
Run this command at the terminal to create a new Laravel Rule.
php artisan make:rule CheckPhone
This will create a new rule under "app/Rules/CheckPhone.php". Open this file and replace the default code with the entire code snippet below.
namespace App\Rules;

use Illuminate\Contracts\Validation\Rule;
use Illuminate\Support\Facades\Http;

class CheckPhone implements Rule
{
    /**
     * Create a new rule instance.
     *
     * @return void
     */
    public function __construct()
    {

    }

    /**
     * Determine if the validation rule passes.
     *
     * @param  string  $attribute
     * @param  mixed  $value
     * @return bool
     */
    public function passes($attribute, $value)
    {
        $res = Http::get('https://phonevalidation.abstractapi.com/v1/?api_key=&phone=' . $value);
        // check if we got a good response code between 200 and 299
        if ($res->successful()) {
            $data = $res->json();
            if ($data['valid']) {
                return true;
            }
            return false;
        }

        return false;
    }

    /**
     * Get the validation error message.
     *
     * @return string
     */
    public function message()
    {
        return 'Abstract API Reported Invalid Phone Number Format';
    }
}
Before saving this file, ensure to replace the placeholder <YOUR_API_KEY> with your actual API key from Abstract.
This code calls the Abstract Phone Validation API with the passed string containing the phone number and checks for the "valid" key in the API response. In this way, this rule will catch any invalid number format entered in the registration form.
Step 2: Attach Rule to Controller
As the last step, the PhoneCheck rule must be attached to the 'RegisterController.php' you have previously updated.
Open this file and replace the validator PHP function with the below code.
return Validator::make($data, [
            'name' => ['required', 'string', 'max:255'],
            'phone' => ['required', new \App\Rules\CheckPhone],
            'email' => ['required', 'string', 'email', 'max:255', 'unique:users'],
            'password' => ['required', 'string', 'min:8', 'confirmed'],
        ]);
As you can see, we have added the CheckPhone rule to the 'phone' parameter, which is obtained from the registration form.
Step 3: Test the Registration form
You are done with all code changes now.
It's time to test the registration form with an invalid number. Open the form and fill up some arbitrary user data with an invalid number format. You should now see an error message that we configured in the CheckPhone validation rule.
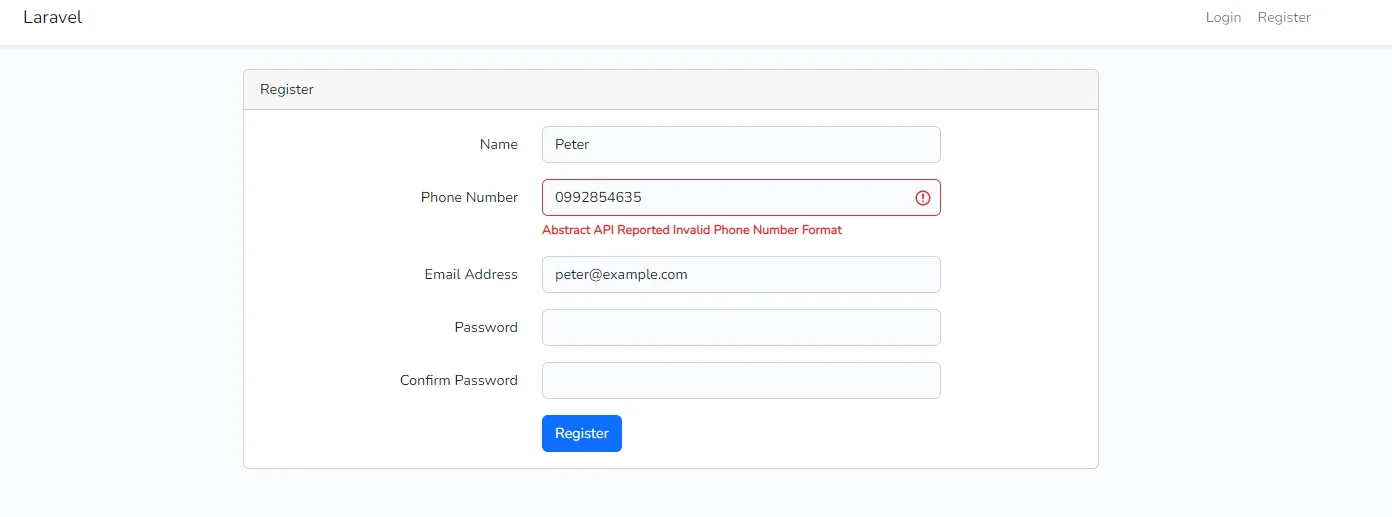
That's it. Abstract Phone Validation API is now working behind the scenes to empower this Laravel application to filter out user registrations with fake number formats. You can also try it with a valid phone number format, and you should be able to submit the form successfully.
FAQs
How do I check the Phone Number Format?
Phone numbers contain country and area-specific details, but their format varies slightly across the continents. You can perform a simple substring extraction to separate the number's country, area, and local portions. With a lookup table, it is easy to identify the country and state/region names of a phone number. However, for details about the carrier, and type of connection ( fixed line or mobile), you can leverage the Abstract Phone Validation API, which maintains a database of phone numbers from over 190 countries.
How to Validate Phone Number Formats in Laravel?
A Laravel application requires phone validation to profile users submitting their phone numbers via a form. It is also important to display the phone number format in the accepted pattern for easy identification and dialing. In Laravel, the recommended approach to validate the phone number format is to attach it to a rule and perform custom validation within the rule. Abstract Phone Validation API can be called within the rule to check for the validity of the phone number format.
How to Check the Phone Number Format in PHP?
Basic form validation of phone numbers is possible using the built-in PHP functions and regular expression facilities to check the first ten digits of a number. But these options do not help in identifying the dialing pattern, validity, and serviceability of the number. For advanced phone number format validation, PHP's HTTP module can be used to call the Abstract Phone Validation API. This API provides additional information about phone numbers, like validity, international and local number formatted string, country/area details, carrier name, and type of connection.
Frequently Asked Questions
What is the Abstract Phone Validation API and why use it in a Laravel app?
The Abstract Phone Validation API is a REST API that checks whether a phone number is valid, returns carrier information, and identifies the connection type. Using it in a Laravel application lets you validate numbers beyond what a simple regex can catch, since the API understands international formats and real carrier data. Abstract offers a free plan with 250 requests per month, which covers most development and testing needs.
How do you integrate the Abstract Phone Validation API into a Laravel registration form?
The recommended pattern is to create a custom Laravel validation rule class (for example, CheckPhone.php) that fires an HTTP GET request to the Abstract API endpoint with the submitted phone number. You then attach that rule to the phone field inside your controller's validation logic. Laravel's built-in HTTP client makes the request straightforward: Http::get('https://phonevalidation.abstractapi.com/v1/?api_key=YOUR_KEY&phone=' . $value). The rule reads the valid key in the JSON response and fails validation if it is false.
Where should the Abstract API key be stored in a Laravel project?
Store the API key in Laravel's .env file and reference it via env('ABSTRACT_PHONE_KEY') inside your validation rule. This keeps the key out of source control and makes it easy to swap between development and production credentials. Never hard-code the key directly in a class or blade template.
What is the difference between regex validation and using an API for phone number format checking?
A regex pattern such as ^\+?[1-9]\d{1,14}$ can verify that a string matches the E.164 structure, but it cannot tell you whether the number is actually active or assigned to a real carrier. Abstract's Phone Validation API performs live lookups, so it catches numbers that look structurally valid but do not exist in the real world. For a registration form where you need high-quality phone data, the API approach is more reliable than regex alone.
What data does the Abstract Phone Validation API return beyond a simple valid or invalid flag?
In addition to the valid boolean, the API response includes the carrier name, the connection type (mobile, landline, or VOIP), the country, and the number formatted in both local and international E.164 formats. This extra data can be stored alongside the phone number in your database or used to route notifications differently depending on whether the number is a mobile or landline.
What PHP and Laravel version requirements apply to this validation approach?
The tutorial is built on PHP 8 and a current Laravel release that ships with the built-in Http facade. If you are on an older Laravel version that does not include the HTTP client, you can use Guzzle directly or install it via Composer. The custom rule class approach described in the article works across all modern Laravel versions that support the Rule interface.
