

Send Emails in a React App Using Mailto
The mailto link is an href redirect that can be added to the <a> anchor element. It works similarly to a regular href link, but instead of opening a link, it opens an email client on the user's device. It's the simplest way to send an email from a frontend app.
To use the mailto redirect, just add it to an anchor element like so:
Put the email address that you want to receive the email after mailto:
That's all it takes to open the user's default email client on their machine and populate the "recipient" field with the intended email.
Mailto also lets you define a default subject, message, and cc/bcc as a query string.
You can use string interpolation to add dynamic content.
Easy right? Unfortunately, this comes with a few caveats. First of all, the emails you can send using this method are pretty limited and ugly. At best, you can get a string with some dynamically injected content.
Next, on mobile, mailto will only work if the user has an email client installed on their device. If the user has multiple email clients installed, it will open the device default without giving the user an option to choose.
Finally, some spammers use bots to search the web for mailto links and then use those bots to spam mail servers.
For these reasons, mailto, while super quick and easy, isn't necessarily the best solution for your website contact.
Send Emails in a React App Using EmailJS
A better solution is to use a third-party SMTP library like EmailJS. EmailJS is a package that handles the SMTP server part of email sending for you, including any spam or security concerns. They also allow you to create email templates that will send beautiful, high-quality emails.
For the purposes of this tutorial, we'll assume you already have a basic app spun up using something like Create React App. If you don't know how to do that, go ahead and check out the Create React App docs to get started.
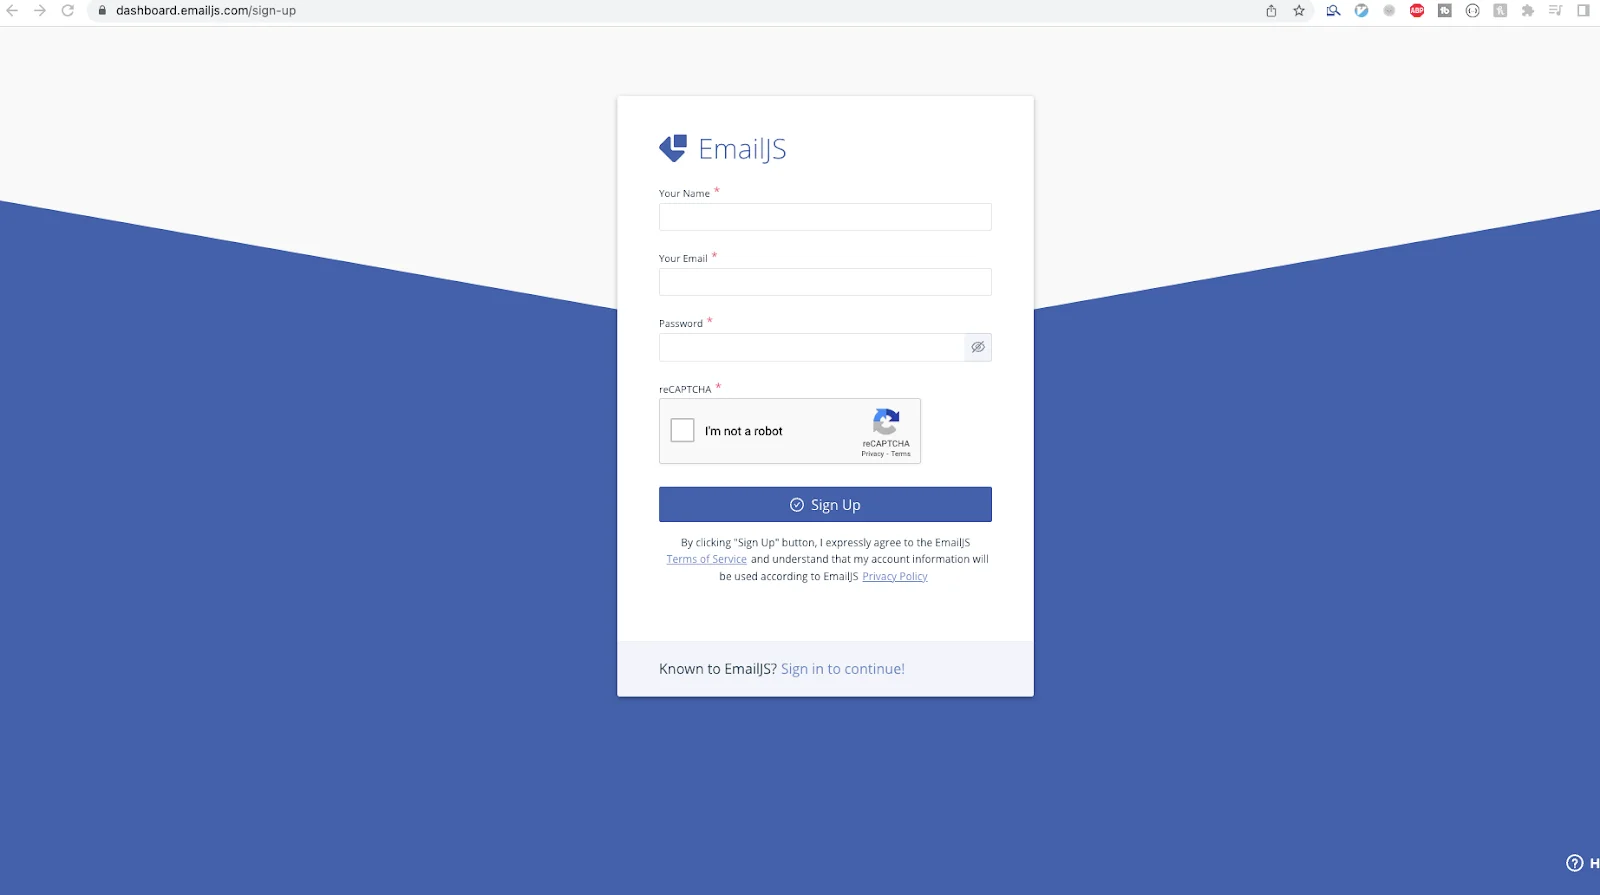
Sign Up for An EmailJS Account
You can sign up for an EmailJS account for free, and you can use the service for free for up to 200 emails a month. You also get two free templates.
Click the "Sign Up" button in the top right corner of the site's homepage. You'll be asked to input your name and email address, and will go through an email confirmation process. Once you've logged in, you should land on your dashboard.
Add an Email Service
You'll need to hook up an email service like Gmail, Yahoo, Outlook, etc. You can add multiple services. For now, choose the email service for whichever email address you'd like to receive the mail that you will send from your app.
Click "Add Email Service." You'll get a popup asking you to choose a service.
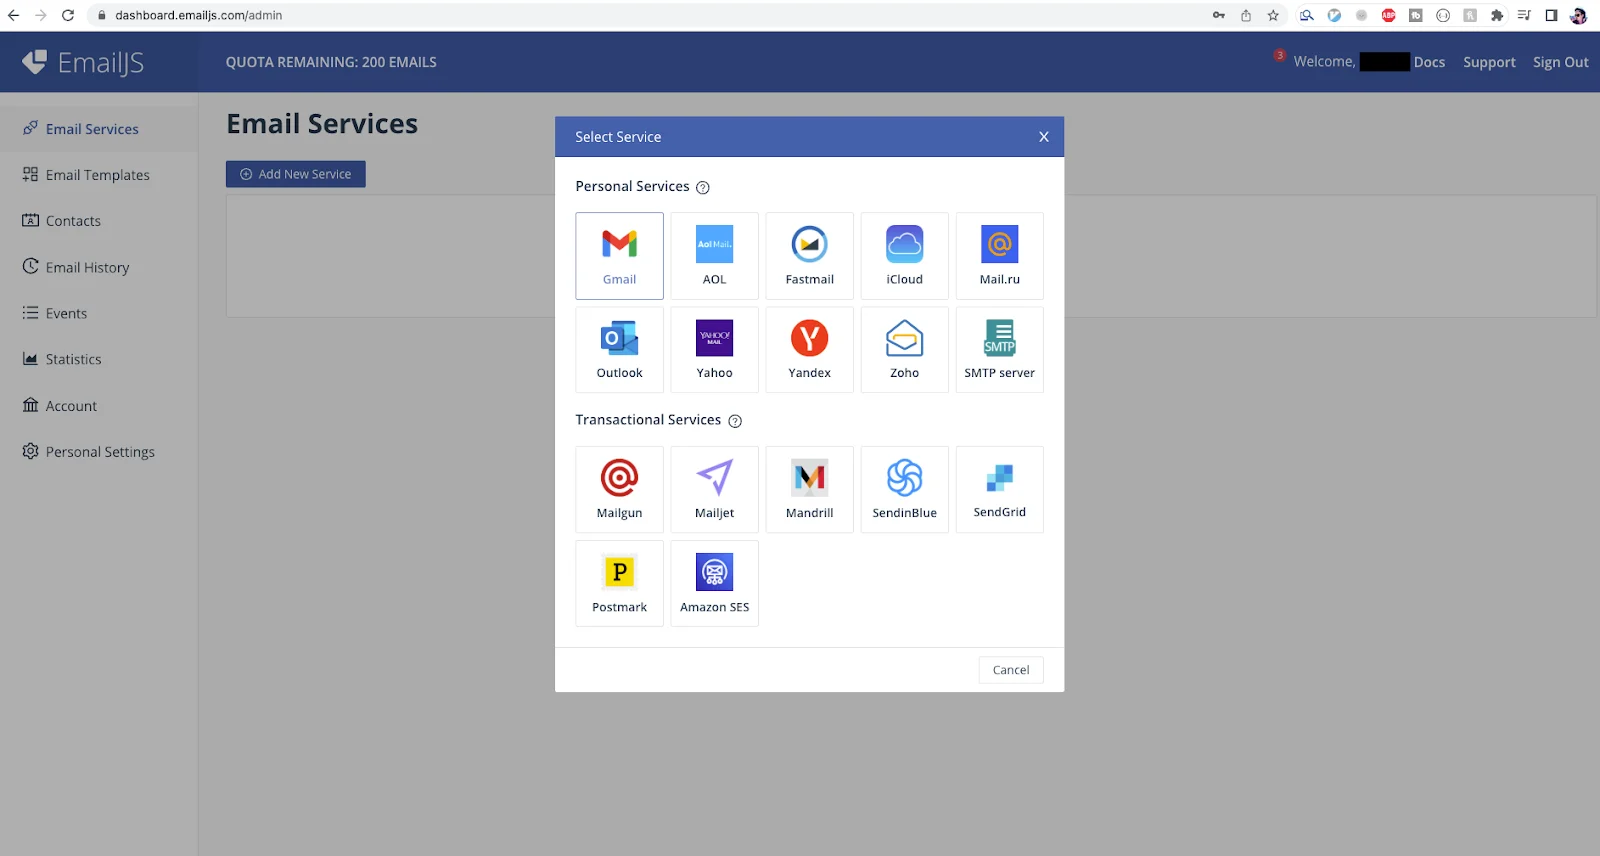
For this tutorial, we'll choose Gmail, but the steps are the same for all services.
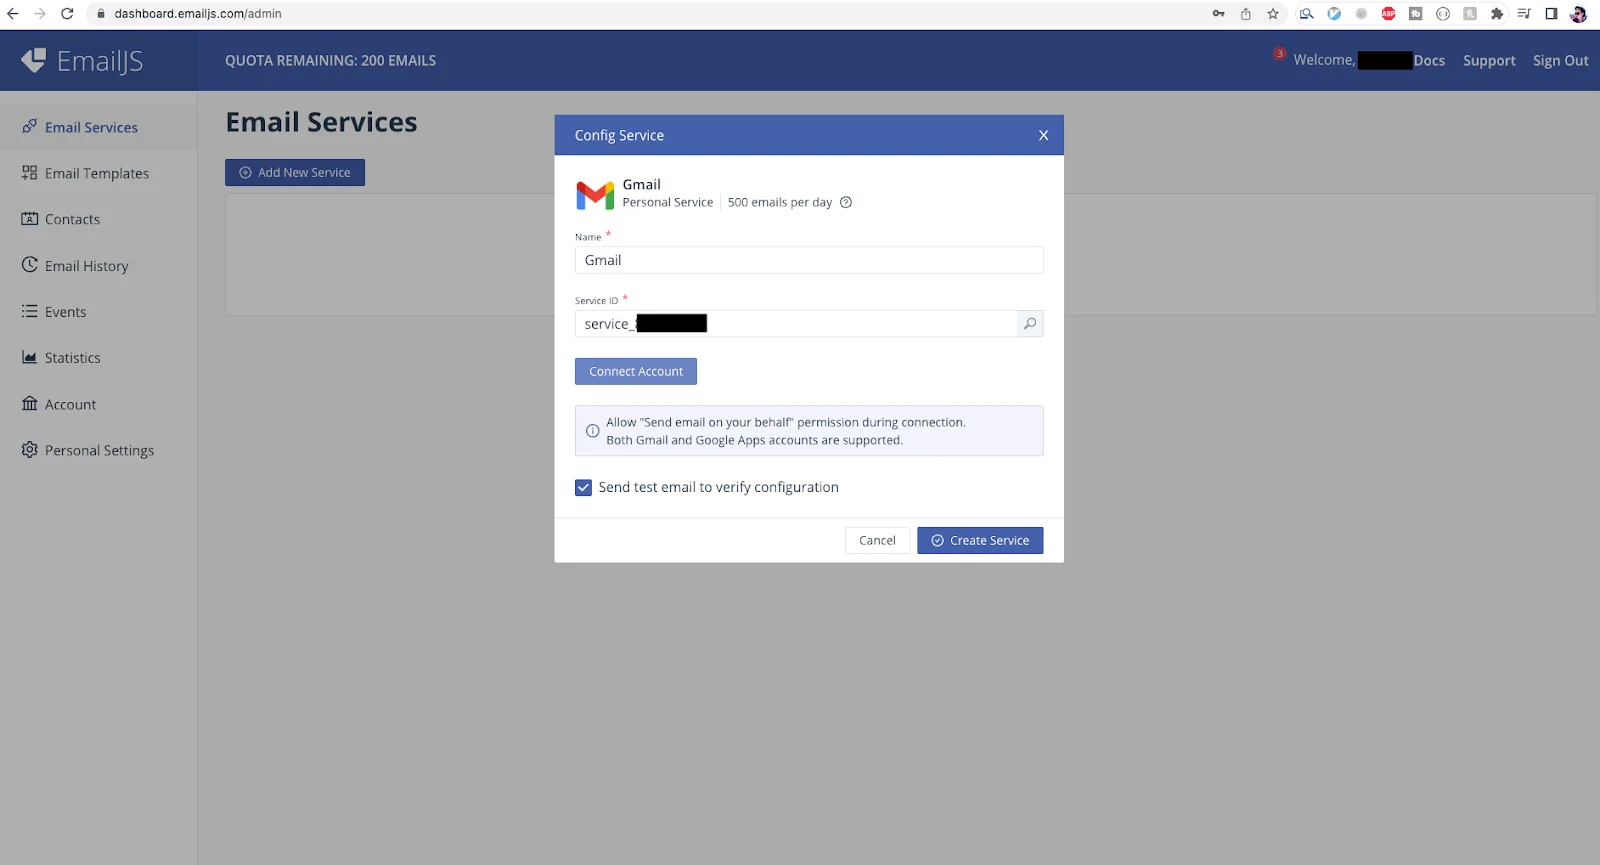
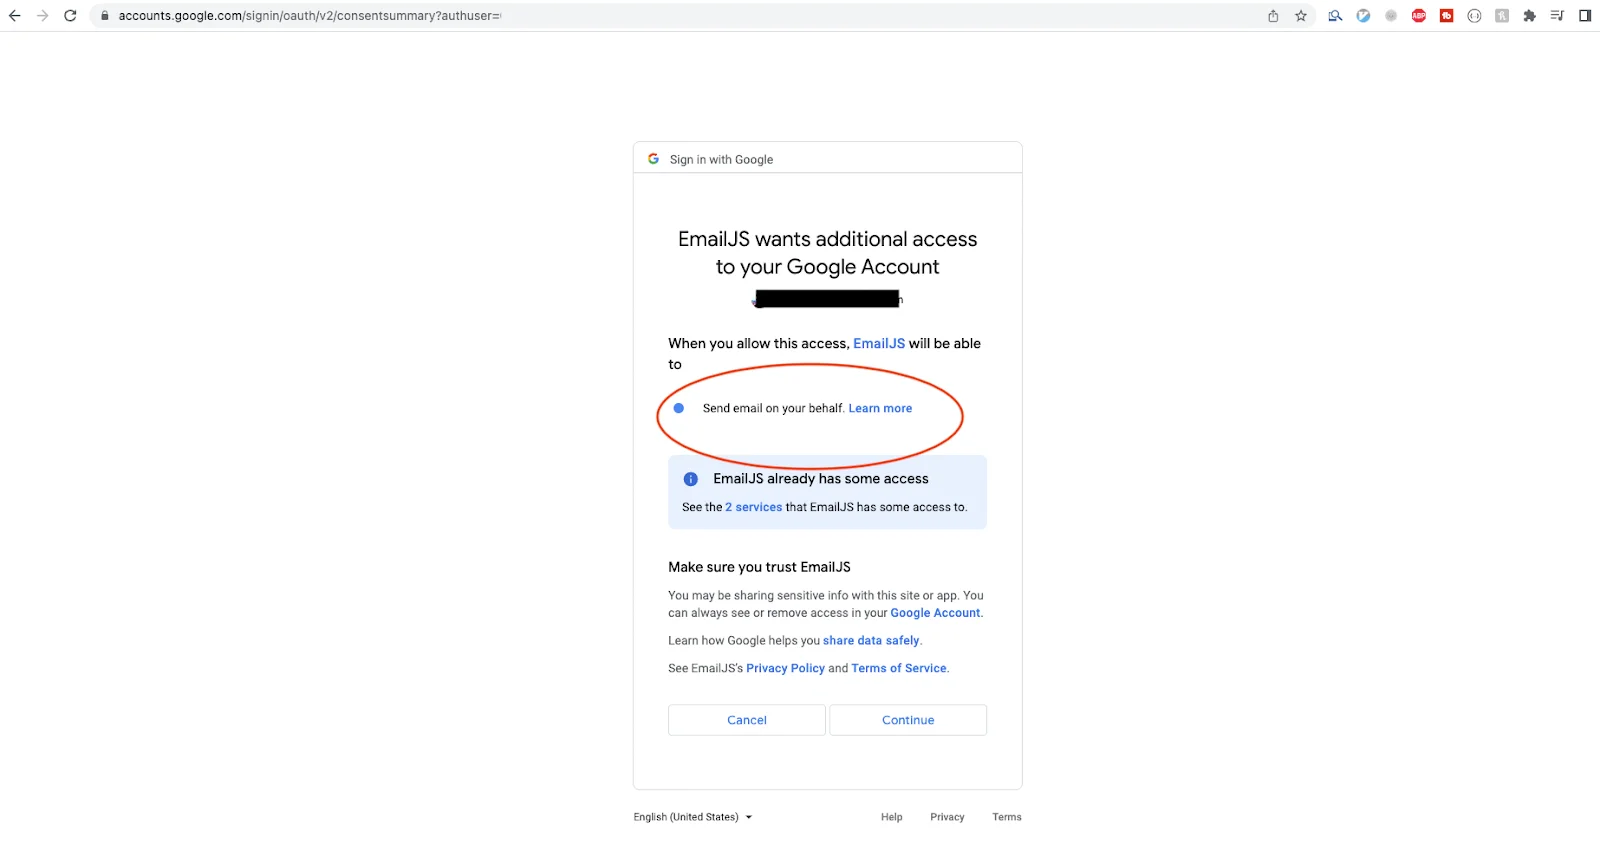
You'll see another popup showing you your new Service ID number. Don't touch that—we will use it later in the Javascript code. Click "Connect Account." You'll be taken through whatever login process your chosen service has.
Choose the email address that you want to receive the emails. Check the "Send Email on Your Behalf" permissions option. In the EmailJS popup, check "Send test email to verify." Make sure you receive an email from EmailJS at your chosen address.
Create an Email Template
Navigate to "Email Templates" and click "Create Template."
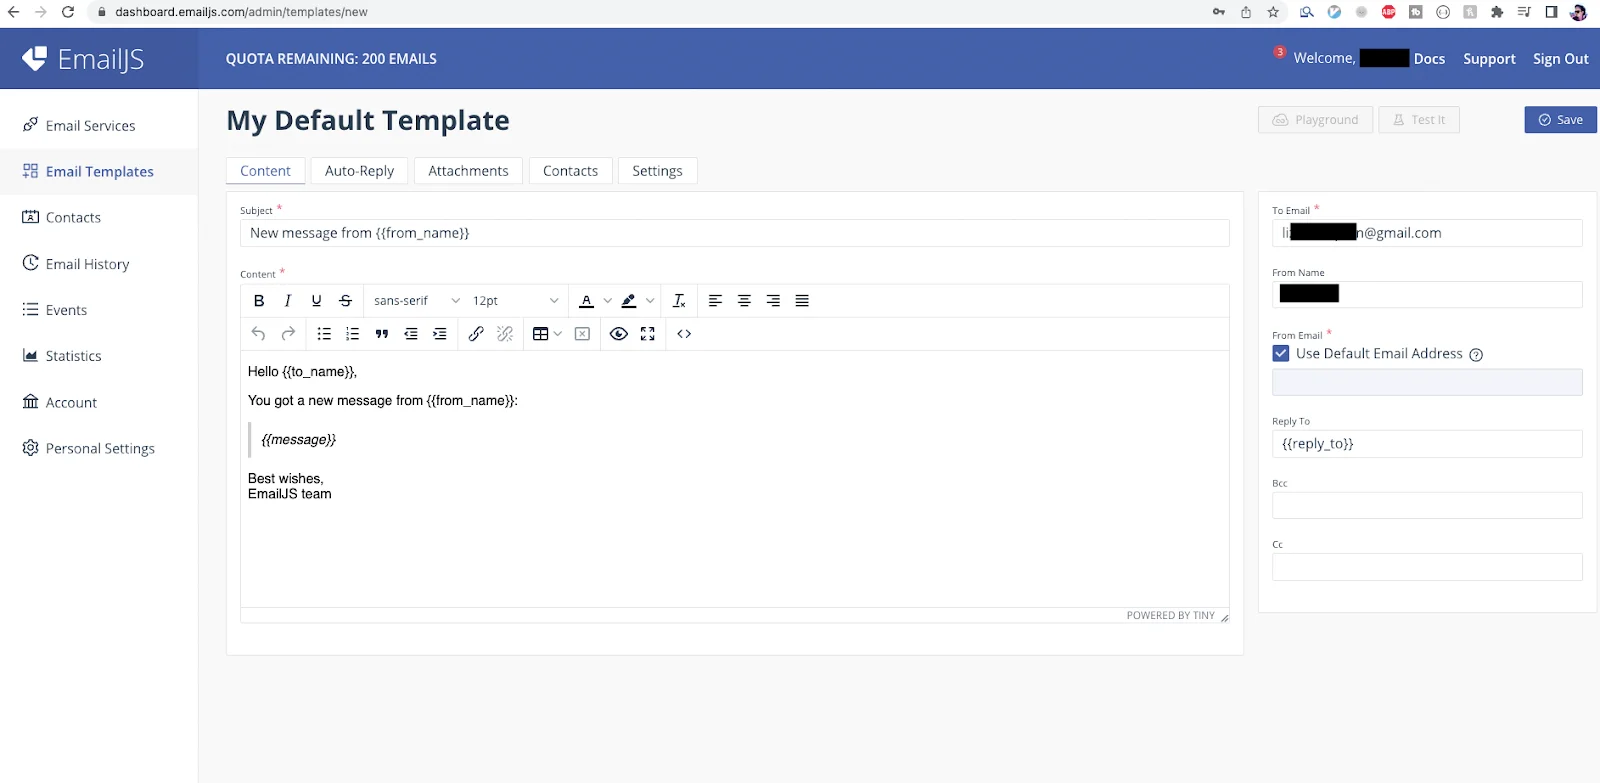
You can customize the email template to your heart's content, adding images, HTML, GIFs, etc. Let's take a look at a couple of the customization options.
Using Variables
EmailJS allows you to add dynamic content through the {{ handlebars }} syntax. These variables can then be named the same way inside your Javascript code. For example:
You can populate this variable with the string pulled from the name field in your React web form by passing it to the .sendForm function we'll use when we incorporate the EmailJS SDK into our code. More on this in the next section.
Formatting With HTML
EmailJS allows you to format beautiful, custom emails using simple HTML code. You can use the HTML to insert images, headings, links and more. To do this, click the code (<>) button. This will open a source code editor dialogue, into which you can paste your HTML code.
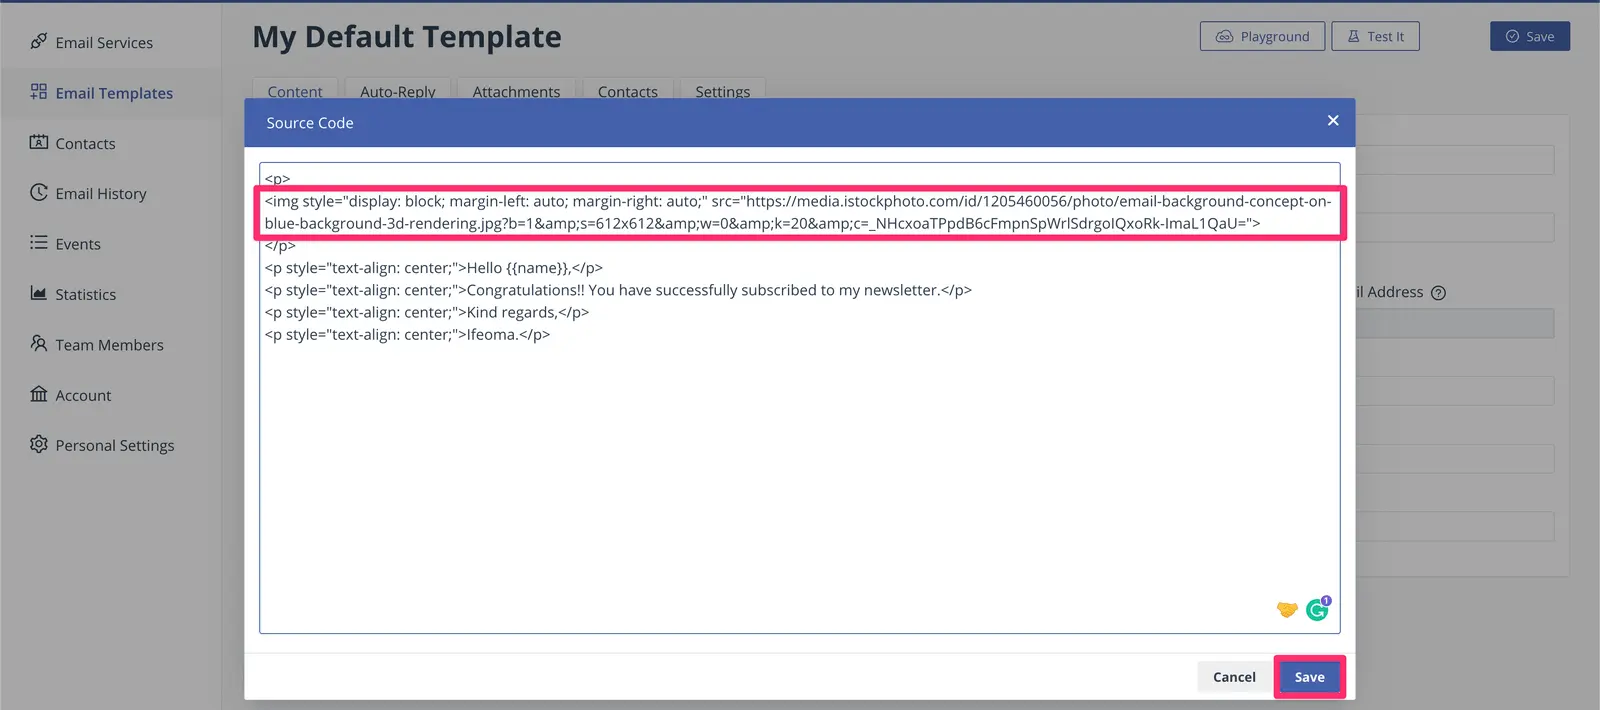
Hit "Save" in the top right corner to save the email template.
Install the EmailJS SDK Into Your App
Next, let's look at setting up the EmailJS SDK, which is how we'll get the information out of our React form and pass it to our EmailJS template. The first thing you'll need to do is install the SDK into your app using the command line.
or
Use the .sendForm Function to Send an Email
Next, import the EmailJS SDK into your App.js file.
The EmailJS SDK provides two methods for sending emails from React. Those are emailjs.send() and emailjs.sendForm().
First, initialize the EmailJS SDK. You can do this inside a useEffect hook so that it happens when the component mounts:
Once the SDK is initialized, we'll use sendForm to capture our user data and inject it into our email, as it allows us to capture all the data in our contact form at once.
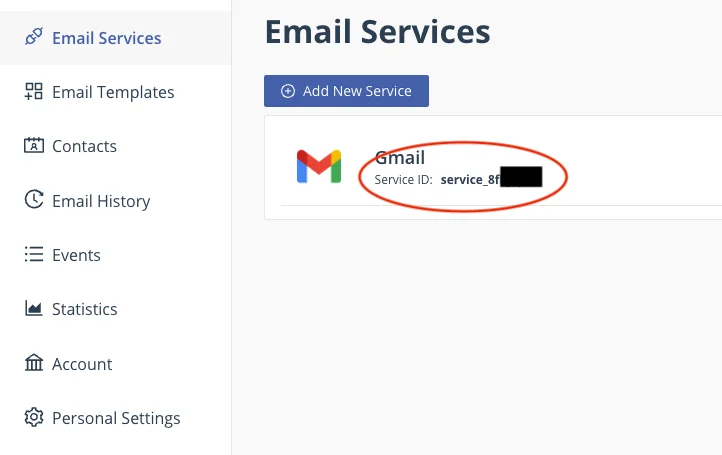
Replace YOUR_SERVICE_ID, YOUR_TEMPLATE_ID, and YOUR_PUBLIC_KEY with the actual values in your EmailJS dashboard. Those can be found in the email services, email templates, and account pages.
Copy the service ID from the Email Services page:
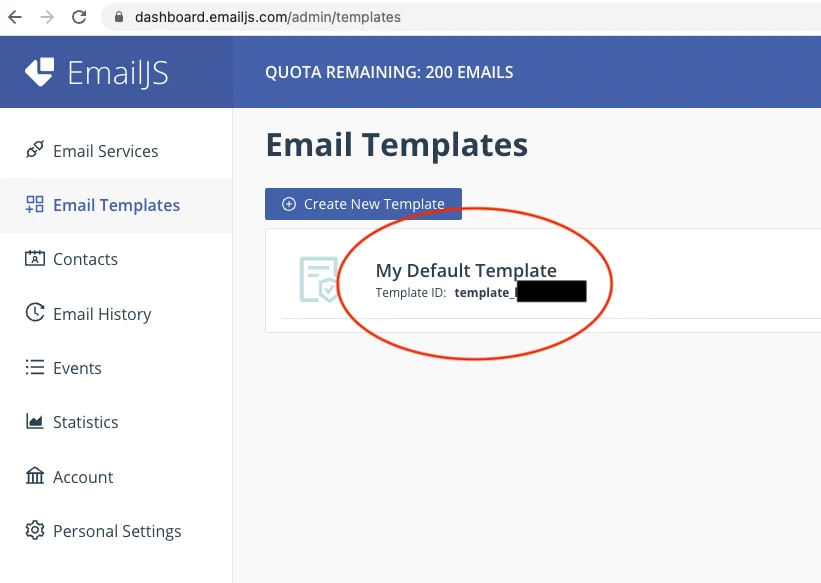
Grab the template ID from the Email Templates page:
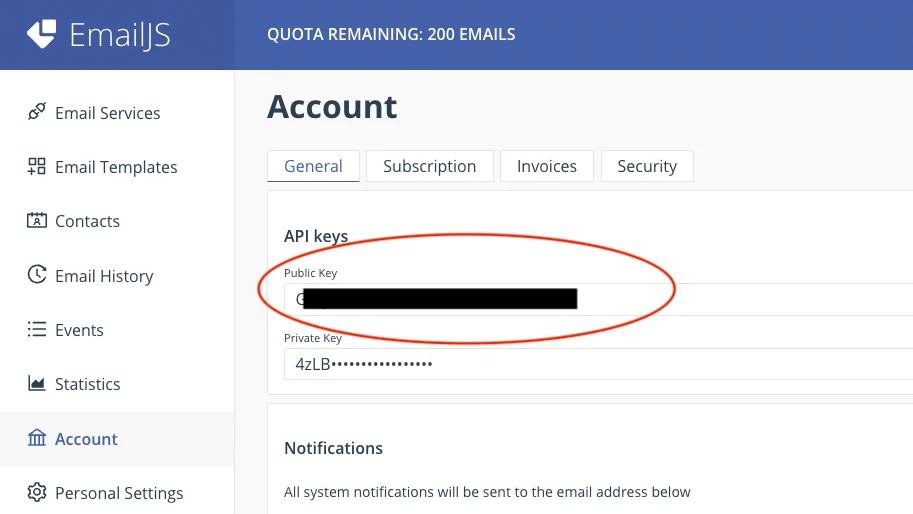
And get the public key from your Accounts page:
In the above example, we used the useRef hook to grab a reference to the <form> element in the JSX code. We then passed that variable into the .sendForm function, where EmailJS is able to parse the form, grab the variables, and inject them into your template.
Make sure the variable names you used in your React code are exactly the same as the ones you used in your EmailJS template.
Other Integrations
SendEmailJS isn't the only email sending service that integrates with React. Other services include Postmark, Amazon AWS SES, MailerSend, SendGrid, and Nodemailer. Resend also makes a handy React library called React Email that provides a handful of components that can be incrementally imported into your React project to build and send emails directly in React.
Information on getting started with React Email can be found here.
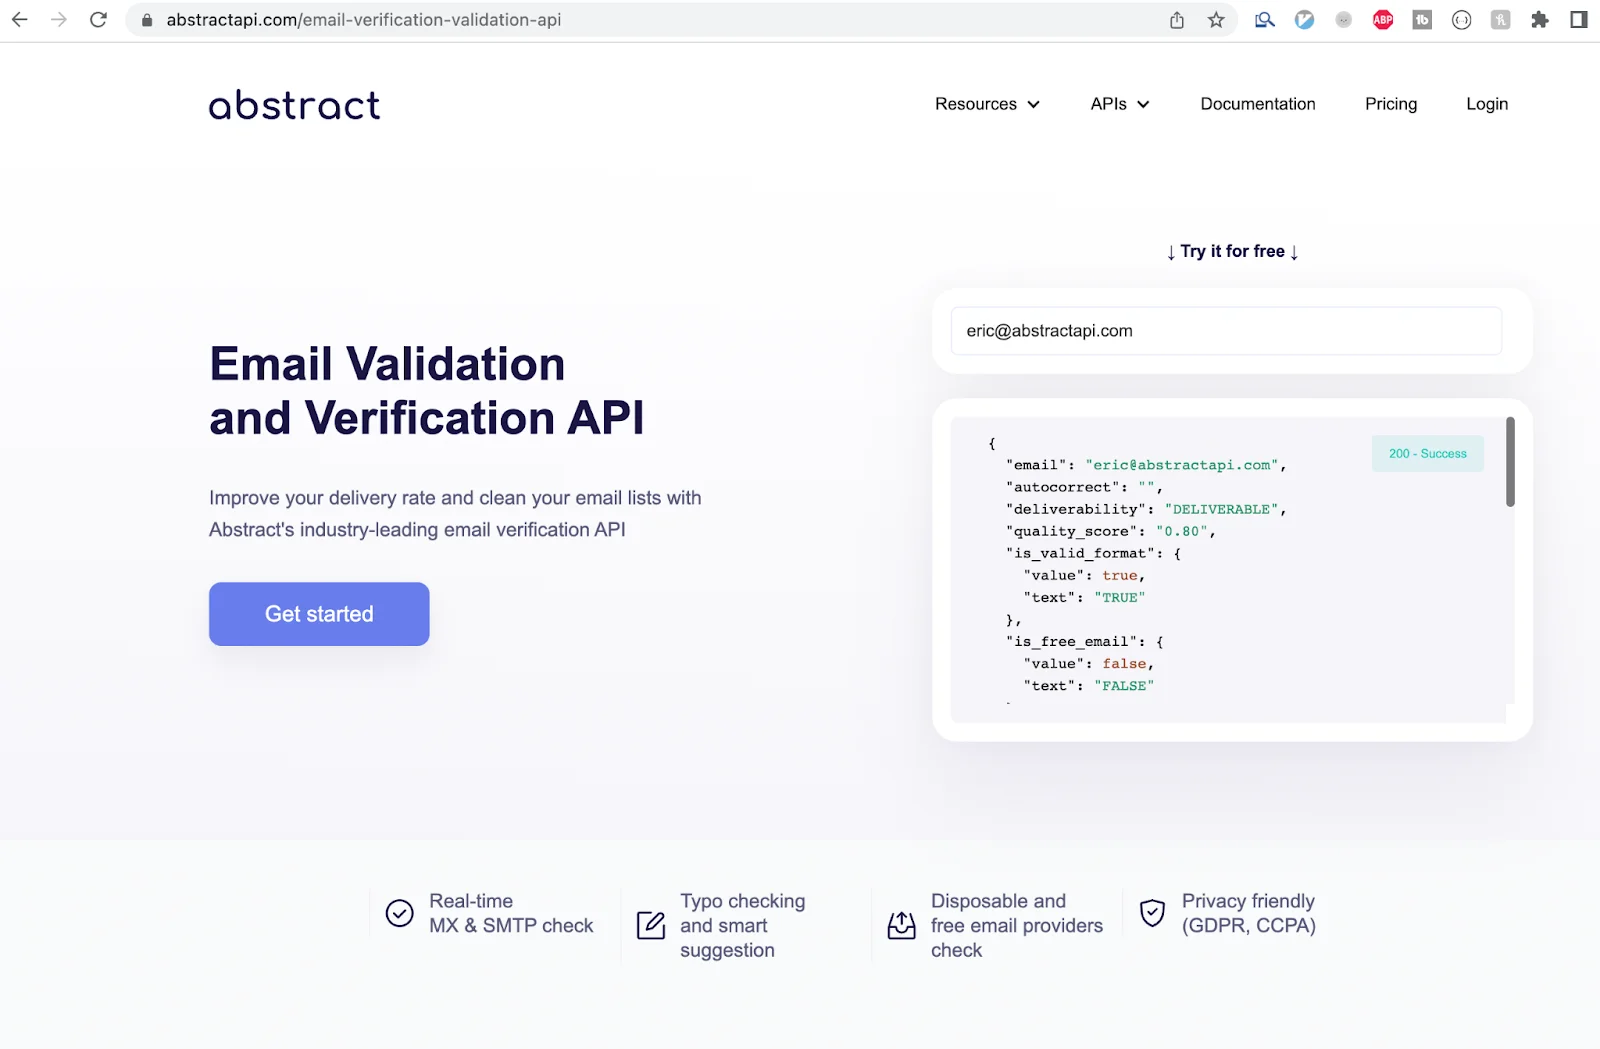
Validate Emails Using AbstractAPI
One additional step you could take to make the mailto redirect more secure would be to validate the sending and receiving email addresses using a service like AbstractAPI.
AbstractAPI's Email Verification and Validation API does more than just validate that a given email is formatted correctly. It also checks the given email against databases and provides information about whether the address is active, whether the address can be delivered to, whether the address is a free or disposable email address, and whether it is SMTP valid.
Let's take a look at adding an email validation step to your React application.
Acquire an API Key
Navigate to the API's Get Started page. Click "Get Started."
You'll be asked to sign up by providing a valid email address and password. Once you've signed up, you'll land on the API's dashboard, where you'll see your API key.
Use Your API Key to Send a Request to the API
We'll use Fetch to send a GET request to the AbstractAPI endpoint with our email for validation. Write a function called sendEmailValidationRequest that accepts an email as a parameter and sends the email to the API.
The response data should look something like this:
Now, we can decide whether or not to use the email address in our mailto link based on one of these parameters.
Frequently Asked Questions
Can you send emails from a React app without a backend server?
Yes. There are two main approaches: a simple mailto link that opens the user's local email client, or a third-party service like EmailJS that handles SMTP and security on your behalf. EmailJS is the more reliable option because it lets you send emails silently from a form without redirecting the user to their email client.
What is EmailJS and how does it work with React?
EmailJS is a client-side service that connects your React app to an email provider (Gmail, Outlook, Yahoo, etc.) through its own SMTP layer. You install the SDK with npm install @emailjs/browser, initialize it with your public key, create a reusable template in the EmailJS dashboard, then call emailjs.sendForm() to send form data as an email. The free tier allows up to 200 emails per month.
What are the limitations of using a mailto link to send email from React?
A mailto link simply opens whatever email client the user has installed, so you have no control over formatting, delivery, or whether the email is actually sent. On mobile devices, the behavior varies depending on which app is set as the default. Mailto links also expose recipient addresses in your HTML source, making them easy targets for spam bots.
How do I pass React form data into an EmailJS template?
Create a template in the EmailJS dashboard using handlebars syntax (for example, {{name}} or {{message}}). The variable names in your template must exactly match the name attributes on your React form inputs. When you call emailjs.sendForm() with a ref to your form element, EmailJS reads those inputs and injects the values into the template automatically.
When should I use a backend email service like SendGrid or Nodemailer instead of EmailJS?
If you need high sending volume, detailed delivery analytics, transactional email workflows, or tighter security over your API keys, a backend service is the better choice. EmailJS exposes your credentials in client-side code, which is acceptable for low-volume contact forms but not for production apps sending emails on behalf of users at scale.
Should I validate email addresses before sending from a React app?
Yes. Validating the email address before sending catches typos, disposable addresses, and addresses with no working mail server, all of which would result in bounces or undelivered messages. An API like Abstract's Email Validation checks SMTP reachability, MX records, and whether an address is disposable, so you can reject bad addresses before the send call is even made.
