


Creating a SwiftUI App
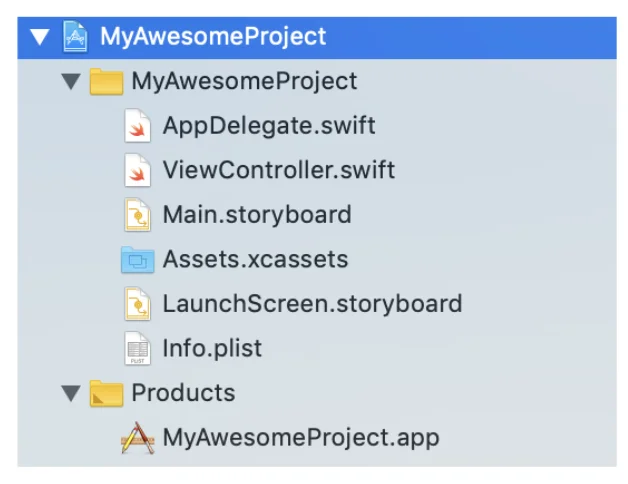
Open up XCode and create a new project. Select "Single View App." Name your app and choose "SwiftUI" as the user interface option. Decide where you want to save your project and click "Create." A scaffold of boilerplate files will be created. This will give you everything you need to get started.
Importing CoreLocation
The first thing you'll need to do is import the Core Location Framework. Core Location determines the current user location. It can do this in a few different ways, including through Wi-Fi, cellular, or GPS radios. Core Location doesn't use all of these methods to determine the location every time. It selectively chooses which method to use to get the current location in the most efficient way possible.

Add the import statement to the top of your AppDelegate.swift file.
import CoreLocation
Inside the AppDelegate class, add the following code:
let locationManager = CLLocationManager()
This initializes a locationManager object and makes it available to the rest of the application.
Using CoreLocation
Once you have Core Location imported, you can use it to request access to the user's location and pull the location data from the device.
Request Access to User Location
The first step in using a user's location is requesting permission to use that location. Apple is extremely strict about privacy and user permissions, and they review every app that enters the app store to make sure that permissions for the camera, microphone, and current location are being correctly granted.
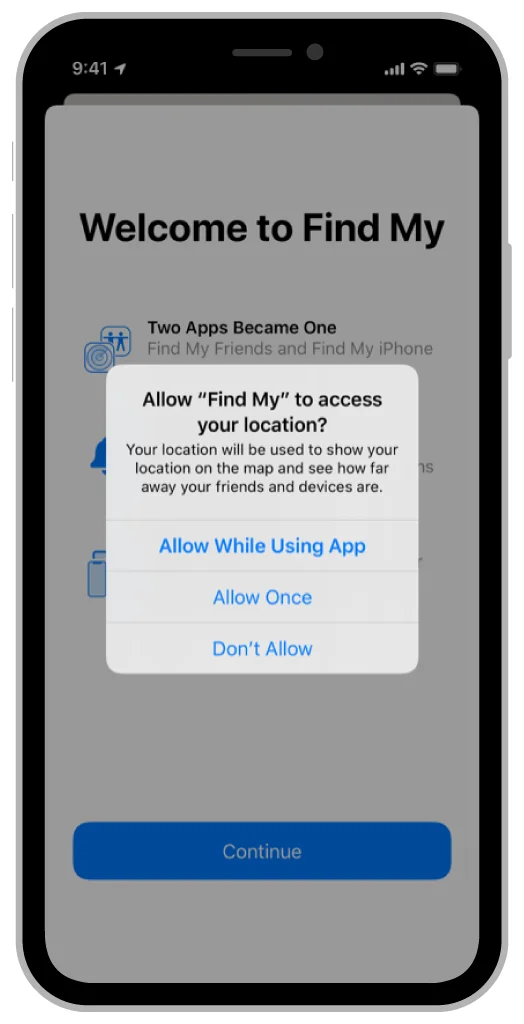
If your app is found to be abusing user permissions or not requesting them correctly, your app will be rejected from the app store.
Provide a Usage Description
You must enter a string into the info.plist file that describes what the permissions will be used for. This string will be shown to the user when their current location is requested. The statement must be 100% true. For example, you can't say you are using location to show a list of restaurants if what you are actually doing is allowing other users to track your user.
Ask for User Location Permission
To request user permission to use location services, you need to add the following code to the AppDelegate.swift file before the return statement in application(_:didFinishLaunchingWithOptions:):
locationManager.requestAlwaysAuthorization()
This is what triggers the location services prompt to display to the user on the screen, where they are able to select "Always Allow," "Allow While Using the App," or "Deny."
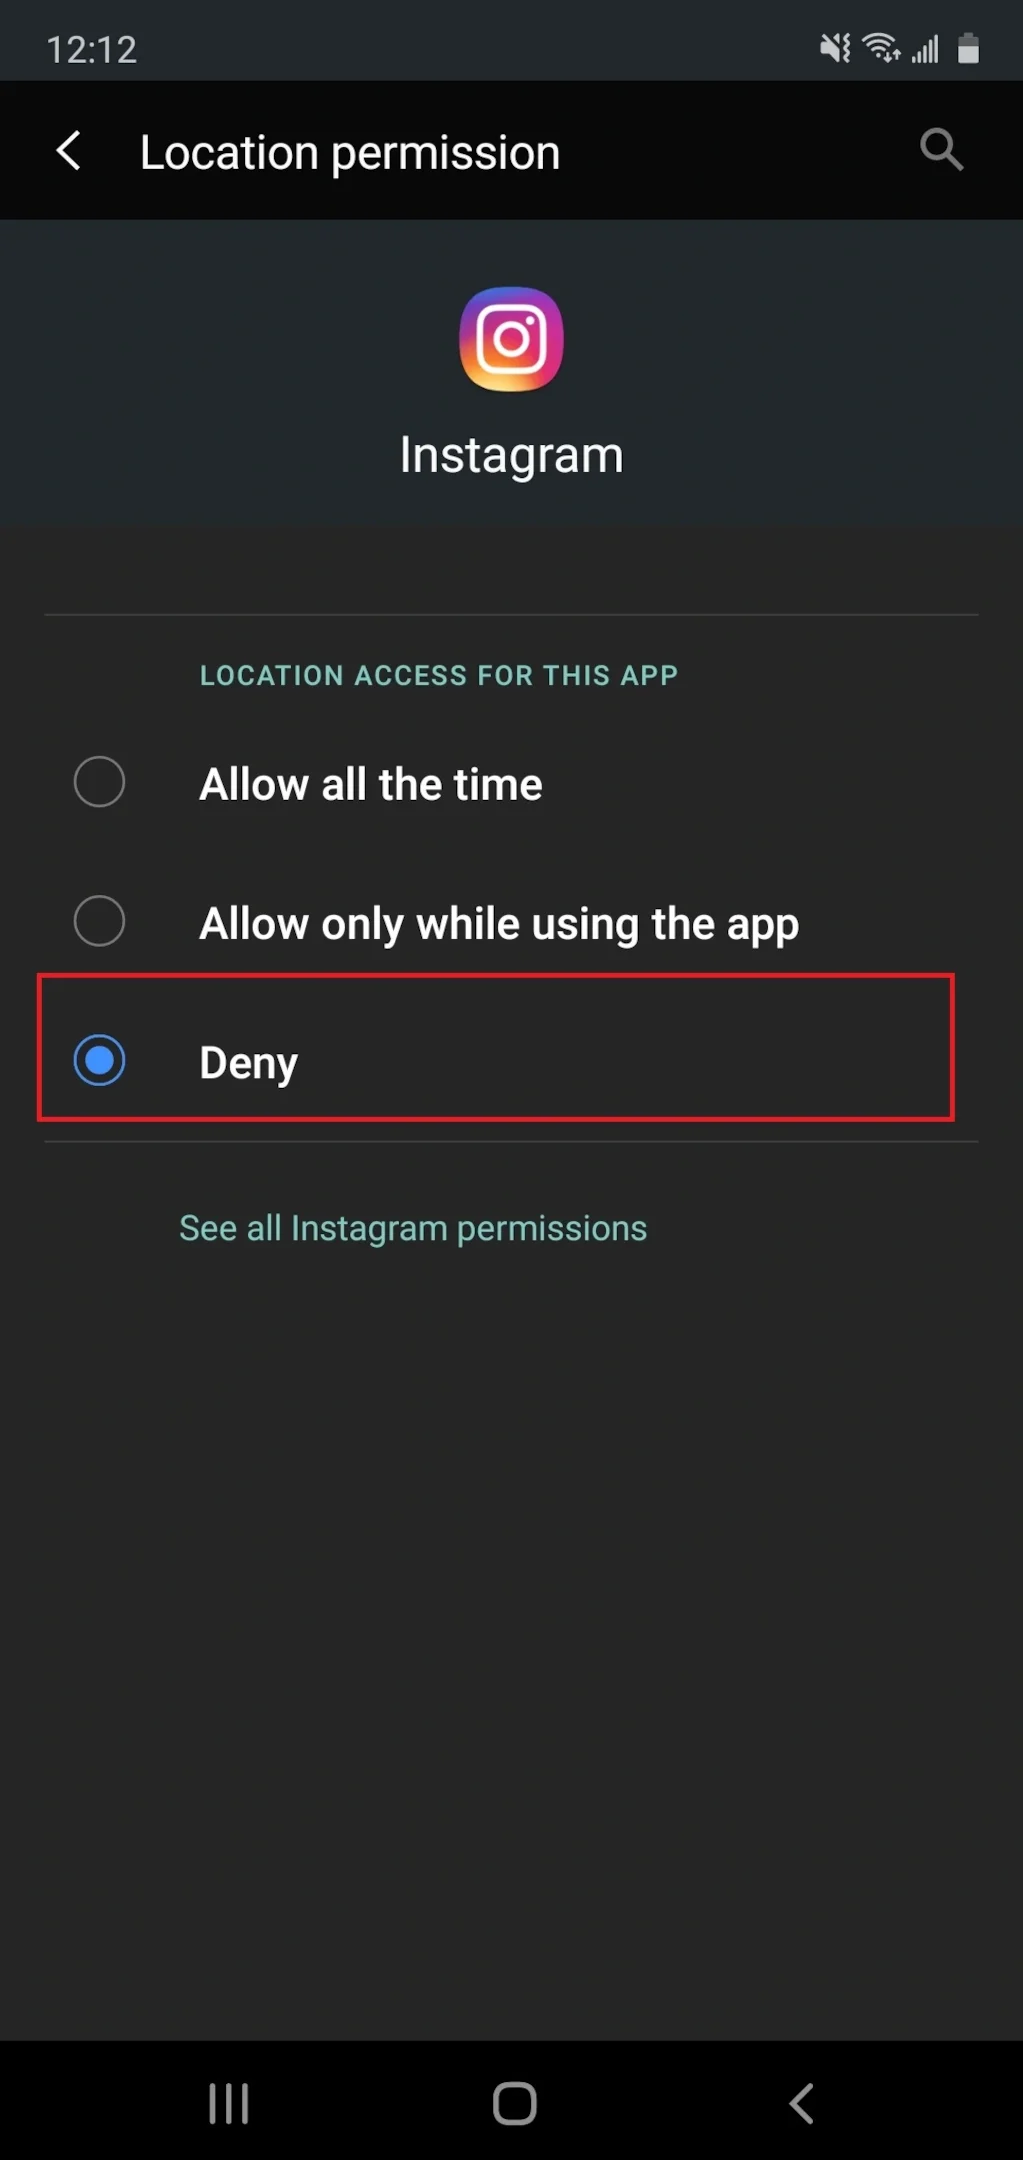
If the user chooses "Deny" or "Allow While Using the App," you must gracefully handle those location authorization cases. A simple switch statement is usually enough.
let status = CLLocationManager.authorizationStatus()

switch status {
    case .authorizedAlways:
        // Handle location authorization case
    case .authorizedWhenInUse:
        // Handle case
    case .denied:
        // Handle case
    case .notDetermined:
        // Handle case
    case .restricted:
        // Handle case
}
Choose the User Location Data You Need
As a rule, you should only request the minimum data necessary for your app to work. Depending on what the app experience is, you may need access to the full location services data, or you may only need one or two features.
Core Location Manager has four main methods to access location:
- Standard location services: Returns a very precise location. Unfortunately, drains the battery very quickly. Good for apps that will be used intensely for a short period of time, such as navigational apps or step counters.
- Significant location changes: Returns a slightly less precise location but has less impact on the battery.
- Regional monitoring: Returns a very precise location with minimal battery drain. However, limits the locations that can be returned to a specific region.
- Visit monitoring: Returns a very precise location, only when the system detects that the user is in a new location. It is not tied to any particular region and is very battery efficient.
Request the User Location Information
Depending on which method you choose to implement, you will add one of the following services to your AppDelegate.swift file:
locationManager.startMonitoringVisits()
locationManager.delegate = self
locationManager.startMonitoringSignificantLocationChanges()
locationManager.delegate = self
locationManager.startUpdatingLocation()
locationManager.delegate = self
locationManager.requestLocation()
locationManager.delegate = self
It is incredibly rare that an app needs to start utilizing location services right away, and even rarer that an app needs to continue to use location services throughout its lifecycle. Wait to call these methods until a user interacts with the app in such a way as to require them.

Allows err on the side of requesting as little as possible, and only when it is absolutely necessary.
Use the User Location Information
Now that you've requested the user's location information, let's take a look at what you'll receive. Add the following line to the bottom of AppDelegate.swift.
extension AppDelegate: CLLocationManagerDelegate {
  func locationManager(_ manager: CLLocationManager, didVisit visit: CLVisit) {
    let clLocation = CLLocation(latitude: visit.coordinate.latitude, longitude: visit.coordinate.longitude)
  }
  }
}
The locationManager function is the callback that happens when CLLocationManager records a new location. It returns to you an object called CLVisit, which has the following properties:
- arrivalDate: When the visit started.
- departureDate: When the visit ended.
- coordinate: A pair of latitude and longitude coordinates.
- horizontalAccuracy: An estimate of the radius of the area of the visit.
Get User Location Description
One thing missing from the CLVisit object is a description of the location. By description, we mean a human-readable explanation of the location, like an address. This can include zip code, city, country, state, etc.
This information can be accessed through the CLGeocoder class.
At the top of the AppDelegate.swift file, add the following:
static let geoCoder = CLGeocoder()
Now, you can use the geoCoder object to return an array of placemarks. Placemarks are useful information about the associated coordinates from a location, including address. One way to use placemarks is as the location description.
AppDelegate.geoCoder.reverseGeocodeLocation(clLocation) { placemarks, _ in
  if let place = placemarks?.first {
    let description = "\(place)"
    self.newVisitReceived(visit, description: description)
  }
}
Fine Tune the Data You Receive
You may want to only receive location updates when certain parameters are met. In that case, you can use the location manager filters to fine-tune what location updates are sent. For example, add the following to application(_:didFinishLaunchingWithOptions:) before the return statement:
locationManager.distanceFilter = 10
locationManager.allowsBackgroundLocationUpdates = false
locationManager.desiredAccuracy = 10
locationManager.activityType = CLActivityType.fitness
Line one tells the Location Manager to only record updates when the distance traveled is 10 meters or more. Line two prevents background location updates, which saves battery life. The third line tells the manager how precise our location accuracy should be, and the fourth line tells the manager to only record location updates for a particular type of activity.
Save the User Location Data
Once you have the location data in memory, you may want to persist it to the disk. To do that, you'll need to use Swift's Codable protocol. This allows you to write the location updates to a JSON file and save that file to the disk.
Add the following to AppDelegate.swift:
func persistLocationToDisk(_ location: Location) {
  let encoder = JSONEncoder()
  let time = location.date.timeIntervalSince1970
  let fileName = documentsURL.appendingPathComponent("\(time)")
  let data = try! encoder.encode(location)
  try! data.write(to: fileName)
  locations.append(location)
}
And then add this line underneath the line where you create the location object:
LocationsStorage.shared.saveLocationOnDisk(location)
Conclusion
Using Swift's user location updates tools makes location access in your iOS app very easy to manage. Just one line of code creates the location manager interface that allows you to access the user's current location and provides all the APIs and methods needed to work with user location updates.
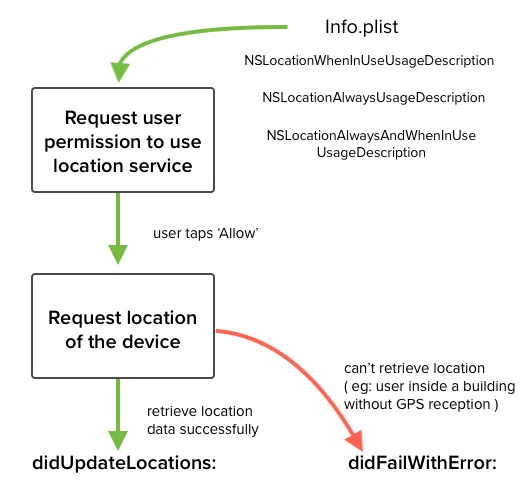
Always make sure you are requesting and handling permissions for the user's location correctly. When it comes to iOS apps, privacy and proper permission requests should be top of mind.
FAQs
How do I find location in Swift 5?
To access user location data, we need to use the Core Location Manager, which allows us to request permission to the user's current location, and receive updates about that location. The didUpdateLocations(locations) method, which is a part of CLLocationManager, gives us the real-time user location updates.
What is Location Manager in Swift?
The Core Location Manager is a class in Swift that allows you to access information about the user's location. The location manager can determine the user's location through Wi-Fi, cellular, or GPS. It doesn't use all of these methods at once to determine the location; rather, it uses whichever method will return the location in the most efficient way.
How Do You Get a Location from CLLocationManager?
Before you can access a user's location you must request location services permissions. Once that is done, you can call locationManager.startUpdatingLocation() to get real-time user location updates.
Frequently Asked Questions
What is the Core Location framework in Swift?
Core Location is Apple's built-in framework for accessing a device's physical location in Swift iOS apps. It uses a combination of GPS, cellular towers, Wi-Fi hotspots, and IP addresses to determine position. The central class you work with is CLLocationManager, which handles permission requests, location updates, and accuracy settings.
How do you request location permissions in a Swift iOS app?
You request permissions by calling requestAlwaysAuthorization() or requestWhenInUseAuthorization() on a CLLocationManager instance. You also need to add usage description strings to your app's info.plist file explaining why location access is needed. Apple's App Store review process strictly checks for proper permission handling, and apps that request permissions without clear justification risk rejection.
What are the different ways to collect location data with CLLocationManager?
There are four main methods: standard location updates (continuous, highest battery use), significant location changes (triggers only on meaningful movement), regional monitoring (alerts when entering or leaving a defined area), and visit monitoring via CLVisit (records arrival and departure at locations). Choosing the least intensive method for your use case is important for battery life and App Store guidelines.
How do you convert coordinates to a readable address in Swift?
Use CLGeocoder, which performs reverse geocoding to convert latitude/longitude coordinates into human-readable addresses. You pass a CLLocation object to the reverseGeocodeLocation method and receive placemark data containing street, city, and country information. This is useful when you need to display a location to users rather than just store raw coordinates.
What is the difference between device-based geolocation and IP geolocation in Swift?
Device-based geolocation uses Core Location and relies on GPS, Wi-Fi, and cellular data; it is precise but requires explicit user permission. IP geolocation determines location from a device's IP address via an external API and requires no permission prompt, but is less accurate (typically city-level). IP geolocation is a good fallback when you need an approximate location without asking the user for access.
How do you persist location data in a Swift app?
You can persist location data using Swift's Codable protocol combined with JSONEncoder to serialize location records to JSON format. This lets you store arrival and departure times alongside coordinates from CLVisit objects, for example. The encoded data can then be saved to disk or sent to a backend API for later retrieval.
