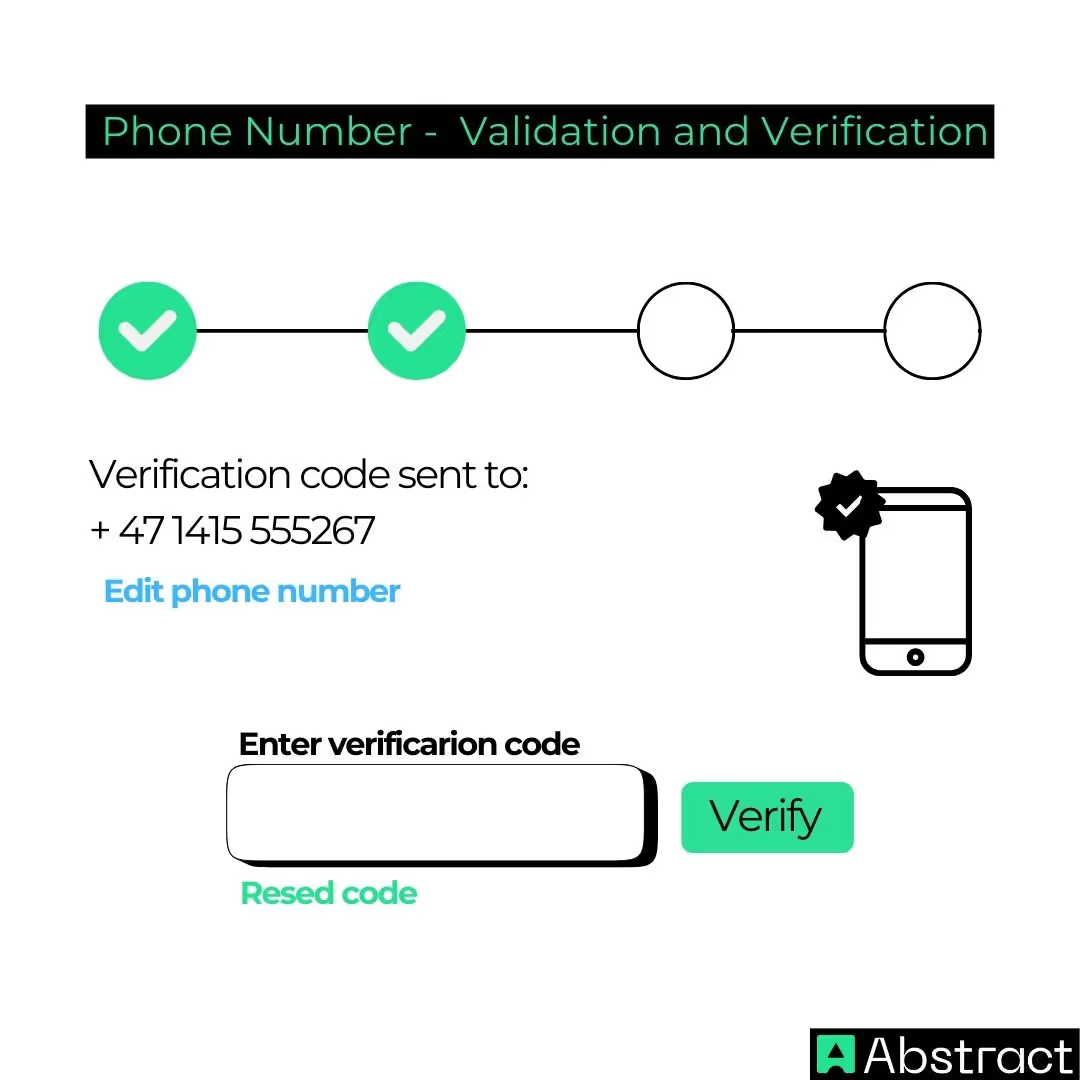
Overview of Phone Number Validation and Verification
What does Validation mean?
Validation is the process of checking whether a given phone number adheres to the expected format. For example:
- A U.S. phone number might need to be 10 digits long and start with specific prefixes.
- An international number might require a + sign followed by a country code.
Why does Validation matter?
- It reduces user errors during sign-up or checkout processes.
- It ensures compatibility with APIs and communication tools that process these numbers.
What is Verification?
Verification takes things a step further by ensuring the phone number belongs to the person entering it. This usually involves:
- Sending an OTP to the provided phone number.
- Asking the user to input that OTP back into the app.
Why is it positive to combine both Validation and Verification?
Validation and verification serve complementary purposes. Validation ensures the input is correctly formatted, while verification confirms its authenticity.
Together, they provide a robust mechanism for handling phone numbers.


Tools and Methods for Validation
You can validate phone numbers using three main approaches: regex, libraries, and APIs.
Using Regex (Regular Expressions)
What is Regex?
Regex is a powerful tool that helps match patterns in strings. In the context of phone numbers, it can check if the input matches a predefined format. This is a common method for client-side validation, and for a detailed walkthrough, you can read our complete guide on how to validate a phone number in JavaScript.
Example Regex for Phone Numbers:
const phoneRegex = /^\+?(\d{1,3})?[-.\s]?(\d{3})[-.\s]?(\d{4})$/;
const isValid = phoneRegex.test("+1-123-456-7890");
console.log(isValid); // true
Advantages
- Lightweight: No need to install additional libraries.
- Works well for simple formats, such as U.S. phone numbers.
Limitations
- Regex becomes complex for international formats.
- It doesn't validate whether the number is active or belongs to the user.
Using Libraries
Libraries like libphonenumber-js simplify phone number validation by providing pre-built methods for parsing and validating numbers from various countries.
Why is it beneficial to use a Library?
- Handles international formats easily.
- Provides metadata like the country and carrier associated with the number.
Here is an example of libphonenumber-js:
import { parsePhoneNumber } from 'libphonenumber-js';
const phoneNumber = parsePhoneNumber('+14155552671');
console.log(phoneNumber.isValid()); // true
console.log(phoneNumber.country); // US
Using APIs
Validation APIs like AbstractAPI go a step further by performing server-side checks to ensure the number is valid and active. These APIs often return additional details, such as the carrier and line type (mobile or landline).
The power of AbstractAPI provides a comprehensive solution for phone number validation by conducting server-side checks, performs real-time validation by connecting to reliable databases, ensuring the number is not only formatted correctly but also active and functional.
Also it offers more in-depth details (e.g., carrier and line type), which are essential for certain applications like fraud prevention or targeted marketing and eliminates the need for manual updates to validation logic, as the API is continuously updated to account for changes in phone number formats or country regulations.
Here is an example of an API Call:
import axios from 'axios';
const validatePhone = async (phone) => {
const response = await axios.get('https://phonevalidation.abstractapi.com/v1/', {
params: { phone, api_key: 'YOUR_API_KEY' },
});
return response.data.valid;
};
Setting Up Phone Number Validation in React
Here’s how you can implement phone validation in React, step by step:
Step 1: Create a Basic Form
function PhoneForm() {
const [phone, setPhone] = useState('');
const validatePhone = () => {
const phoneRegex = /^\+?(\d{1,3})?[-.\s]?(\d{3})[-.\s]?(\d{4})$/;
return phoneRegex.test(phone);
};
return (
<div>
<input
type="text"
placeholder="Enter phone number"
value={phone}
onChange={(e) => setPhone(e.target.value)}
/>
<button onClick={() => alert(validatePhone() ? "Valid" : "Invalid")}>
Validate
</button>
</div>
);
}
Step 2: Boost functionality with a Library
import PhoneInput from 'react-phone-number-input';
import 'react-phone-number-input/style.css';
function PhoneNumberInput() {
const [value, setValue] = useState('');
return <PhoneInput value={value} onChange={setValue} />;
}
For more complex form validation sce, a schema builder. We have a detailed guide on how to perform Yup phone number validation that you can follow.
Phone Number Verification in React Native
Challenges in Verification
- Mobile apps need to handle SMS messages, which requires integration with third-party services like Twilio or Firebase.
- Verification must be secure to prevent spoofing or interception.
How to Workflow with AbstractAPI
Step 1: Send an OTP
const sendOtp = async (phone) => {
const response = await axios.post('https://example.com/send-otp', { phone });
console.log(response.data); // OTP sent
};
Step 2: Verify the OTP
const verifyOtp = async (otp) => {
const response = await axios.post('https://example.com/verify-otp', { otp });
return response.data.valid;
};
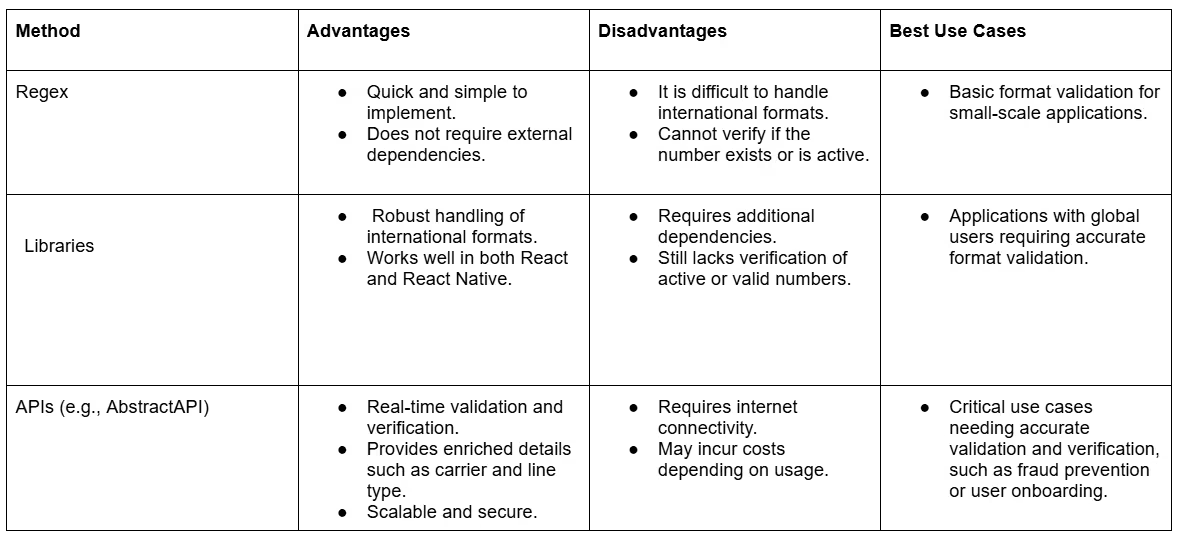
Pros and cons of each method across React and React Native
Benefits of this table: It is a great guide to ensure developers can weigh their options effectively based on project requirements.

Common Challenges and How to Overcome Them
When implementing phone number validation and verification, we can often encounter challenges.
And by addressing these challenges proactively, we can create a more reliable and user-friendly phone number validation process.
Below are some common issues and practical solutions:
Handling International Formats
Challenge: International phone numbers differ significantly in length, prefixes, and formatting rules, making validation tricky.
Solution:
- Use libraries like libphonenumber-js, designed to support a wide range of international formats effortlessly.
- Implement an API such as AbstractAPI, which automatically detects the country code and validates international numbers without additional setup.
Dealing with Invalid User Inputs
Challenge: Users may enter incomplete, incorrectly formatted, or otherwise invalid numbers.
Solution:
- Use regex or libraries for immediate client-side validation, ensuring the input adheres to basic formatting rules.
- Provide clear, user-friendly error messages to guide users in correcting their input.
- Enhance validation with AbstractAPI to identify invalid or inactive numbers in real-time, offering more robust protection against erroneous inputs.
Optimizing Performance When Using APIs
Challenge: API calls can introduce latency or slow down the application if not implemented efficiently.
Solution:
- Batch API requests when validating multiple numbers simultaneously to reduce the number of individual calls.
- Cache validation results for recently validated numbers to minimize repetitive calls.
- Ensure proper error handling for network issues to maintain a seamless user experience.
Conclusion
Phone number validation and verification are crucial components in modern applications, ensuring data integrity, user authenticity, and enhanced user experiences.
Here are the key takeaways from this guide:
- Choosing the right method: Each validation approach—regex, libraries, and APIs—has unique strengths and weaknesses. Developers should select a method based on their project's scale, audience, and requirements.
- Balancing simplicity and accuracy: While regex is simple and quick for basic validations, libraries and APIs like AbstractAPI provide the robustness and accuracy necessary for complex applications.
- Embracing best practices: Implementing tools like AbstractAPI enables developers to go beyond format checks, offering real-time validation, enriched data, and improved security.
Call-to-Action with us!
Ready to streamline your phone number validation process? Explore AbstractAPI’s Phone Number Validation Service for a powerful, easy-to-integrate solution that meets the demands of modern applications.
With these insights, you are now equipped to implement phone number validation and verification in both React and React Native effectively. Happy coding! 😊


