


Creating an Email Form With Vue
Open up the project folder in your IDE (VS Code is usually recommended for working with Vue projects.) The first file we'll look at is App.vue, which handles rendering the HTML template for your project.
There are two components in the Vue file: the <Welcome> component, and the <HelloWorld> component. These are defined inside the src/components directory and provided by Vue to give you something to work with right away. For now, we'll delete these and work directly inside the App.vue file.
Create a Vue SFC
Remove everything from App.vue and add the following.
To keep things simple, we have turned the App file into a Vue Single-File Component (SFC.) An SFC file is a file with a .vue extension that allows you to define plain HTML, CSS, and Javascript inside the same file.
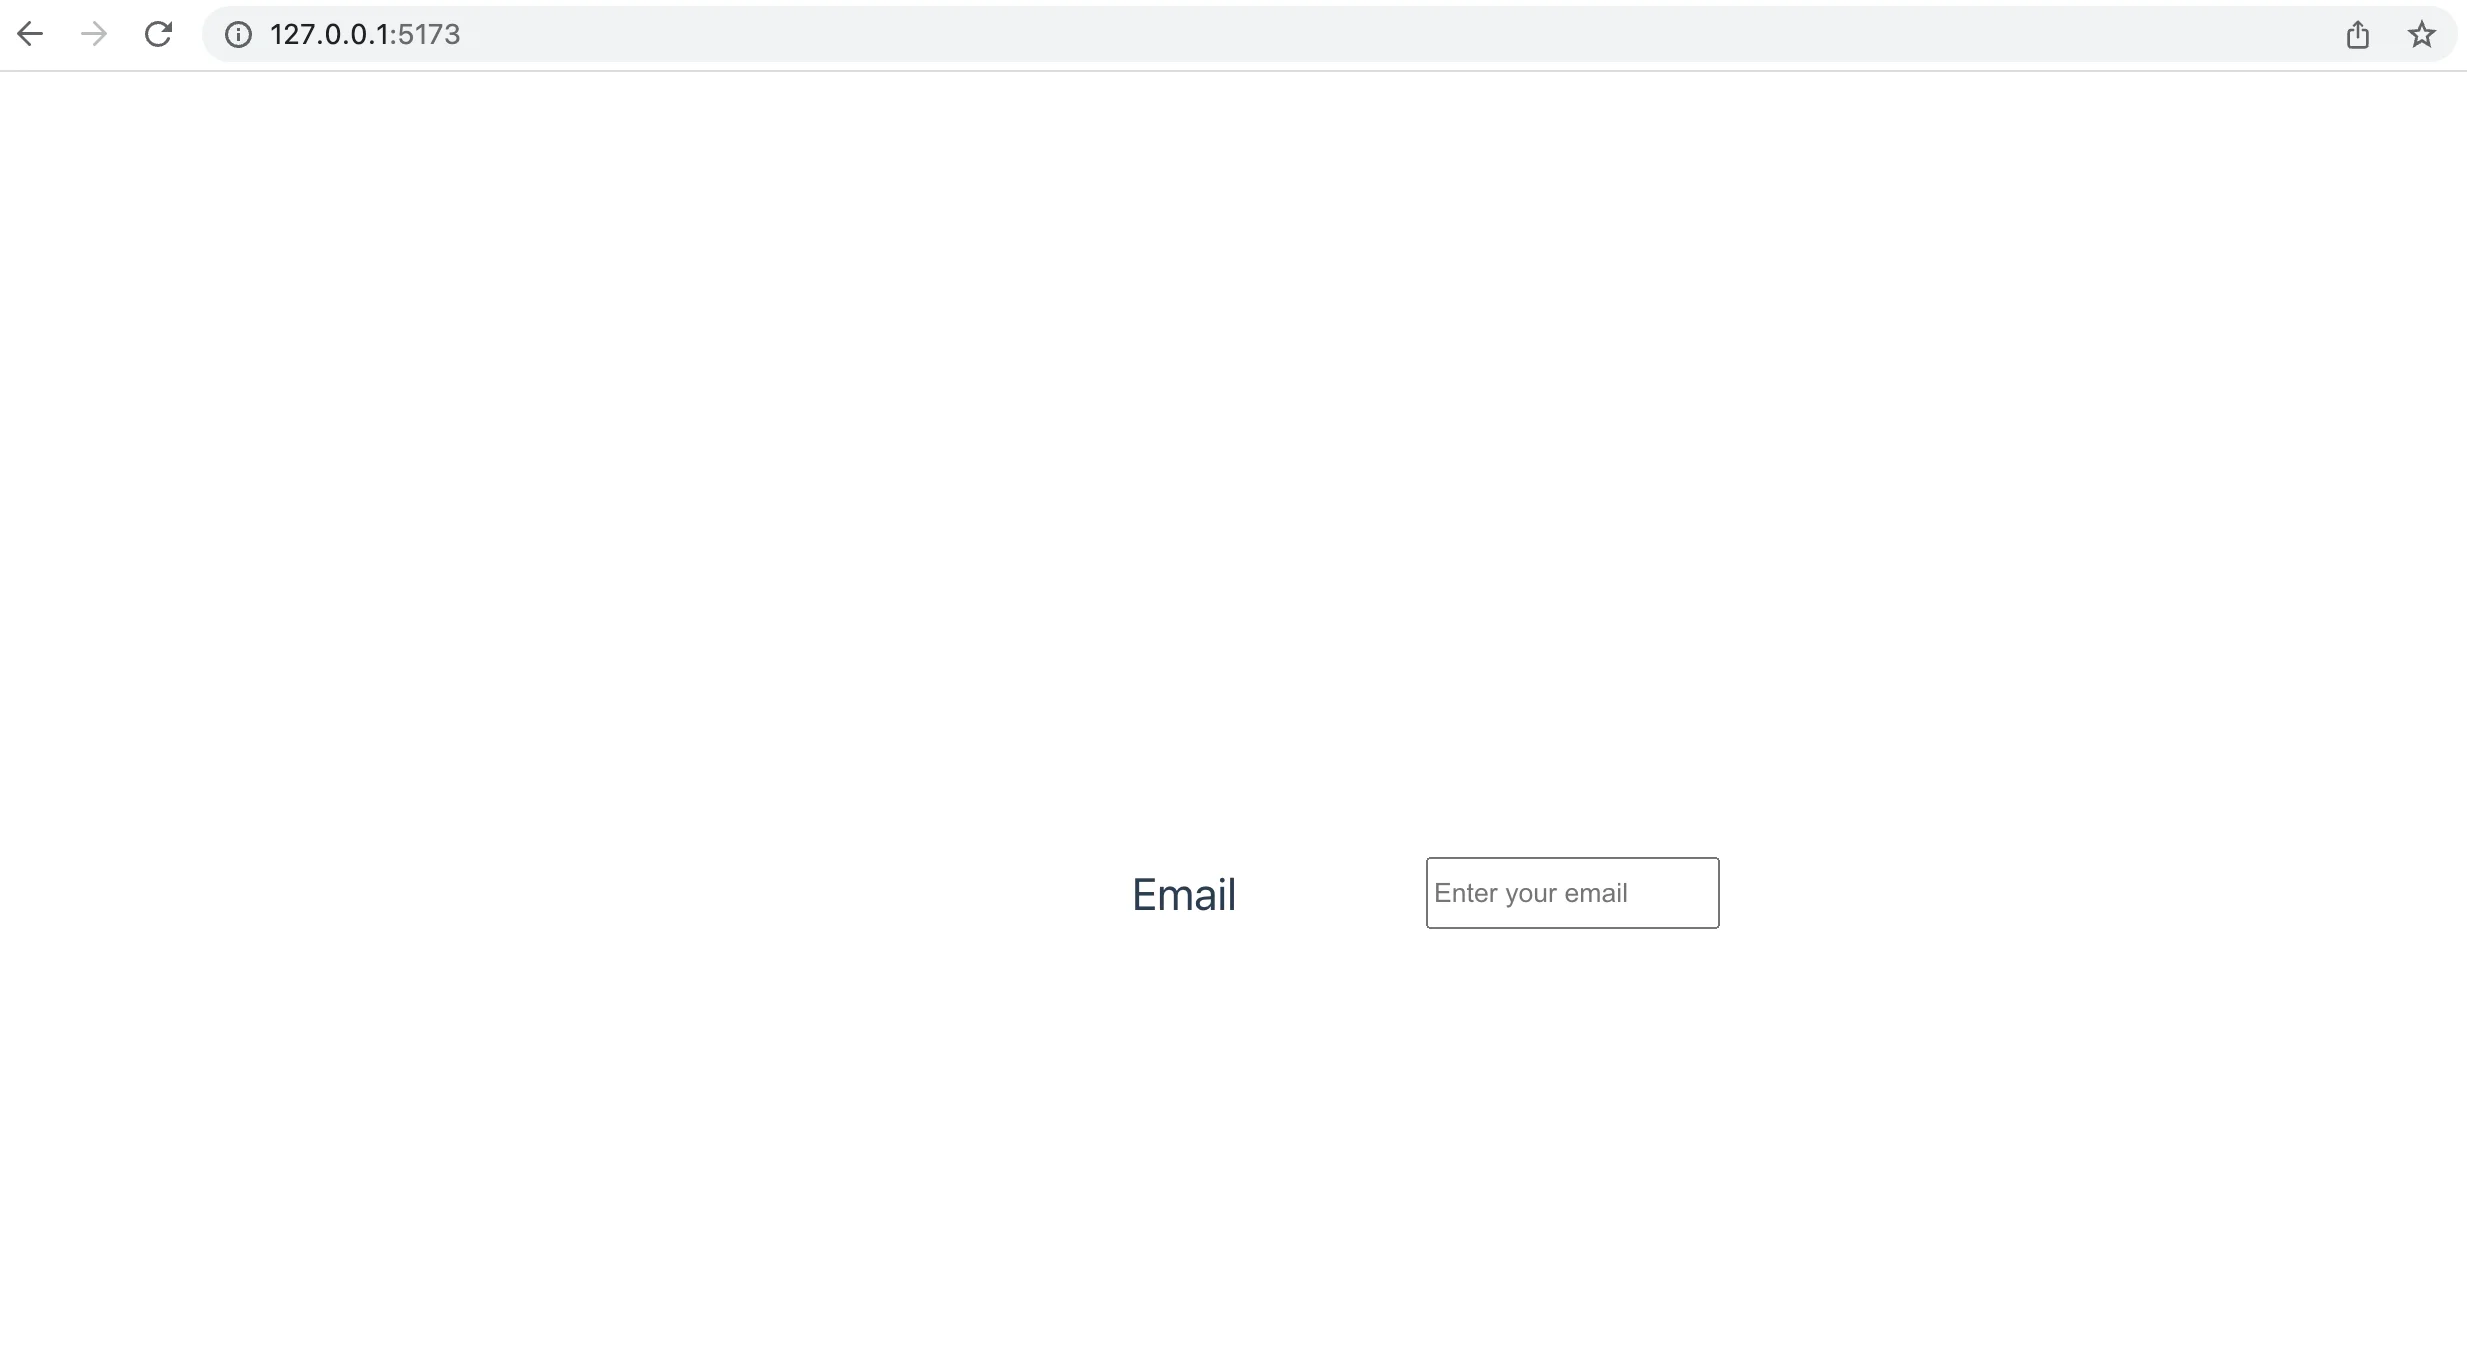
Here, inside the <script> tag, we've defined a default component export, similar to the way we would in React. The data value is what Vue uses to bind data to the template. Inside the <template> script, we've created a simple form and bound it to the email data value through the v-model attribute.
The v-model attribute tells Vue that this input should update the email data value. We've also rendered the email data value in a new <p> tag underneath the input, so we can demonstrate how the Vue template section renders data using handlebar syntax.
We've also given the input a placeholder value.
Take a look at http://localhost:5173 to see the new form. Note that it already comes with some decent style right out of the box.
When you input the email into the email input, the data gets updated in the model, and the Vue template renders the new value of the data.
Add Form Logic
We have an input, but it's not actually a form yet. Let's add a <form> element to the Vue template section, a button to submit the form, and an onSubmit method to be called when the form is submitted.
We've used the @submit binding to tell Vue what function to call when the form is submitted, and we've added a custom onSubmit function to the methods field of the script section. Head back to the app in the browser, enter an email into the email input and hit the submit button. Then open the console and check what was logged. You should see the event that was captured by the event handler.

In real life, we'd want to send this data off to our server, but for the purposes of demonstrating form fields and form validation, we'll just keep logging the data for now.
Add Form Validation Logic
The next step is to do some simple form validation. The easiest way to do this in Vue is to use the HTML5 validation attributes. These are things like required, minLength, maxLength and type that tell the browser when something unexpected is in the form inputs.
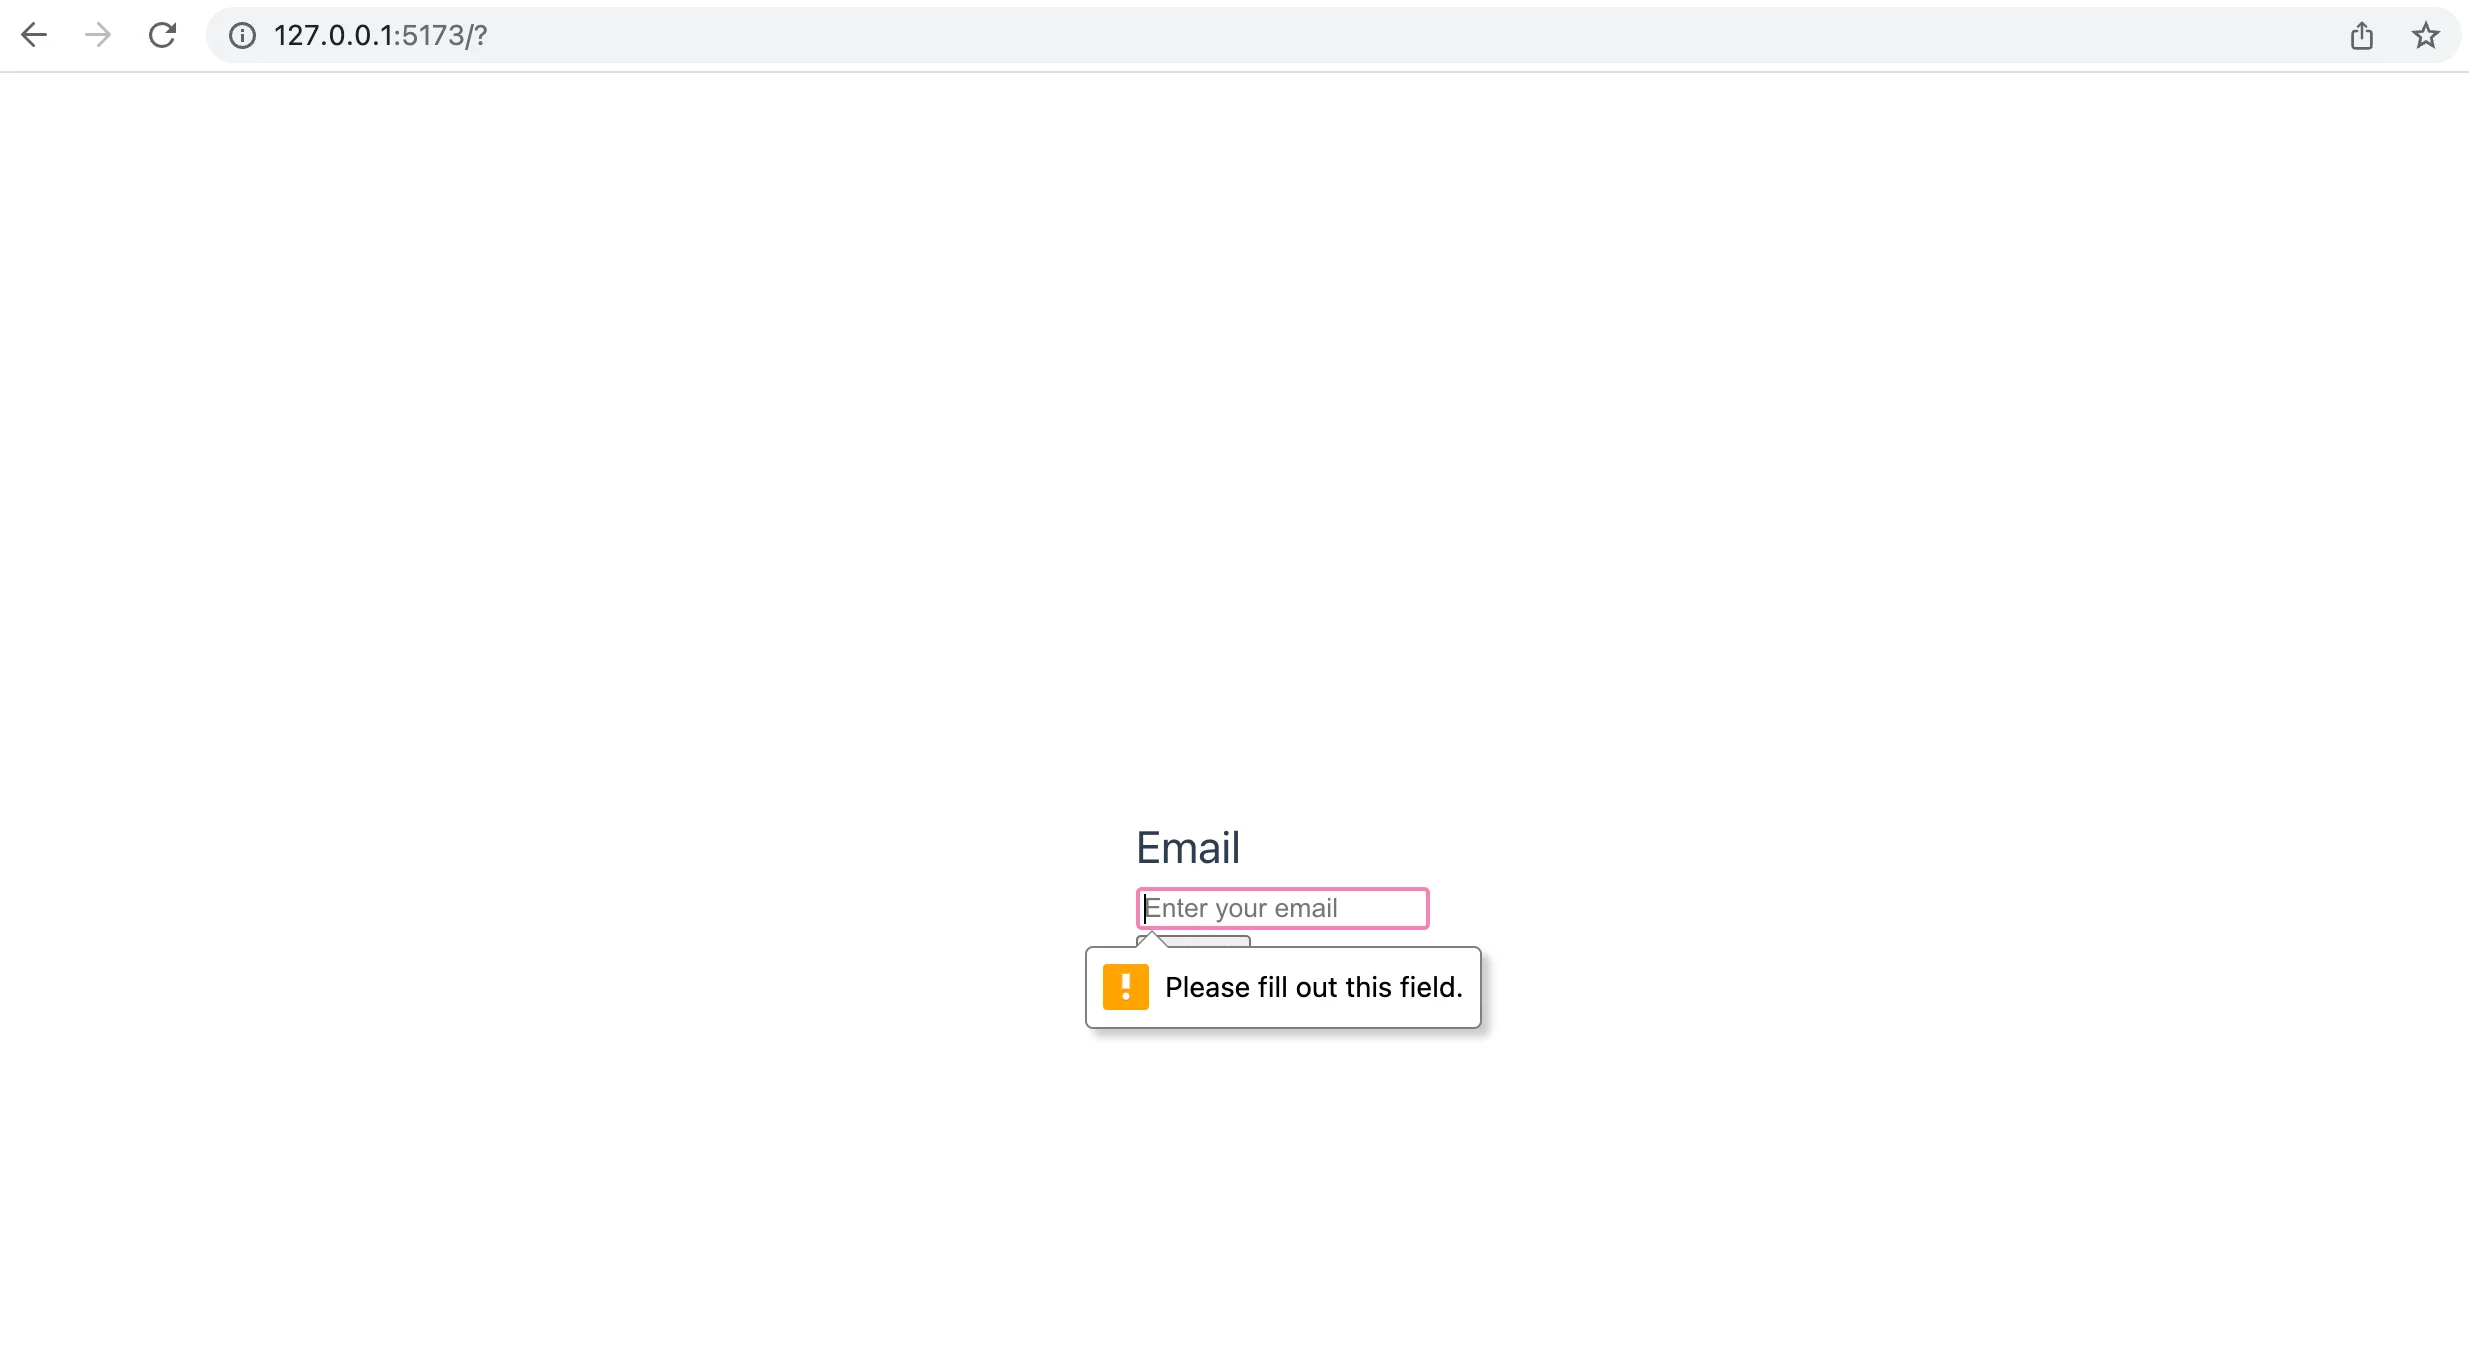
Add the Required Validation
To start, let's add the required value to our email input. The way to do this in Vue is the same way you would do it in regular HTML.
Now, try submitting the form in the browser without adding anything to the input field, and you will see an error message rendered by the browser.
Add the Form Email Type
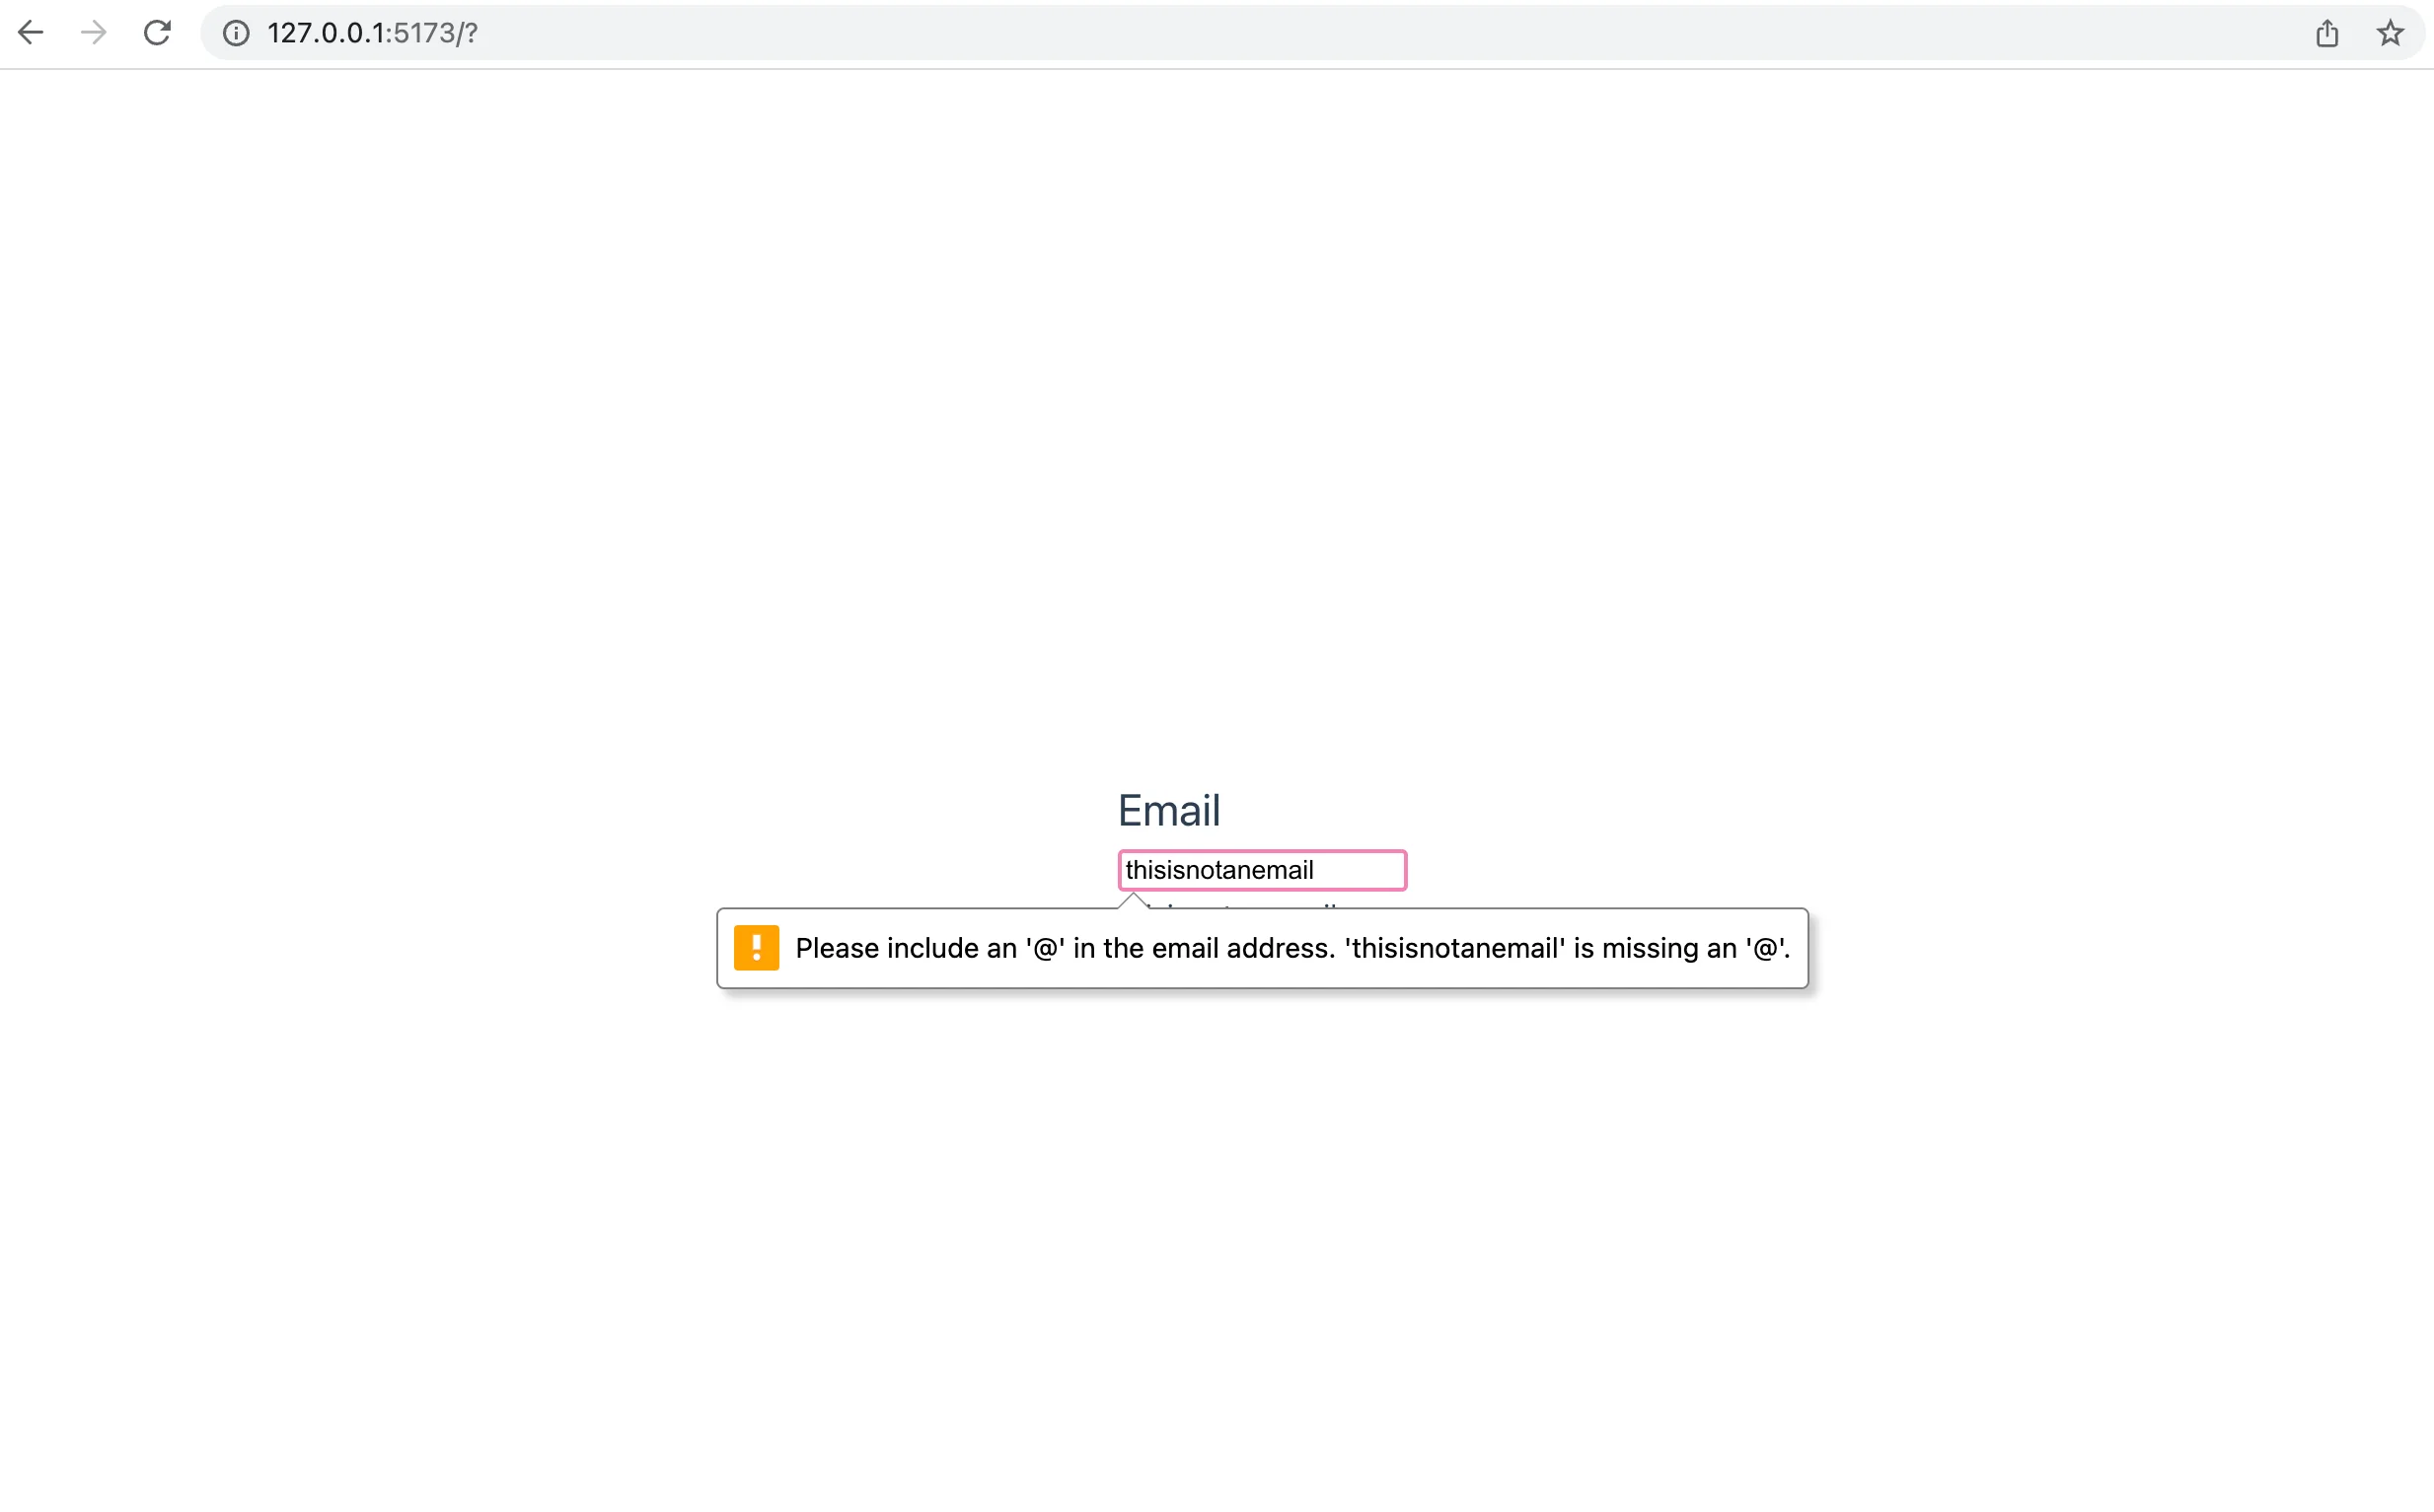
The next step in simple client-side validation with Vue is to add the type to the input field. By telling Vue that this input expects an email input, we can allow Vue to let the browser run its own validation check against the input that the form receives.
Add the type attribute to the input form, then head back to localhost and try inputting something other than an email string into the input.
You should see a similar validation error message to what you saw when you tried to submit the form without its required field.
Add Custom Validations
Using the built-in HTML5 validators is fine, but often you want more fine-grained control over your validation rules and error messages. Fortunately, adding custom validations to a Vue form is very easy.
Add Validation Using Watchers
One way to add custom validations to Vue forms is to use a watcher. A Vue watcher watches the value it has been assigned to and performs some function when it detects there has been a change in the value.
We can add a watcher to our email value and tell the watcher to call a custom validateEmail function to validate the email address any time it changes.
Add a watch field to the Vue script section. The watch field should be an object that holds the values that should be watched. For now, we'll add the email data value, and tell watch what to do when it detects a change in the email input.
Head back to localhost and start typing into the input. You should immediately get an alert that the email is invalid.
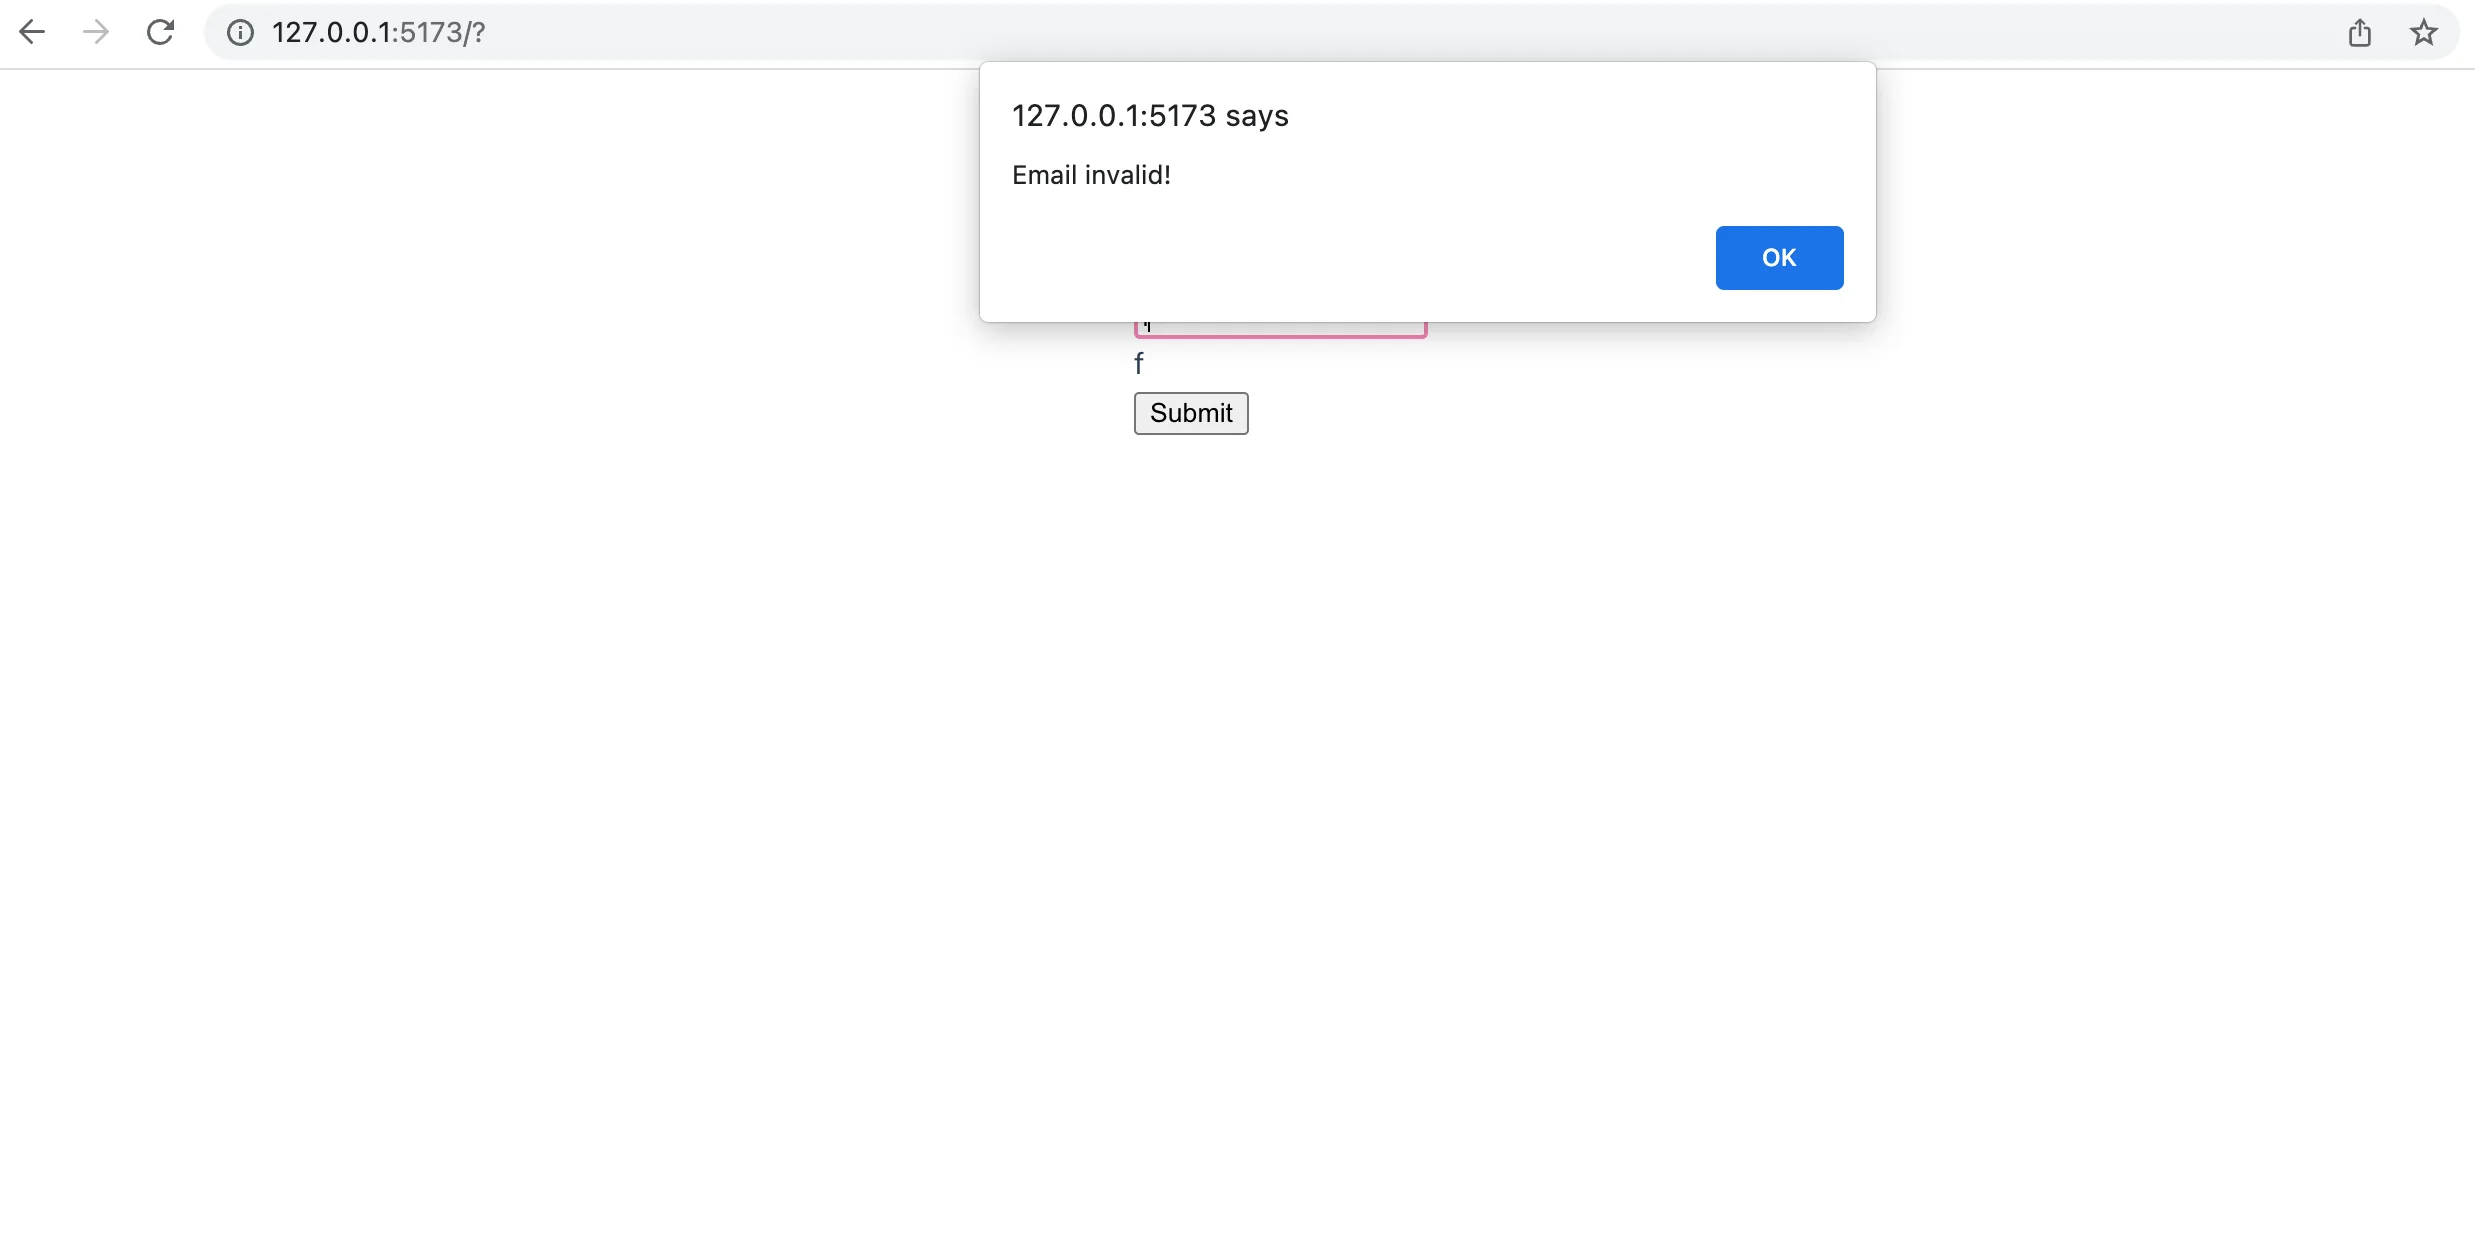
Improve Error Messages
Our validation function is working, but at the moment it's not very useful. This will alert that the email is invalid on every keystroke, which is very annoying and prevents the user from typing the full email into the input.
A better way to alert the user would be to show an error message somewhere else on the screen, that doesn't interfere with their ability to update the input fields.
Create a new data value called errorMessage. Render the value inside a <p> tag below the input (you can repurpose the existing <p> tag for this.) Let's also give the p class a red color to show that it's an error message.
Next, update the validateEmail function to show an error message when the email is invalid, and remove the message when the email is correct.
Now, when you return to localhost and begin typing into the input, a red error message will appear underneath the input as long as the email is invalid. Once you enter a valid email, the error message will disappear.

Improving Custom Validation
This works, but using just Regex to validate email is not recommended. It's too difficult to capture all the different possible valid email values in a single Regular Expression. In fact, the argument about whether to use Regex to validate emails is a long and very passionate one on Stack Overflow.
For that reason, it's better to use some other method to validate email addresses, such as the provided browser validators accessible through HTML5, or using a dedicated third-party service like AbstractAPI's Free Email Validation API.
Getting Started With the Abstract API
Let's look at the AbstractAPI Free Email Validation API as an alternative solution to Regex.
In order to use the API, you'll need to sign up and get an API key. The API key authenticates you with the API and allows you to make requests.
Navigate to the API home page and click "Get Started"
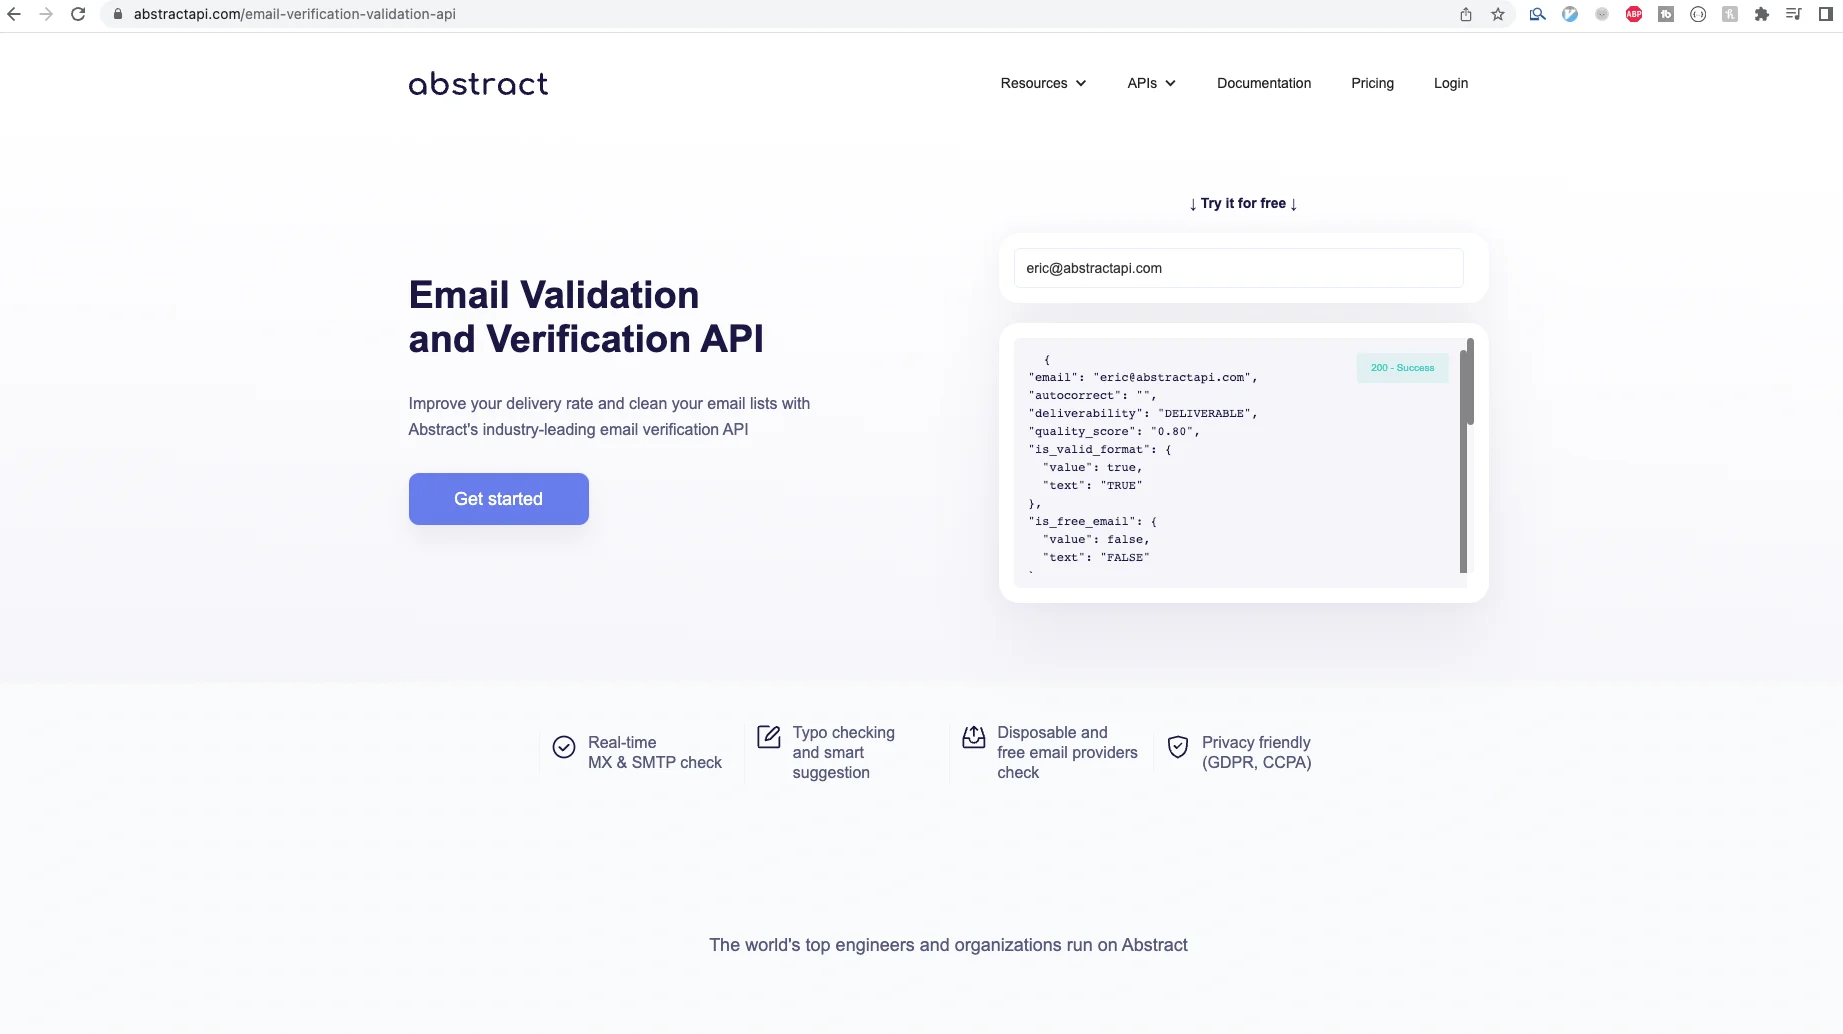
You will need to sign up with an email address and password. Once you've done that, you'll land on the email API dashboard, where you'll see your API key.
Send a Validation Request to the API
Update your validateEmail function to send a request to the API. This function will now send an AJAX request to the API endpoint with the email for validation. It will then receive and analyze the API response object and return a boolean value based on the contents of the object.
The response from the API will look something like this:
We should examine each of these fields and then return true if all the fields indicate that we have a valid email, and return false if not. For now, however, we're only going to look at the is_valid_format field.
Note that we've had to turn the validateEmail function into an async function because we are now sending an API request inside the function and must await the response from the API before we can use the data. Unlike other places where you use async/await, in Vue, the async keyword comes before the function name.
Move the Validation Function to the Submit Handler
Since we are now sending a network request to determine if we have a valid email, it no longer makes sense to call this method on every keystroke. That would send too many requests to the API and would potentially slow down the app and create a bad user experience.
Instead of calling validateEmail inside the watcher, we are simply going to call it inside our onSubmit handler. This way, when the user hits the Submit button, the validation method will send one request to the API, receive the response, and then use that response to decide whether or not to continue submitting the email to our server (or wherever it is going next.)
You can delete the watch field entirely and move the call of the validateEmail function inside the onSubmit function.
Head back to localhost, type an invalid email into the browser and hit "Submit." After a moment, you should see your "Invalid Email" error message rendered underneath the user input.
Conclusion
In this tutorial, we learned how to create a basic email form and do simple form validation with Vue.js. Using Vue.js to build forms is very easy. We also learned how to use the AbstractAPI Free Email Validation API to validate emails, and learned how to render validation errors to users in our app.
There are many ways in which we could improve this. For starters, we need a loading indicator after the user hits the submit button to show that the app is processing information and sending a network request. Otherwise, the user may hit the button multiple times.
Another way we could improve this is by adding a stylesheet rather than using inline styles. Adding a stylesheet with view is easy: simply add a <style> tag as you would in a regular HTML file.
FAQs
How Do I Validate Input on Vue?
Vue provides a few ways of validating user input. You can take advantage of the simple HTML5 validation attributes like required, minLength, maxLength and type to allow the browser to handle client side validation for you.
You can also define your own validation rules inside the methods field of a Vue <script> section. You can call your validation methods inside watchers, which will run the function anytime Vue notices a change in the value it has been assigned to watch. You can also attach validation methods to onSubmit handlers so they will only be called when a user tries to submit a form.
What Is Vuelidate?
Vuelidate is a simple but powerful validation library built for Vue. It allows you to define validation rules next to your data, making organization easy and clear. Vuelidate extends your Vue script section with an additional validations field, where you can include custom validation rules that map to each of your data values.
How Do You Use V-Validation?
V-Validation is an attribute that can be added to any Vue input field. It allows you to define custom validation rules for the given form field. Similar to v-model, it binds to the HTML template and tells Vue how to update the logic for the HTML tag.